


Picture your front walkway at 7pm in November. It’s dark. Your guests are squinting at uneven pavers, trying not to trip on the garden border. Your driveway is basically a black hole. And your house, the one you spent all summer landscaping, is completely invisible from the street.
Now picture the same scene with landscape lighting. Warm pools of light along the walkway. Subtle uplighting on the garden beds. Bollard lights marking the driveway edge. Night and day difference. Literally.
Here’s the thing. Learning how to landscape light installation isn’t as complicated as most people assume. Especially with low voltage LED systems, which are the go-to for residential properties across Canada. You don’t need to be an electrician. You don’t need to trench power lines through your yard. And you can do most of it in a single weekend.
A well-planned landscape lighting installation boosts curb appeal, improves safety on walkways and driveways, and can increase your property value by 15% to 20% according to some real estate estimates. Plus, modern LED landscape fixtures use a fraction of the energy compared to old halogen systems. We’re talking maybe $3 to $5 per month to run an entire yard’s worth of lights.
In this guide, we’ll walk through everything from planning your layout to connecting fixtures, covering both low voltage and 120V options. Whether you’re lighting a garden path, a long driveway, or flower beds, you’ll know exactly what to do by the end.
Landscape Lighting Installation: What You Need Before Starting
Before you buy a single fixture or dig a single hole, you need a plan. Rushing into a landscape lighting installation without one is how people end up with uneven spacing, dark spots, and cables running in weird directions.
Landscape Lighting Installation Guide for Walkways, Gardens & Driveways
Start with a sketch. Doesn’t need to be fancy. Just a rough overhead view of your property showing:
- The areas you want to light (walkway, garden beds, driveway, trees, house facade)
- Where your outdoor electrical outlet is located
- The total distance from the transformer to the farthest fixture
- Any obstacles like tree roots, irrigation lines, or underground utilities
Call before you dig. Seriously. In most Canadian provinces, you’re required to contact your local utility locator service before any digging. In Ontario, that’s Ontario One Call. It’s free and prevents you from hitting a gas line or buried cable. Kind of important.
How many fixtures do you need? Good question. Here’s a rough guide:
| Area | Fixture Spacing | Fixture Type |
| Walkways | Every 1.8 to 2.4 metres (6-8 feet) | Path lights |
| Driveways | Every 2.4 to 3 metres (8-10 feet) | Bollard lights or stake lights |
| Garden beds | Every 1.2 to 1.8 metres (4-6 feet) | Spot lights or well lights |
| Trees/features | 1-2 per tree or feature | Uplights or flood lights |
Choosing Between Low Voltage and Line Voltage
This is the first big decision. And for 90% of residential lighting projects, the answer is low voltage.
| Feature | Low Voltage (12V) | Line Voltage (120V) |
| Safety | Very safe, minimal shock risk | Requires licensed electrician |
| Installation | DIY-friendly | Permit required in most provinces |
| Cost | Lower upfront | Higher upfront |
| Best For | Walkways, gardens, accent lighting | Tall poles, floodlights, commercial |
| Energy Use | Very low with LED | Higher |
| Cable Burial Depth | 7-15 cm (3-6 inches) | 30-45 cm (12-18 inches) minimum |
Low voltage wins for most homeowners. But we’ll cover both options below.
Read more: Stunning Landscape Lighting Ideas
Tools and Materials for a Landscape Lighting Installation
Gather everything before you start. Trust us on this one.
Tools:
- Tape measure
- Flat-blade screwdriver
- Wire strippers
- Wire cutters
- Small garden trowel or flat shovel
- Rubber mallet
- Voltage tester
- Outdoor-rated extension cord (for testing)
Materials:
- LED landscape light fixtures (CSA-certified)
- Low voltage transformer (12V, sized to your total wattage)
- Low voltage landscape cable (12 or 14 gauge, direct burial rated)
- Wire connectors (waterproof, gel-filled recommended)
- Ground stakes (usually included with fixtures)
- Outdoor timer or photocell (often built into the transformer)
- Cable staples or landscape stakes for securing wire
One landscape lighting installation tip that saves headaches: buy 10% to 15% more cable than you think you need. Runs are always longer than they look on paper. Always.
How to Install Low Voltage Landscape Lighting (12V Systems)
This is the method most Canadian homeowners should use. Low voltage systems are safe, affordable, and don’t require permits or an electrician. Here’s how to install low voltage landscape lighting from start to finish.
Step 1: Plan Your Layout and Mark Fixture Locations
Take your sketch and transfer it to the actual yard. Use small flags, wooden stakes, or even spray paint to mark where each fixture will go.
Walk the path at night with a flashlight. Put the flashlight on the ground at each marker. Does the spacing feel right? Are there dark gaps? Adjust now, not after you’ve buried cable.
A few things to think about:
- Walkways look best with lights on alternating sides rather than perfectly lined up. More natural that way.
- Gardens benefit from a mix of uplighting and downlighting. Don’t just blast everything from one angle.
- Driveways need consistent spacing. Drivers need to see the edges clearly.
Step 2: Install the Transformer
The transformer converts your home’s 120V power to safe 12V output. It’s the brain of your whole system.
Mount it near an outdoor GFCI outlet, at least 30 cm (12 inches) above ground level to protect it from snow and water. Most transformers come with a mounting bracket and screws.
Sizing your transformer: Add up the total wattage of all your fixtures. Then choose a transformer rated for at least 20% more than that total. So if your fixtures add up to 80 watts, get a 100-watt transformer. This leaves room for expansion and prevents the system from running at full capacity.
Don’t plug it in yet. Wait until everything is connected.
Step 3: Run the Low Voltage Cable
Starting from the transformer, run your cable along the planned path to each fixture location. Lay it on top of the ground for now. You’ll bury it later.
Cable layout methods:
- Daisy chain (series): One cable runs from fixture to fixture in a line. Simple but can cause voltage drop on longer runs.
- T-method (split): Cable runs from the transformer to a central point, then splits in two directions. Better voltage distribution.
- Hub method: Multiple shorter cables run from the transformer to different zones. Best for larger properties.
For runs longer than 30 metres (100 feet), use 12-gauge cable instead of 14-gauge. Thicker cable reduces voltage drop, which means your fixtures at the far end stay bright instead of dimming. Nobody wants the last three path lights looking like dying candles.
Leave about 30 cm of extra cable at each fixture location. You’ll need slack for connections.
Step 4: Connect and Position the Fixtures
Most low voltage LED landscape fixtures use one of two connection methods:
Quick connectors (pierce-point): These snap onto the cable and pierce through the insulation to make contact. Fast and easy. But they can let moisture in over time. If you use these, add a dab of silicone sealant.
Waterproof wire nuts (recommended): Strip about 1 cm of insulation from the cable, strip the fixture leads, twist together, and cap with a gel-filled waterproof connector. Takes an extra minute per fixture but lasts way longer. Especially through Canadian winters.
Push each fixture’s ground stake into the soil at your marked location. Angle them as needed. Uplights should point at about 30 to 45 degrees for tree lighting. Path lights should stand straight.
Step 5: Test and Adjust
Now plug in the transformer. Every fixture should light up. Walk the entire layout.
Check for:
- Dark spots between fixtures. Move them closer if needed.
- Glare. If a light shines directly into your eyes from the walkway, reposition or angle it down.
- Voltage drop. If the last fixtures on a run are noticeably dimmer, you may need heavier gauge cable or a higher-capacity transformer.
- Colour consistency. All fixtures should match in colour temperature. Mixing 3000K and 5000K looks awful.
Happy with it? Good. Now bury the cable. A flat shovel or garden edger works well. Push it about 7 to 15 cm (3 to 6 inches) into the soil along garden edges, under mulch, or in a shallow trench along walkways.
That’s it for low voltage. Not bad, right?
How to Install 120V Landscape Lighting (Line Voltage Systems)
Line voltage landscape lighting uses your home’s standard 120V power directly. No transformer. More power. But also more risk and more rules.
When 120V Makes Sense
You’d choose 120V for:
- Tall lamp posts or pole-mounted fixtures (over 1.2 metres high)
- High-output floodlights for security or large areas
- Commercial properties or parking areas
- Permanent hardwired installations in municipal settings
120V fixtures deliver more light output per fixture. But for typical residential walkways, gardens, and driveways, they’re overkill. Low voltage LED handles those jobs more efficiently and more safely.
Why You Need a Licensed Electrician for 120V
This isn’t a suggestion. It’s the law in most Canadian provinces.
Installing 120V outdoor wiring requires:
- An electrical permit from your local authority
- Inspection by a certified inspector
- All wiring in approved conduit buried to code depth (usually 30 to 45 cm minimum)
- GFCI protection on all outdoor circuits
- CSA-certified fixtures and components
The Electrical Safety Authority (ESA) in Ontario, and equivalent bodies in other provinces, enforce these requirements. Doing 120V electrical work without a permit can void your home insurance and create serious safety hazards. Not worth saving a few hundred dollars on an electrician.
If 120V is what your project needs, hire a licensed professional. Get the permit. Do it right.
Step-by-Step Guide to Installing Landscape Lighting for Specific Areas
Different areas of your property need different approaches. Here are some landscape lighting installation tips for each zone.
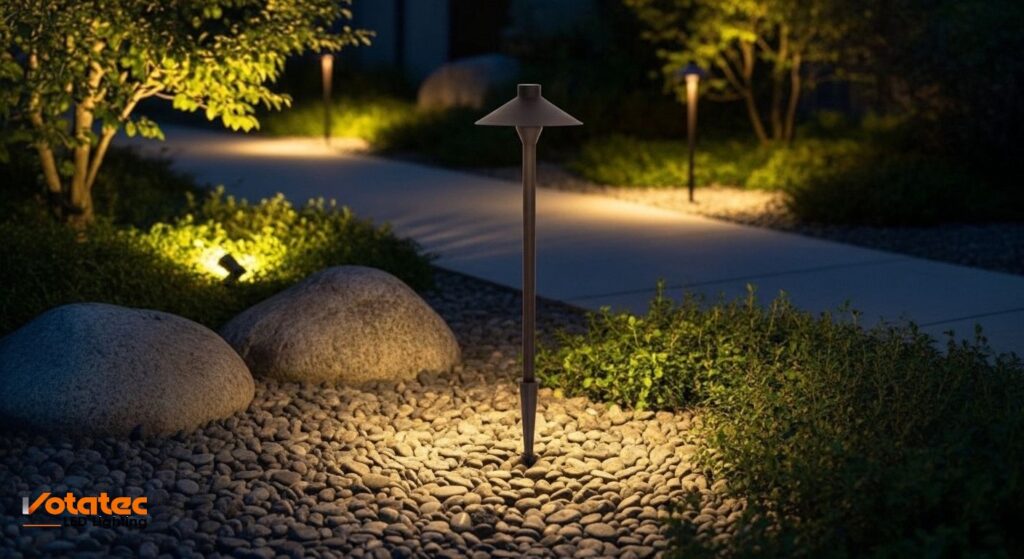
Walkway Lighting Installation
Walkways are the most common landscape lighting project. And the easiest to get wrong.
Do this:
- Space path lights every 1.8 to 2.4 metres (6 to 8 feet)
- Stagger lights on alternating sides for a natural look
- Use fixtures that cast light downward, not into people’s eyes
- Keep fixture height between 35 and 60 cm (14 to 24 inches)
Don’t do this:
- Line up fixtures like an airport runway on both sides
- Use fixtures taller than 60 cm on narrow paths. They look oversized and create glare.
- Forget about winter. Snow can bury short fixtures. Choose models that sit high enough to stay visible.
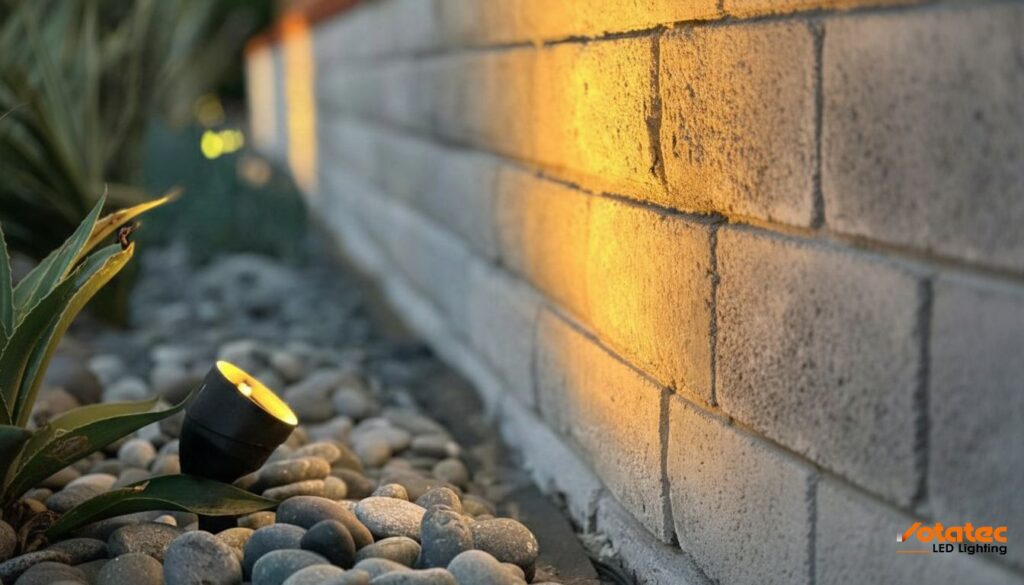
Garden and Flower Bed Lighting
Gardens give you more creative freedom. Mix techniques for the best effect.
- Uplighting on trees and tall shrubs creates drama. Position a spot light at the base, angled up at 30 to 45 degrees.
- Downlighting from a tree branch (called moonlighting) mimics natural light. Subtle and beautiful.
- Cross-lighting uses two fixtures on opposite sides of a feature. Reduces harsh shadows.
- Path lighting along garden borders defines the edge and prevents people from stepping into flower beds.
Use warm white (2700K to 3000K) for gardens. It makes foliage look natural and inviting. Cool white makes plants look washed out. Nobody wants that.
Driveway Lighting
Driveways need functional lighting above all else. Drivers need to see edges, curves, and where the driveway meets the sidewalk or garage.
- Bollard lights work great for long driveways. They’re sturdy, visible, and weather-resistant.
- Recessed ground lights are sleek and don’t get hit by snow plows. But they need proper drainage to avoid ice buildup.
- Stake lights are the easiest to install along gravel or landscaped driveway borders.
Space driveway fixtures every 2.4 to 3 metres (8 to 10 feet). Make sure they’re bright enough to see without creating glare for drivers.
How Much Does Landscape Lighting Installation Cost in Canada?
Let’s talk numbers. Costs vary depending on system type, number of fixtures, and whether you hire a professional.
| Component | Low Voltage (DIY) | 120V (Professional) |
| Fixtures (10 units) | $200 – $600 | $400 – $1,200 |
| Transformer | $80 – $250 | Not needed |
| Cable (30m) | $40 – $80 | $60 – $120 (in conduit) |
| Connectors/hardware | $20 – $50 | $50 – $100 |
| Electrician labour | $0 (DIY) | $500 – $1,500 |
| Permit fees | $0 | $75 – $200 |
| Total estimate | $340 – $980 | $1,085 – $3,120 |
The DIY low voltage route saves you a lot. And with LED fixtures, your operating costs are minimal. Maybe $3 to $8 per month depending on how many fixtures you run and how long they’re on each night.
Some provincial energy programs offer rebates on energy-efficient outdoor lighting upgrades. Check with your local utility, like BC Hydro or Ontario’s SaveOnEnergy programs, for current offerings.
According to Natural Resources Canada (NRCan), switching to LED outdoor lighting can reduce your exterior lighting energy consumption by up to 75%. Over 5 years, that adds up.
Landscape Lighting Installation Tips: Common Mistakes to Avoid
After helping thousands of customers with outdoor lighting projects, we’ve seen these mistakes over and over. Don’t make them.
Mistake 1: Too many fixtures, too close together. More isn’t always better. Over-lighting makes your yard look like a used car lot. Space them out. Let there be some shadow. It’s more natural.
Mistake 2: Ignoring voltage drop. On long cable runs, voltage decreases the farther you get from the transformer. Your first fixture is blazing bright, your last one is barely glowing. Use heavier gauge cable or split the run into multiple circuits.
Mistake 3: Using non-waterproof connections. Canadian weather is brutal. Freeze-thaw cycles, spring runoff, ice storms. If your wire connections aren’t waterproof, they’ll corrode within a season. Use gel-filled connectors. Every time.
Mistake 4: Skipping the timer or photocell. Running landscape lights manually means you’ll forget to turn them off. A timer or photocell (dusk-to-dawn sensor) handles it automatically. Most transformers come with one built in.
Mistake 5: Buying non-certified fixtures. In Canada, outdoor electrical products must be certified by a recognized lab. Look for CSA, cUL, or cETL marks. Products without these certifications may not meet Canadian safety standards and won’t qualify for any rebate programs. The CSA Group sets the testing standards for all electrical products sold in Canada.
Mistake 6: Forgetting about maintenance access. Bury your cable, but remember where it is. Sketch a map or take photos before covering everything with mulch. Future you will be grateful when something needs troubleshooting.
Frequently Asked Questions About Installing Landscape Lighting
How Deep Should I Bury Low Voltage Landscape Lighting Cable?
For low voltage cable (12V), bury it 7 to 15 cm (3 to 6 inches) deep. Many homeowners simply tuck it under mulch or along garden bed edges. For 120V wiring, code requires a minimum burial depth of 30 to 45 cm (12 to 18 inches) in approved conduit. Always check your local building code for specific requirements.
Can I Install Landscape Lighting Myself or Do I Need an Electrician?
Low voltage (12V) landscape lighting is completely DIY-friendly. You’re working with safe voltage levels and no permits are needed. For 120V line voltage systems, you need a licensed electrician and an electrical permit in most Canadian provinces. There’s no grey area here. If it’s 120V outdoor wiring, hire a pro.
How Many Landscape Lights Do I Need?
It depends on the area. For walkways, plan one fixture every 1.8 to 2.4 metres. For driveways, every 2.4 to 3 metres. For gardens, it varies by what you’re highlighting. A typical front yard with a walkway, garden bed, and driveway might use 12 to 20 fixtures total. Start with fewer and add more if needed. You can always expand a low voltage system easily.
What’s the Best Colour Temperature for Outdoor Landscape Lighting?
Warm white, between 2700K and 3000K, is the most popular choice for residential landscape lighting. It creates a welcoming, natural ambiance. For security lighting or commercial areas, 4000K to 5000K (neutral to cool white) provides better visibility. Avoid mixing colour temperatures in the same zone. It looks inconsistent and cheap.
How Long Do LED Landscape Lights Last?
Quality LED landscape fixtures are rated for 50,000+ hours. If you run them 8 hours per night, that’s about 17 years. Compare that to halogen landscape lights, which last maybe 2,000 to 3,000 hours and need replacing every year or two. LEDs cost more upfront but save significantly over time. Both in bulb replacements and energy costs.
Final Thoughts on Your Landscape Lighting Installation Guide
Installing landscape lighting transforms your property from invisible after dark to welcoming and safe. And with low voltage LED systems, the whole project is doable in a weekend without any special skills or permits.
Plan your layout first. Choose CSA-certified LED fixtures. Don’t cheap out on waterproof connectors. And size your transformer with room to grow. Follow those basics and you’ll have a system that looks professional and lasts for years.
Votatec carries a full range of CSA-certified LED landscape lighting fixtures designed for Canadian conditions, from path lights and bollards to ground-mounted spot lights and flood lights. Every product is rated for -40°C to +50°C operation and backed by a 5-year warranty.
Browse Votatec’s LED Landscape Lighting Collection
Need help choosing the right fixtures for your project? Request a free quote or talk to our lighting specialists. We’ll help you plan the perfect layout for your walkways, gardens, and driveways.