


That recessed light in your kitchen has been flickering for weeks. Or maybe it’s the old pot light in the bathroom that buzzes every time you flip the switch. Either way, it needs to come out. And the good news? You don’t need to hire an electrician for most of this.
Here’s the quick version of how to remove a recessed light fixture. Turn off the breaker. Remove the bulb and trim ring. Squeeze the spring clips to release the trim. Then disconnect the fixture from the junction box or pull the entire housing can out of the ceiling. About 15-30 minutes per fixture once you know the steps.
But not all recessed lights come apart the same way. Old-style can housings with spring clips are a different job than modern LED slim panels with torsion springs. And if you’re pulling fixtures to upgrade rather than just swap a bulb, the process changes again.
This recessed light removal guide covers every scenario. Let’s start with the part most people skip.
Electrical Safety for Recessed Lights: What to Do Before You Start
Before you touch anything inside that ceiling, kill the power. Not the wall switch. The breaker.
Electrical safety for recessed lights isn’t complicated, but it’s non-negotiable. Wall switches can fail, get bumped by someone walking past, or be wired on a shared circuit you didn’t know about. The only way to guarantee zero voltage at the fixture is to flip the circuit breaker off at the panel.
Read more: What Is a Recessed Downlight?
How to Verify the Power Is Off Safely
Here’s the step-by-step:
- Find the right breaker. Turn the recessed light on first. Go to the panel and flip breakers one at a time until the light goes off. Label that breaker with tape.
- Test with a voltage tester. Hold a non-contact voltage tester near the fixture. If it beeps or lights up, the circuit is still live. Go back to the panel. These testers cost $20-30 at any hardware store. Worth every penny.
- Post a warning. Tape a note on the panel saying “Working on lighting – do not turn on.” Someone flipping the wrong breaker while your hands are inside a ceiling box is not a risk you want to take.
- Let the bulb cool. If the light was running, especially a halogen or incandescent recessed light, wait 10-15 minutes. LED bulbs run cool so this mainly applies to older fixtures.
In Canada, all electrical work must comply with the Canadian Electrical Code. The Electrical Safety Authority (ESA) in Ontario requires that work beyond simple bulb changes be done by licensed electricians or knowledgeable individuals who follow code. If you’re capping wires after removing a fixture, make sure you’re comfortable with basic electrical connections. Otherwise, call a professional.
Tools You’ll Need to Remove Recessed Lighting
Gather everything before you climb the ladder. Nothing worse than getting up there and realizing your pliers are in the garage.
| Tool | Purpose |
| Non-contact voltage tester | Verify power is off |
| Flathead screwdriver | Pry trim rings, release clips |
| Phillips screwdriver | Remove housing screws and brackets |
| Needle-nose pliers | Squeeze spring clips, grip wires |
| Wire nuts + electrical tape | Cap exposed wires after removal |
| Step ladder | Reach the ceiling safely |
| Safety glasses | Protect eyes from dust and debris |
| Work gloves | Grip and hand protection |
| Utility knife | Score painted-over trim edges |
| Dust mask | Protection from insulation and ceiling dust |
Got everything? Good. Let’s get into it.
How to Remove a Recessed Light Fixture From the Ceiling: Full Walkthrough
The process for how to remove a recessed light fixture from the ceiling depends entirely on what type you’ve got. Old can housings, modern LED panels, and retrofit kits all come apart differently. We’ll cover each one below.
But first, the question that saves a lot of unnecessary work.
How to Change Recessed Ceiling Light Bulb vs. Full Fixture Removal
Do you actually need to remove the fixture? Or just change the bulb? Sounds obvious, but plenty of people rip out entire housings when all they needed was a new lamp.
You just need a bulb change if:
- The fixture housing is in good shape, no rust, no discolouration, no water damage
- The trim ring sits flush and looks fine
- The socket works when tested with a known good bulb
- You’re happy with the fixture style and just want it working again
How to change recessed ceiling light bulb varies by type. Standard BR30 or PAR30 flood bulbs twist counterclockwise and pull down. GU10 pin-base bulbs push in slightly, then twist a quarter turn counterclockwise. Standard screw-base bulbs are the usual counterclockwise twist everyone knows.
You need full fixture removal if:
- The housing is rusted, heat-warped, or water-damaged
- You’re converting from old can lights to LED slim panels
- The fixture is non-IC rated and you need insulation above it
- You’re patching the ceiling and eliminating the light entirely
- The fixture buzzes, overheats, or has a failing socket that can’t be replaced
If it’s a full removal job, keep reading.
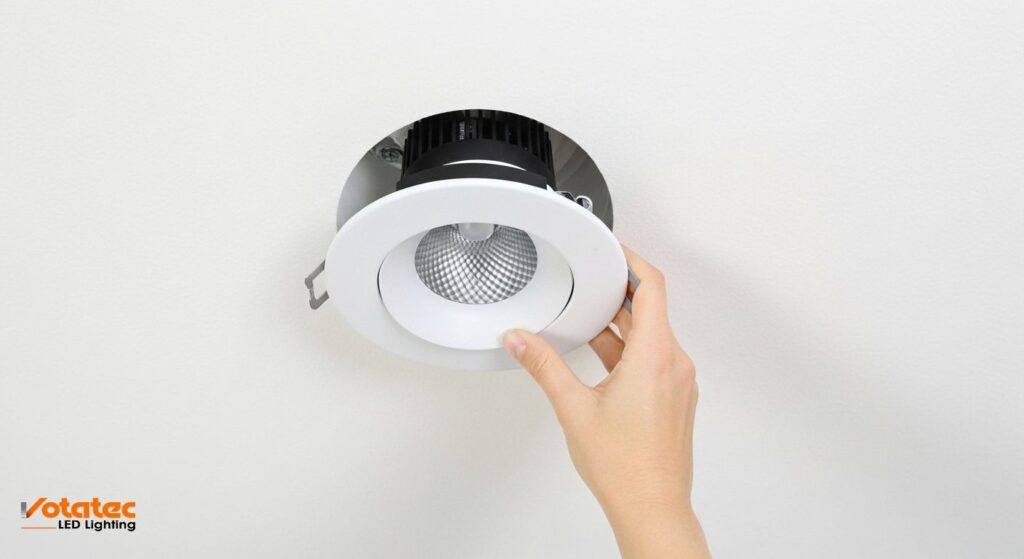
How to Remove Recessed Lighting Spring Clips Without Damage
Most traditional recessed lights use spring clips to hold the trim ring against the ceiling. These are the V-shaped metal springs that squeeze between the trim and the inside of the housing can. Getting them out without scratching your ceiling or bending the springs takes a bit of patience.
Here’s how to remove recessed lighting spring clips the right way:
Step 1: Grip the trim ring with both hands and pull straight down about 2-3 inches. The springs will resist. That’s normal. Steady, firm pressure. Don’t yank.
Step 2: Once the trim drops low enough to expose the springs, reach behind the trim ring and squeeze the spring clip ends together with your fingers or needle-nose pliers. The clips hook into slots inside the housing can. Squeezing them inward releases them from those slots.
Step 3: Release one spring at a time. Hold the trim with one hand while you free each clip with the other. Most trims have two or three clips. Once all clips are released, the trim ring and baffle come straight down.
Step 4: Set the trim and clips aside carefully. If you plan to reuse them, keep the springs attached to the trim. Reattaching loose springs is frustrating and time-consuming.
A couple of tips. If springs are stuck from years of heat cycling, a small flathead screwdriver can pry the clip ends out of the housing slots. Go gently, forcing them bends the spring and can crack the trim ring. And if someone painted the ceiling without masking the fixtures, score around the trim edge with a utility knife first. Otherwise you’ll peel paint off the ceiling when the trim comes down. Not a great look.
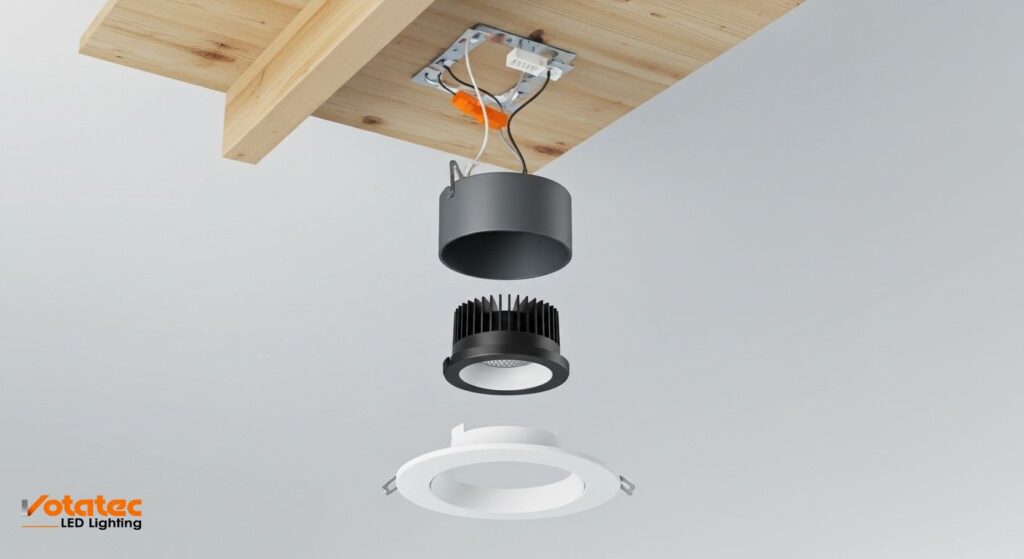
Recessed Light Housing Removal: Getting the Can Out of the Ceiling
With the trim off, you’re looking up into the housing can. This is the metal cylinder sitting inside the ceiling between the joists. Recessed light housing removal is the most involved step, and the method depends on how the can was originally installed.
Read more: Different Types of LED Ceiling Lights
New construction housings are nailed or screwed to ceiling joists with mounting bars. You’ll see a metal bar spanning between joists with the can attached.
To remove:
- Disconnect the wiring first. Inside the junction box on top of or beside the can, you’ll find wire nuts connecting the fixture’s wires to the house wiring. Unscrew the wire nuts, separate the wires, and cap the house wires with new wire nuts. Wrap each cap with electrical tape for extra security.
- Find the mounting hardware. Look for screws or clips holding the can to the mounting bar. Some have screws accessible from below. Others have spring clips or friction tabs that push inward to release.
- Remove the can. Once mounting hardware is released, push the can up into the ceiling space and angle it out through the hole. If it’s a tight fit, you may need to bend one of the mounting tabs slightly.
Remodel housings (also called retrofit cans) don’t attach to joists. They grip the drywall using spring clips or wing brackets that press against the top surface of the ceiling. To remove these, reach inside the can and push the spring clips inward until they clear the drywall edge. The can drops straight down.
Important: If your ceiling has insulation above the fixture, expect loose insulation to fall through the hole once the can is out. Wear safety glasses and a dust mask. And if you’re not installing a replacement immediately, stuff a piece of cardboard or a temporary plug into the opening to stop conditioned air from escaping into the attic.
LED Recessed Light Removal: Slim Panels and Wafer Lights
Modern LED slim panels are different from traditional can lights. There’s no metal housing. Instead, a thin LED panel sits flush against the ceiling, held by torsion springs that clip into a mounting frame or directly into the drywall hole.
LED recessed light removal is actually the easiest of all types:
Step 1: Pull the panel straight down from the ceiling. It’ll resist because of the torsion springs. Steady pressure. Don’t twist.
Step 2: Once the panel hangs below the ceiling, squeeze each torsion spring clip to release it from the mounting bracket or drywall hole. Most panels use two spring clips on opposite sides.
Step 3: The panel is now hanging by its electrical connection. This is typically a quick-connect plug that snaps into a junction box above the ceiling. Press the release tab on the connector and unplug it. If it’s hardwired, you’ll need to open the junction box and disconnect the wire nuts.
Step 4: Cap any exposed wires in the junction box with wire nuts and electrical tape. If you’re removing the fixture permanently, install a blank ceiling box cover to meet electrical code requirements.
Five minutes. That’s how long LED slim panel removal takes once you’ve done it a couple of times. Way easier than dealing with old can housings.
Replace Recessed Light Fixture: When Removal Means an Upgrade
Most people don’t pull recessed lights just to leave a hole in the ceiling. They remove them to upgrade. And if you’re already doing ceiling light fixture removal, you might as well install something better while you’re at it.
Old Can Light vs. LED Slim Panel: Which Should You Install?
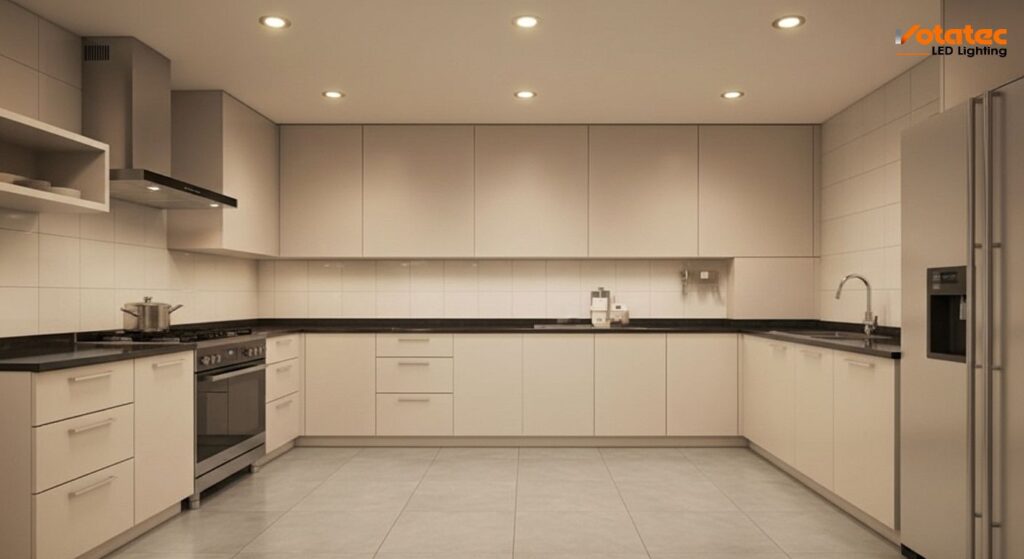
The most popular upgrade path in Canada right now is converting old 5-inch or 6-inch can lights to LED slim panels. The comparison isn’t even close.
| Feature | Old Can Light (Incandescent/CFL) | LED Slim Panel |
| Wattage | 65-100W | 10-15W |
| Light Output | 700-1,200 lumens | 800-1,200 lumens |
| Lifespan | 1,000-8,000 hours | 50,000+ hours |
| Profile Depth | 7-8 inches into ceiling | 0.5-1 inch thin |
| IC Rating Concerns | Yes, fire risk if non-IC | Not applicable |
| Installation Time | 30-60 minutes | 10-15 minutes |
| Energy Savings | Baseline | 75-85% less energy |
| Heat Output | High | Minimal |
LED slim panels use 75-85% less energy, generate almost no heat, and last 10-15 years under normal use. They’re thinner than a smartphone, so they fit in tight ceiling spaces where old cans won’t work, like between floors in condos or under ductwork.
How to Uninstall Recessed Lights and Upgrade to LED in One Step
Here’s the efficient approach. Instead of removing the old fixture and then doing a separate installation, combine both steps.
- Remove the old trim, spring clips, and bulb (steps covered above).
- If you have an old can housing, you have two options: remove the can entirely, or use an LED retrofit kit that drops into the existing can opening. Retrofit kits are faster because they use the existing housing as a mounting point.
- Connect the new LED panel’s quick-connect plug to the junction box wiring.
- Push the torsion springs up through the ceiling hole, position the panel, and let the springs pull it flush against the ceiling.
- Turn the breaker back on and test.
Total time to how to uninstall recessed lights and replace with LED? About 20-30 minutes per fixture, including removing the old one.
Common Mistakes When Removing Recessed Lights
Even simple jobs go wrong when steps get skipped. Here are the mistakes that cause the most headaches during recessed lighting removal.
Not Verifying Power Is Off
This is the dangerous one. Breakers can be mislabelled. Multi-wire circuits can have shared neutrals that remain energized even when you think the circuit is dead. Always, always test with a non-contact voltage tester. Every single time. No exceptions.
Forcing Spring Clips and Damaging Trim
If you bend a torsion spring or snap a clip, the trim won’t hold properly when you reinstall or install a replacement. Patience saves hardware. If a clip is stuck, use pliers or a small flathead screwdriver. Don’t pull harder. Go slow. The two minutes of extra care are worth it.
Ignoring Insulation Contact Ratings
If you remove a non-IC rated fixture and replace it with another non-IC fixture, you still need to keep insulation at least 3 inches away from the housing. IC-rated fixtures and LED slim panels eliminate this concern entirely. If you’re upgrading, this is one more reason to go LED.
Leaving Uncapped Wires in the Ceiling
Any exposed wire must be capped with a wire nut and enclosed in an accessible junction box. Bare wires inside a ceiling cavity are a code violation and a fire hazard. If you’re removing a fixture permanently, install a blank cover plate on the junction box. Don’t just tape the wires and push them into the ceiling.
Pulling Too Hard on LED Panels
Slim panels connect to the junction box by wires that can pull loose if you yank the panel down too aggressively. Gentle, steady pressure. Let the torsion springs do the work. You’ll feel the resistance ease as the springs extend. If it feels like you’re forcing it, something is catching. Stop and check before you pull a wire loose.
Forgetting to Patch the Ceiling Hole
If you’re removing a recessed light without replacing it, you’ll have a 5 or 6-inch hole in your ceiling. That hole needs a blank cover plate on the junction box and proper drywall patching. An open hole wastes conditioned air, lets moisture into the ceiling cavity, and doesn’t meet building envelope standards. Patch it right.
Frequently Asked Questions About Removing Recessed Lights
1. Can I remove a recessed light fixture myself or do I need an electrician?
You can handle basic tasks like removing trim rings, spring clips, and even the housing can yourself, as long as you turn off the breaker and verify power is off with a voltage tester. But if you need to disconnect hardwired connections, cap wires in a junction box, or modify electrical circuits, Canadian electrical codes recommend using a licensed electrician. In Ontario, the ESA requires permits for certain types of electrical work beyond simple fixture swaps.
2. How do I remove recessed lighting spring clips that are stuck?
Stuck spring clips are usually caused by paint, corrosion, or heat warping. First, score around the trim ring edge with a utility knife if it’s painted over. Then pull the trim down 2-3 inches and use needle-nose pliers to squeeze each clip inward, releasing it from the housing slot. If clips are severely corroded, a small flathead screwdriver helps pry them free. Go slowly to avoid bending springs or cracking the trim.
3. What’s the difference between removing an old can light and a modern LED slim panel?
Old can lights have a metal housing cylinder mounted inside the ceiling, held by bars attached to joists or spring clips gripping the drywall. Removal involves detaching the housing from its mounting hardware and disconnecting wiring in the junction box. LED slim panels are much simpler. They sit flush against the ceiling, held by two torsion spring clips. Pull the panel down, squeeze the springs, and unplug the quick-connect wire connector. LED removal takes about 5 minutes compared to 15-30 for old can lights.
4. Can I replace an old recessed can light with an LED slim panel without an electrician?
If the existing junction box and wiring are in good condition, many LED slim panels are designed as direct retrofit replacements that use the same electrical box. The panel connects via a plug-in adapter, so no wire splicing is needed. However, if existing wiring is old, damaged, or lacks a proper junction box, hire a licensed electrician to make sure the installation meets Canadian Electrical Code standards.
5. Do I need to patch the ceiling after removing a recessed light fixture?
If you’re replacing the old fixture with a new one like an LED slim panel, patching isn’t needed because the new fixture covers the opening. But if you’re removing the fixture permanently, yes. Install a blank cover plate on the junction box first, then patch the drywall with a repair kit. An open hole wastes heated or cooled air, lets moisture into the ceiling cavity, and doesn’t meet building envelope requirements.
Bottom Line on How to Remove a Recessed Light Fixture
Removing a recessed light fixture is a straightforward job once you know the steps. Kill the power, test with a voltage tester, remove the trim and clips, and either pull the housing or disconnect the LED panel. Most homeowners and facility managers can handle it in under 30 minutes per fixture.
And if those old pot lights are coming out anyway, it’s the perfect time to upgrade. LED slim panels cut energy use by 75-85%, last over a decade, and install in a fraction of the time. No bulky cans, no heat concerns, no insulation worries.
Votatec offers a full line of CSA-certified LED recessed slim panels and retrofit kits designed for Canadian homes lighting and commercial buildings. IC-rated, dimmable, and available in 3000K through 5000K colour temperatures to match any space.
Ready to upgrade your recessed lighting? Browse Votatec’s LED slim panel collection or request a free quote for your project.


Jim Brennan 1 month ago
My recessed light doesn’t work. I tried installing a new bulb. Any ideas would be appreciated.