


That ceiling light’s been flickering for weeks. Maybe months. And every time you flip the switch, there’s that annoying half-second delay before it finally comes on. Sound familiar?
Here’s the good news. Learning how to replace LED ceiling light fixtures is one of the easiest home upgrades you can do yourself. No electrician needed for most jobs. Just a few basic tools, about 30 to 45 minutes, and you’ll have a brighter, more energy-efficient room.
The thing is, most people overthink this. They assume ceiling light replacement means complicated wiring or tearing into drywall. It doesn’t. If your existing junction box is in good shape, you’re basically disconnecting a few wires and reconnecting new ones. That’s it.
And the payoff? LED ceiling lights use around 75% less energy than traditional incandescent fixtures. They last 50,000+ hours. So you won’t be climbing that ladder again for a very long time.
In this guide, we’ll walk through every step of how to replace LED ceiling light fixtures, from safely killing the power to testing your new light. We’ll also cover wiring basics, choosing the right fixture, and Canadian rebate programs that can help offset the cost. Whether you’re a homeowner tackling a weekend project or a contractor doing a quick swap, this guide has you covered.
When Should You Consider an LED Ceiling Light Replacement?
Not every flickering light needs a full fixture swap. Sometimes it’s just a loose bulb. But there are clear signs that it’s time for a proper LED ceiling light replacement.
Your fixture is more than 10 years old. Older fixtures weren’t designed for LED technology. They might work with screw-in LED bulbs, but you’re not getting the full benefit. Integrated LED fixtures are built to manage heat better, last longer, and distribute light more evenly.
You’re still running incandescent or fluorescent. If your ceiling fixture uses old-school bulbs, you’re paying roughly 4 times more in electricity than you need to. Pretty wild when you think about it. A simple LED swap can cut your lighting energy costs by 75%.
The fixture looks dated. Honestly, this one matters more than people admit. A yellowed, dusty dome light from 2005 drags down the whole room. Modern LED fixtures are slim, clean, and way brighter.
You’re seeing flickering, buzzing, or uneven light. These are signs of failing ballasts, bad connections, or end-of-life components. Time to replace, not repair.
Signs Your Current Fixture Needs Replacing
- Persistent flickering even after changing the bulb
- Visible discolouration or burn marks on the fixture
- Buzzing or humming sounds when the light is on
- Uneven brightness or dark spots
- The fixture doesn’t accept modern LED bulbs properly
- You smell burning plastic. This one means stop using it immediately.
If you’re checking two or more boxes, a full LED light fixture upgrade makes more sense than patching the old one.

Tools and Materials You’ll Need
Before you start, gather everything. Nothing’s worse than being on a ladder with wires hanging out and realizing you forgot the wire nuts.
Tools:
- Non-contact voltage tester (around $15 to $25, and honestly, every homeowner should have one)
- Flathead and Phillips screwdrivers
- Wire strippers
- Needle-nose pliers
- Step ladder
- Electrical tape
- Flashlight or headlamp (since, you know, you’ll have the power off)
Materials:
- New LED ceiling light fixture (CSA-certified)
- Wire nuts (usually included with the fixture)
- Mounting bracket (usually included)
- Optional: new junction box if the old one is damaged
Got everything? Good. Let’s get into it.
Step 1: Turn Off Power and Remove Old Ceiling Light Fixture
This is the most important step. Not optional. Not something you skip because you’re “pretty sure” which switch controls the light.
Go to your electrical panel. Find the breaker that controls the room’s lighting circuit. Flip it off. Then go back to the room and flip the light switch on to confirm the light doesn’t come on.
But don’t stop there.
Read more: Different Types of LED Ceiling Lights for Every Room
How to Verify Power Is Off (Safety First)
Use a non-contact voltage tester at the fixture. These little tools light up or beep if current is present. Hold it near the wires, near the junction box, near anything metal on the fixture. No beep? You’re safe to proceed.
According to the Electrical Safety Authority (ESA), electrical incidents in homes often happen during DIY projects where homeowners assume the power is off without testing. Don’t be that person.
Now, to remove old ceiling light fixture:
- Remove the globe, shade, or cover. Most twist off counterclockwise or have small screws holding them in place.
- Remove the light bulbs.
- Look for the mounting screws or nuts holding the fixture base to the ceiling. Usually there are two or three.
- Support the fixture with one hand while unscrewing with the other. It’ll drop slightly once the last screw is out, but it should still be connected by wires.
- You’ll see wire connections – typically wire nuts joining the fixture wires to the house wires. Don’t pull anything yet.
Take a photo with your phone. Seriously. It takes two seconds and saves you from guessing later which wire goes where.
Step 2: Disconnect and Remove the Old Fixture
With the fixture hanging by its wires, it’s time to disconnect.
Untwist the wire nuts connecting the fixture wires to the house wires. You’ll typically see three connections:
- Black (hot) to black
- White (neutral) to white
- Green or bare copper (ground) to green or bare copper
Untwist them carefully. Set the old fixture aside.
Now look at those house wires. Are they in good shape? No fraying, no melted insulation, no discolouration? Good. If you see damage, that’s when you call a licensed electrician. Not worth the risk, right?
Also check if the wire insulation is cracked or brittle. Older homes, especially those built before the 1980s, sometimes have aluminum wiring or cloth-insulated wiring that needs professional attention. Natural Resources Canada (NRCan) has guidelines on home electrical safety standards that are worth reviewing if you’re unsure.
Step 3: Inspect the Junction Box and Wiring
Here’s where people sometimes hit a snag. The junction box, that metal or plastic box recessed into your ceiling, needs to be in decent condition.
Check for:
- Secure mounting. Give it a gentle tug. It shouldn’t move or wobble. If it does, it needs to be resecured to a ceiling joist or replaced with a fan-rated box.
- Proper size. Most LED ceiling lights are lightweight, so a standard box works fine. But if you’re installing something heavier than about 22 kg (50 lbs), you’ll need a fan-rated box.
- No damage. Cracks, rust, or missing knockouts mean it’s time for a new box.
If the box is good, move on. If not, replacing a junction box is a straightforward job, but it adds about 20 minutes to your project.
LED Ceiling Light Wiring: Connecting the Wires Correctly
Let’s talk about wiring for a second because this is where people get nervous. Don’t be. Canadian residential wiring follows a simple colour code:
| Wire Colour | Function |
| Black | Hot (carries current from the panel) |
| White | Neutral (return path) |
| Green or Bare Copper | Ground (safety) |
Your new LED fixture will have matching wires. Black to black. White to white. Ground to ground. Twist the exposed copper ends together clockwise, then secure with a wire nut. Wrap electrical tape around the base of each wire nut for extra security.
One thing to watch for. Some LED fixtures, especially integrated panel types, have a quick-connect plug instead of individual wires. Even easier. You just match the colours and click them together.
If your house has older wiring where the colours don’t match this standard, or if you see aluminum wiring (a silvery colour instead of copper), stop and consult a licensed electrician. Aluminum-to-copper connections need special connectors to prevent fire hazards.
Step 4: Mount the New Bracket or Mounting Plate
Almost every LED ceiling fixture comes with a mounting bracket or crossbar that attaches to the junction box. This bracket holds your new fixture to the ceiling.
Here’s what to do:
- Remove the old mounting bracket from the junction box. It’s usually held by two screws.
- Attach the new bracket using the screws provided with your new fixture. Thread them into the junction box ears.
- Make sure the bracket sits flush against the ceiling. Tighten the screws snug, but don’t overtighten. You can crack the box.
- Feed the house wires through the centre opening of the bracket.
Some fixtures use a centre-mount stud instead of a crossbar. Same idea, just a single threaded rod in the middle. Follow the fixture’s instructions for which style yours uses.
Quick tip. If there’s a gap between the bracket and the ceiling because your junction box is recessed too deep, most kits include a spacer or adjustable screws. Use them. You want that fixture sitting flat.
Step 5: Install New LED Light Fixture to the Junction Box
Now the fun part. You’re about to install new LED light fixture and actually see results.
- Connect the wires. Black to black, white to white, ground to ground. Twist, cap with wire nuts, tape.
- Tuck the wires neatly into the junction box. Don’t force them. Fold them carefully so nothing gets pinched.
- Lift the fixture to the ceiling and align it with the mounting bracket.
- Secure the fixture. Depending on the type, you’ll either tighten screws, twist the fixture onto a centre stud, or snap it into clips.
For a flush mount LED ceiling light, the base typically slides over the mounting bracket screws and locks with decorative nuts. For recessed-style fixtures, there might be spring clips that push up into the ceiling hole.
Make sure the fixture is tight against the ceiling. No gaps, no wobble. If it’s not sitting flat, pull it down and check if a wire is bunched up behind it.
Step 6: Secure the Fixture and Test
With the fixture mounted, it’s time to see if everything works.
- Go back to your electrical panel and flip the breaker back on.
- Return to the room and flip the light switch.
- The light should come on instantly. No delay, no flicker. That’s the beauty of LED.
If it doesn’t turn on, don’t panic. Flip the breaker off again, remove the fixture, and check your wire connections. The most common problem? A loose wire nut. Tighten everything, try again.
If the light flickers, there are a couple of possible causes. Your dimmer switch might not be compatible with the new LED fixture. Older dimmers designed for incandescent bulbs can cause flickering with LEDs. You’ll need a dimmer compatible LED ceiling light or swap the dimmer for an LED-rated one. Usually costs $15 to $30.
Step 7: Adjust Settings and Final Check
You’re almost done. Take a step back and check a few things:
- Is the light evenly distributed? No hot spots or dark corners?
- Is the colour temperature what you expected? Some fixtures have selectable Kelvin settings (3000K/4000K/5000K) with a small switch on the fixture body. Adjust before sealing everything up.
- Is the fixture secure? Give it a gentle push. Solid? Good.
- Does it work with your dimmer? If the fixture is dimmable, test the full range. Smooth dimming with no buzzing means you’re set.
That’s it. Seven steps. You just replaced your ceiling light.
Flush Mount LED Ceiling Light vs. Recessed: Which to Choose?
This is a question that comes up a lot. Here’s the quick breakdown.
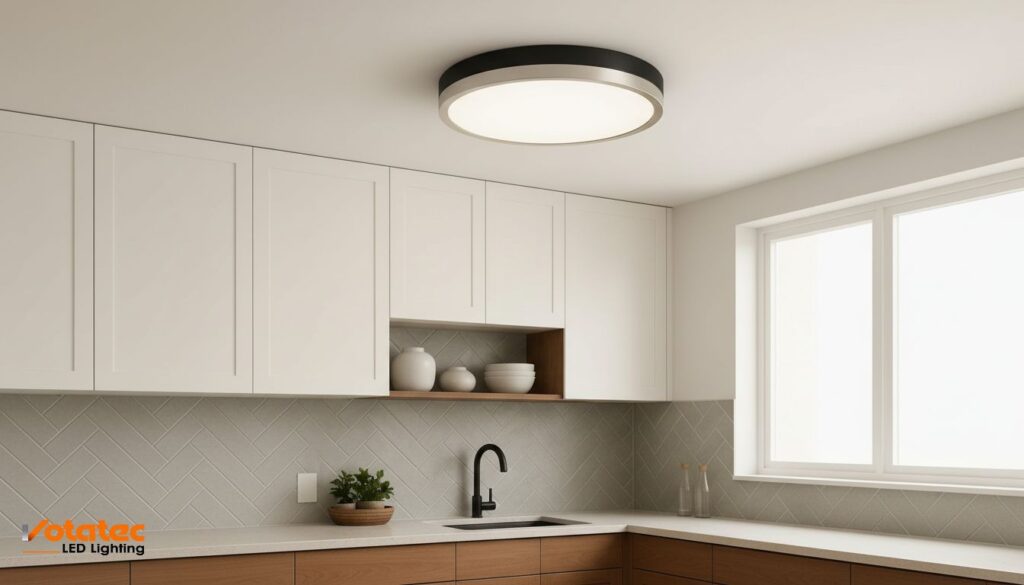
Flush mount LED ceiling lights sit directly against the ceiling surface. They’re the most common type in Canadian homes, easy to install, and work with standard junction boxes. Great for rooms with lower ceilings (under 2.7 metres or 9 feet).
Recessed LED lights sit inside the ceiling. They look sleeker and more modern, but installation is more involved. You need enough ceiling cavity space, and you may need to cut new holes if you’re not replacing existing recessed cans.
For a straightforward replacement, flush mount is almost always the easier choice. If you’re doing a full renovation and want a cleaner look, recessed is worth the extra effort.
How to Choose the Right LED Replacement
Picking the right fixture matters just as much as installing it correctly. Here’s what to consider.
Best LED Ceiling Lights for Home: What to Look For
Lumens, not watts. Forget wattage. That’s an old way of thinking. Lumens tell you how bright the light actually is. For a typical bedroom or hallway, 800 to 1,100 lumens works well. Kitchens and bathrooms need 1,500 to 3,000 lumens. More light, less energy. Pretty good deal.
Colour temperature. Measured in Kelvin (K). Lower numbers like 2700K give warm, yellowish light. Higher numbers like 5000K are cool and blueish. Most Canadian homeowners prefer 3000K to 4000K for general living spaces. It’s personal preference, but 4000K is a solid all-around choice.
CRI (Colour Rendering Index). This tells you how accurately colours appear under the light. A CRI of 90 or above makes everything look natural. Below 80? Things start looking washed out. Look for 90+ CRI if you care about how your space looks. And you should.
Certifications. In Canada, any fixture you install must be certified by a recognized testing lab. Look for CSA, cUL, or cETL marks. For maximum rebate eligibility, Energy Star or DLC certification helps. CSA Group sets the standards for electrical product safety in Canada, and their mark means the product has been independently tested.
Dimmer compatibility. Not all LED fixtures work with all dimmers. If you have a dimmer switch, check the fixture’s compatibility list before buying. Otherwise you’ll get flickering, buzzing, or a light that only dims to 50% and then just turns off.
LED vs. Traditional: Quick Comparison
| Feature | LED Ceiling Light | Incandescent | Fluorescent |
| Energy Use | 10-20W | 60-100W | 25-40W |
| Lifespan | 50,000+ hours | 1,000 hours | 8,000 hours |
| Warm-up Time | Instant | Instant | 30-60 seconds |
| Contains Mercury | No | No | Yes |
| Dimmable Options | Yes (most) | Yes | Rarely |
| Heat Output | Low | High | Medium |
| Annual Cost (4 hrs/day) | ~$7-$14 | ~$35-$70 | ~$18-$28 |
The numbers speak for themselves. Honestly.
LED Ceiling Light Replacement: Your Top Questions Answered
What If Your Ceiling Light Won’t Turn Off After Replacing?
This is more common than you’d think. If your ceiling light won’t turn off after replacing, the most likely cause is reversed wiring. The hot (black) and neutral (white) wires may be swapped. Turn off the breaker, open the fixture, and check your connections. Black must connect to black, white to white.
Another possibility is a faulty switch. If the switch has a backlit indicator or a smart switch function, it can sometimes feed a small amount of current to the fixture even in the “off” position. Enough to keep an LED glowing dimly. Replacing the switch with a standard toggle usually fixes this.
How Long Does It Take to Replace a Ceiling Light?
For a straightforward swap where the junction box is in good condition, about 20 to 45 minutes. If you need to replace the mounting bracket or deal with older wiring, add another 15 to 20 minutes. Your first one takes the longest. After that, it gets faster.
Do I Need an Electrician to Replace a Ceiling Light in Canada?
For a simple like-for-like replacement where you’re swapping one fixture for another using the existing junction box and wiring, most Canadian provinces allow homeowners to do this themselves. But, and this is a big but, if you need to run new wiring, add a new junction box, or modify the circuit in any way, you need a licensed electrician and likely an electrical permit. Rules vary by province, so check with your local ESA office.
Can I Replace a Fluorescent Ceiling Light with LED?
Absolutely. And you should. Fluorescent fixtures contain mercury, buzz constantly, and take forever to warm up. Replacing them with LED is one of the best upgrades you can make. You’ll need to remove the old fluorescent fixture entirely (including the ballast) and install a new LED fixture in its place. The wiring process is the same as we described above.
What Happens If I Wire an LED Light Incorrectly?
If the hot and neutral wires are reversed, the light may still work but it creates a safety hazard, the fixture remains energized even when the switch is off. If the ground wire isn’t connected, you lose a layer of shock protection. And if wires are loose or exposed, you risk arcing and potentially a fire. Always double-check connections and use a voltage tester.
Replace Your LED Ceiling Light with Confidence
Knowing how to replace LED ceiling light fixtures is a practical skill that saves you money on electrician calls and energy bills. Seven steps. Basic tools. Under an hour. And you get better light, lower energy costs, and a fixture that’ll last for years.
If you’re planning a ceiling light upgrade, Votatec offers a full range of CSA-certified LED ceiling lights designed for Canadian homes and commercial spaces. From slim flush mount panels to high-lumen fixtures for kitchens and offices, every product ships from our Canadian warehouse with a 5-year warranty.
Ready to upgrade? Get a quote or contact our lighting specialists for help choosing the right fixture for your space.