


You’re chopping onions at the counter. The overhead kitchen light is on. But your own body is throwing a shadow right where the knife meets the cutting board.
Sound familiar?
This is the number one complaint people have about their kitchen lighting. And it’s not a brightness problem. It’s a placement problem. A single kitchen ceiling light, no matter how powerful, can’t illuminate a kitchen properly because you’ll always end up standing between the light and your work surface.
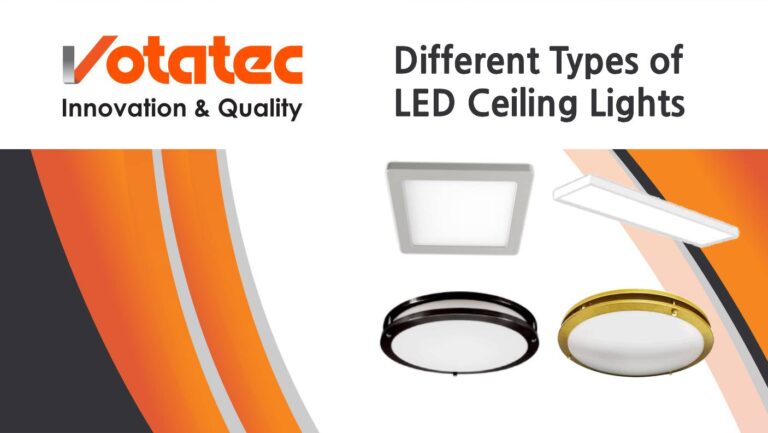
Here’s the thing. Fixing your kitchen lights isn’t complicated once you understand a few basics: which types of kitchen light fixtures go where, how bright they need to be, and what colour temperature actually looks good on food and countertops. This guide covers every kitchen lighting idea that matters. From LED downlights and under cabinet kitchen lighting to pendant lights for kitchen islands and smart dimmers, you’ll walk away knowing exactly what to buy and how to set it up.
The Three Layers of Kitchen Lighting (And Why You Need All of Them)
Every well-lit kitchen uses three types of light. Not one. Not two. Three.
Ambient lighting is your base layer. Kitchen ceiling lights like recessed pot lights, flush mounts, and LED panel fixtures handle this job. Think of it as the background brightness that lets you walk into the room without tripping over the dog.
Kitchen task lighting goes where you actually work. Countertops, the sink, the stove, the island. This is the layer that solves the shadow problem. Under cabinet kitchen lighting with LED strips, pendant lights for kitchen islands, and directed downlights are all task lighting. Without it, you’re cooking in your own shadow. With it, light comes from in front of you, not behind.
Accent lighting is the finishing touch. Inside glass-door cabinets, above the uppers, along the toe kick. It adds depth and makes the kitchen feel intentional instead of flat. Not strictly necessary, but it’s the difference between a kitchen that works and one that feels great.
Here’s where people go wrong. They install 12 pot lights across the ceiling and call it done. The kitchen ends up bright but harsh, like an operating room. Forum after forum, homeowners say the same thing: “It felt clinical.” That’s because they only have ambient light. No task layer, no accent layer, no warmth. Just flat overhead brightness everywhere.
You need all three layers. And you need them on separate switches or dimmers so you can adjust the mood. Morning coffee doesn’t need the same kitchen lights as Thanksgiving dinner prep.
How Many Recessed Lights in a Kitchen? The Lumen Math
Most lighting guides get vague here. “Make sure it’s bright enough.” Not helpful.
So let’s talk real numbers.
The general recommendation is 30 to 40 lumens per square foot for overall kitchen lighting. But that’s just the ambient layer. Kitchen task lighting areas need more, around 50 to 75 lumens per square foot on the work surface itself.
Here’s what that looks like in practice:
| Kitchen Size | Square Footage | Ambient Lumens Needed | Task Lumens (counters) |
|---|---|---|---|
| Small (galley/apartment) | 70-100 sq ft | 2,100-4,000 | Add 500-1,000 per task zone |
| Medium (standard) | 100-200 sq ft | 3,000-8,000 | Add 500-1,000 per task zone |
| Large (open-concept) | 200-350 sq ft | 6,000-14,000 | Add 500-1,000 per task zone |
So how many can lights for a kitchen? A medium kitchen with six recessed downlights at 800 lumens each gives you 4,800 lumens of ambient light. That covers it nicely. A large open-concept kitchen might need 10 to 14 can lights depending on the layout. Add under-cabinet strips for the task zones and you’re in great shape.
Keep in mind that lumens at the fixture aren’t the same as lumens on the surface. A pot light recessed 6 inches into the ceiling loses some output to the housing. Budget about 10% to 15% more than the table shows.
One more thing. If anyone in the household is over 50, bump the numbers up by 50% to 100%. Our eyes need significantly more light as we age, and this is one detail that most kitchen designers skip entirely.
Colour Temperature and CRI: Why Your Food Looks Wrong Under Bad Lighting
This is the biggest gap in almost every kitchen lighting guide online. Four out of five top-ranking articles skip colour temperature completely. But it might be the single most important decision you make when choosing kitchen light fixtures.
Colour temperature is measured in Kelvin (K). Lower numbers are warmer (yellowish), higher numbers are cooler (bluish-white). Here’s what matters for kitchens:
2700K (warm white): Cozy, amber tone. Great for dining areas and accent lighting. Makes wood tones and warm colours look rich. But food prep under 2700K can feel dim and slightly yellow, kind of like cooking under candlelight.
3000K (soft warm white): The sweet spot for most kitchens. Warm enough to feel inviting, bright enough for task work. This is what lighting professionals recommend most often for residential kitchen lighting.
3500K (neutral white): Slightly crisper. Good for kitchens that double as workspaces or where you want colours to render accurately. A lot of commercial kitchens land here.
4000K and above (cool white): Feels clinical in a home kitchen. Save this for commercial food prep or institutional settings.
One homeowner on a design forum put it perfectly: “I picked 5000K because I wanted ‘bright’ and now my kitchen looks like a hospital cafeteria. My food looks blue. My skin looks grey. I hate it.”
That’s a $400 mistake that’s hard to undo.
Here’s the real trick though: CRI.
CRI stands for Colour Rendering Index. It measures how accurately a light source shows colours, on a scale of 0 to 100. Sunlight is 100. Cheap LED kitchen lighting can score as low as 70.
In a kitchen, CRI matters more than almost anywhere else in your home. You’re looking at food. You’re looking at cabinet finishes, backsplash tile, paint colours. A CRI of 80 makes everything look a bit washed out. A CRI of 90+ makes colours pop the way they’re supposed to.
Buy LED kitchen light fixtures rated CRI 90 or higher. The price difference is small. The visual difference is massive.
Bottom line: 3000K, CRI 90+ for most residential kitchens. You won’t regret it.
Zone-by-Zone Kitchen Lighting Ideas That Actually Work
Different parts of your kitchen need different light. Here’s how to handle each zone with the right kitchen light fixtures.
Countertops and Prep Areas
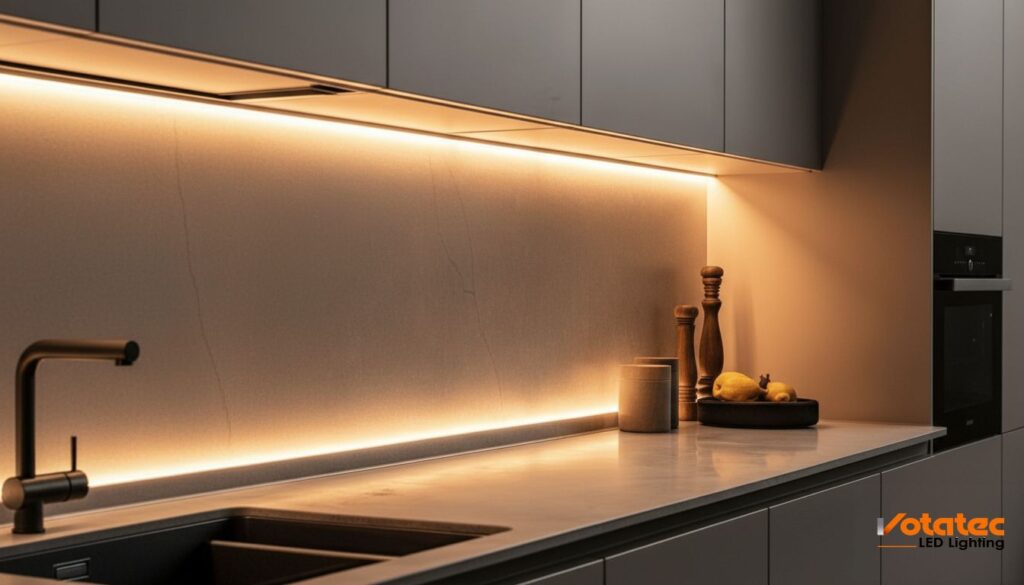
Under cabinet kitchen lighting with LED strips or light bars is the best solution here. Period. They put light directly on the work surface and eliminate the body-shadow problem completely. Mount them toward the front edge of the cabinet (not the back) so light falls on the counter, not the backsplash.
Specs: 200 to 500 lumens per linear foot. 3000K. CRI 90+. Use aluminium channel diffusers to prevent visible LED dots along the strip.
Kitchen Island Lighting
Pendant lights for kitchen islands are the go-to. Hang them 75 to 90 cm (30 to 36 inches) above the countertop surface. For islands longer than 1.8 metres (6 feet), use two or three pendants spaced evenly. Kitchen pendant lighting comes in every style from modern minimalist to farmhouse, so match the fixtures to your overall design.
If your island is a primary workspace (not just a breakfast bar), add recessed downlights above as well. Kitchen island lights with pendants alone don’t always deliver enough task-level brightness, especially for food prep.
Sink Area
A recessed pot light directly above the sink works well. Centre it on the sink basin, not on the window behind it. If you have a window above the sink, the pot light handles night-time visibility while daylight covers the rest.
Kitchen Ceiling Lights (Ambient Layer)
Kitchen recessed lighting is the most common choice in Canadian kitchens. But where to place can lights in kitchen spaces depends on your cabinet layout, not just the ceiling grid.
Space them at roughly half your ceiling height. So for a standard 8-foot ceiling, that’s about 1.2 metres (4 feet) apart.
Here’s a tip from a licensed electrician on a professional forum: “I like it to look like the lights were placed on purpose.” Align your kitchen ceiling lights with the cabinet layout, not on a rigid grid. Centre them over the counter edge so half the light falls on the counter, half on the floor. Looks intentional. Works better.
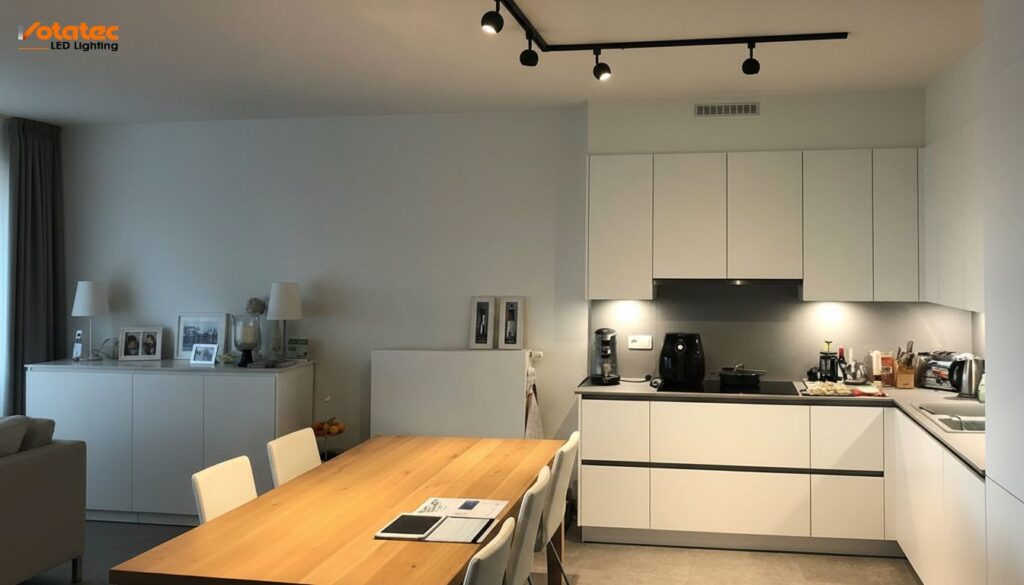
For kitchens without recessed lighting access (like condos with concrete ceilings), surface-mount LED fixtures and track lighting are solid alternatives. Modern kitchen lighting doesn’t have to mean pot lights. Track systems and linear LED fixtures can look just as clean.
Inside Cabinets, Drawers, and Pantry
Small LED puck lights or short strip segments inside glass-door cabinets add accent lighting. Motion-activated LED strips inside deep drawers and pantries are a nice touch that’s genuinely useful, not just decorative. You open the drawer, the light turns on. Simple.
Toe Kick and Above-Cabinet
Toe kick lighting (a strip along the base of your cabinets at floor level) works as a night light for late-night kitchen trips. Above-cabinet lighting bounces off the ceiling and adds a soft ambient glow. Both are accent layers. Nice to have, not essential. But if you’re going for a modern kitchen lighting look, these details are what separate a builder-grade kitchen from one that feels designed.
Under Cabinet Kitchen Lighting: The One Upgrade Everyone Wishes They’d Done Sooner
If you only change one thing about your kitchen lights, make it this.
Under cabinet kitchen lighting is the single most impactful upgrade you can make. The social proof is overwhelming. In renovation forums, the phrase that comes up over and over is “game changer.” Users say they end up using their under-cabinet lights more than the overhead kitchen lighting on a daily basis.
One homeowner shared this: “We even sometimes work in the kitchen without turning on the overhead lighting.” After ten years, the LEDs were still going strong.
And it’s not just about brightness. Under cabinet lighting eliminates shadows on your work surface. It makes dark countertops (granite, quartz, butcher block) actually visible instead of absorbing all the overhead light. One forum user nailed it: “UCL is almost a MUST if you have dark counter top.”
What does it cost? Less than you’d think. A complete LED strip system with professional installation runs around $1,500 to $2,000 for a typical kitchen. One electrician on a renovation forum charged $35 per fixture for the labour portion. A homeowner transformed their entire kitchen for under $300 in fixtures, doing the wiring themselves on a low-voltage system.
Hardwired vs. plug-in? Hardwired looks cleaner and connects to your dimmer. Plug-in is easier for DIY and works fine if you have accessible outlets above the counter. For a renovation, go hardwired. For a quick upgrade, plug-in works.
LED strips vs. light bars? Strips are flexible and fit tight spaces. Light bars have built-in diffusers and look more finished. Both work well. The key is CRI 90+ and a colour temperature that matches your other kitchen light fixtures. Mismatched colour temperatures between overhead and under-cabinet lights look awful.
Kitchen Lighting Layout: Where to Place Can Lights in Kitchen Spaces
Getting the placement right matters more than picking expensive kitchen light fixtures. A $50 pot light in the right spot outperforms a $200 fixture in the wrong one.
Kitchen recessed lighting spacing: Half the ceiling height. For an 8-foot ceiling, space them about 1.2 metres (4 feet) apart. For a 9-foot ceiling, about 1.4 metres (4.5 feet). Keep the first row about 60 to 90 cm (2 to 3 feet) from the wall so light hits the countertop, not the upper cabinets.
Kitchen pendant lighting height: 75 to 90 cm (30 to 36 inches) above the island surface. If your ceiling is higher than 9 feet, add 7 to 10 cm (3 to 4 inches) per extra foot of ceiling height.
Under-cabinet strip placement: Front edge of the cabinet, not the back. If the strip is mounted at the back, you light the backsplash instead of the counter. Some people add a small trim piece or light rail moulding along the front edge of the upper cabinets to hide the strip from view.
Open-concept kitchens need a bit more thought. When your kitchen flows into the living and dining areas, you need clear visual boundaries through lighting. Brighter, cooler kitchen task lighting in the kitchen area and warmer, dimmer ambient lighting in the adjacent living space. Use separate circuits and dimmers for each zone. This way the kitchen can be fully lit while the living room stays relaxed.
How to Bring More Light into Kitchen Spaces Without a Full Renovation
Dark cabinets. Dark countertops. Small window. Sound like your kitchen?
You don’t need a $30,000 renovation to fix it. Here are the fastest kitchen lighting ideas, roughly in order of impact:
1. Add under-cabinet LED strips. This is the single biggest change. Even cheap, plug-in LED kitchen lighting makes a noticeable difference. Good ones make a dramatic difference. Budget maybe $100 to $300 for a DIY solution.
2. Choose a reflective backsplash. Glass tile, glossy ceramic, or even a sheet of stainless steel behind the stove. Reflective surfaces bounce light from your under-cabinet strips back into the room. One designer described it as “doubling your light for free.”
3. Replace upper cabinet doors with glass inserts. Interior cabinet lighting shines through glass doors, adding brightness without adding fixtures to the ceiling.
4. Paint walls lighter. White or light grey walls reflect dramatically more light than dark or medium-toned paint. Homeowners on renovation forums call this “the $50 fix that changed everything.”
5. Add a second lighting layer. If you only have one kitchen ceiling light, add track lighting or a few strategically placed pot lights. Track lighting is especially good for renters and condos because it runs off a single existing ceiling box.
Read more: How to Choose the Right Track Lighting for Your Home
6. Use higher-lumen bulbs. Sometimes the simplest fix is swapping your current bulbs for LED equivalents with 50% more lumens. Costs maybe $10 per bulb.
Not every kitchen needs a gut renovation. Sometimes a weekend and a few hundred dollars gets you 80% of the way there.
Smart Controls and Dimmers for Kitchen Lighting
A dimmer switch is the most underrated kitchen lighting idea out there. Full stop.
Bright light for cooking. Lower light for dinner. Minimal light for a midnight snack. One switch handles all of that. And LED-compatible dimmer switches are inexpensive, usually $25 to $50 per switch.
But here’s what separates a good kitchen lighting setup from a great one: separate circuits.
Put your kitchen ceiling lights on one dimmer. Under-cabinet lights on another. Kitchen island lights on a third. This gives you total control over the mood and function of your kitchen at any time of day. It’s something professional lighting designers recommend but most homeowners skip because it requires planning during the wiring phase.
For smart home integration, look for LED kitchen light fixtures compatible with these protocols:
- Wi-Fi: Easiest to set up. Works with Alexa and Google Home directly.
- Zigbee: More reliable for larger setups. Needs a hub.
- Matter: The newest standard. Works across all major ecosystems (Apple HomeKit, Google, Amazon).
Smart dimmers let you create scenes (like “cooking mode” or “dinner party”) and control zones from your phone. Some homeowners set up automated routines where kitchen lights dim gradually after 9pm. Pretty nice feature for families.
Just make sure your LED fixtures are dimmable. Not all are. Check the spec sheet before you buy.
Canadian Rebates and Energy Savings
Switching to LED kitchen lighting saves money on two fronts: lower electricity bills and, in some cases, rebates that cover part of the upfront cost.
LED uses about 75% less energy than incandescent lighting. A kitchen with eight 10W LED pot lights uses 80W total. The same light output from incandescent? Around 480W. At Ontario’s average rate of $0.13/kWh and 10 hours per day of use, that’s a savings of about $190 per year. Just for the pot lights.
Provincial utility programmes offer rebates for LED upgrades:
- Ontario (SaveOnEnergy): Commercial LED retrofits can receive rebates covering up to 50% of project costs.
- BC Hydro: Business Energy Saving programme provides incentives for commercial lighting upgrades.
- Hydro-Quebec: Programmes for energy-efficient lighting in commercial and institutional buildings.
These rebates primarily target commercial and institutional kitchens (restaurants, cafeterias, healthcare facilities, schools). If you’re a facility manager or contractor, check eligibility before purchasing. Votatec’s LED fixtures are DLC-qualified, which is a requirement for most Canadian rebate programmes.
For residential projects, the savings come mainly from reduced electricity costs and the long lifespan of LED, typically 50,000+ hours at L70 rating. That’s over 13 years at 10 hours per night. You’ll repaint the kitchen twice before the LEDs need replacing.
Common Kitchen Lighting Mistakes
These come directly from homeowner forums. Real regrets from real renovations.
1. Planning lighting after the cabinets are installed. This is the biggest one. Once your cabinets are up and the ceiling is closed, your wiring options get expensive fast. Plan your kitchen lighting layout at the same time as your cabinet layout. Not after.
2. Only installing one type of kitchen light. Whether it’s all pot lights or a single ceiling fixture, one-layer lighting always disappoints. You need the three layers: ambient, task, accent.
3. Skipping the dimmer. Full brightness at 6am is brutal. Full brightness during a dinner party kills the mood. A $30 dimmer switch solves both problems.
4. Wrong colour temperature. Too warm (2700K everywhere) and the kitchen feels dim and yellow. Too cool (5000K) and it feels like a lab. Mixed temperatures between kitchen light fixtures look messy. Pick one (3000K is safest) and stay consistent.
5. Not enough recessed lights. “Not enough pot lights, undersized fixtures” shows up in regret threads constantly. When in doubt, add one more than you think you need. You can always dim them down. You can’t dim up what isn’t there.
6. Forgetting the inside of the pantry. You open the pantry door and stare into darkness. A motion-activated LED strip costs $15 and solves it permanently.
Frequently Asked Questions
How many recessed lights in a kitchen do I need?
For a standard 8-foot ceiling, space kitchen recessed lighting about 1.2 metres (4 feet) apart. A 10×12 kitchen typically needs 6 to 8 can lights for even ambient coverage. A larger open-concept kitchen may need 10 to 14. Align them with your cabinet layout rather than placing them on a rigid grid, and add under cabinet kitchen lighting for task areas.
Is under cabinet kitchen lighting worth it?
Yes, and most homeowners say they wish they’d done it sooner. It eliminates shadows on your countertop, makes dark surfaces visible, and many people use it more than their overhead kitchen lights daily. Budget $100 to $300 for DIY or $1,500 to $2,000 with professional installation.
What colour temperature is best for kitchen lighting?
3000K (soft warm white) works best for most residential kitchens. It’s warm enough to feel inviting but bright enough for food prep. Make sure kitchen light fixtures are CRI 90+ so food and finishes look their true colours. Avoid 5000K unless it’s a commercial food prep environment.
Can I install kitchen LED lights myself or do I need an electrician?
Low-voltage LED strips (12V or 24V) are safe for DIY. Hardwired 120V fixtures like pot lights require a licensed electrician in most Canadian jurisdictions. In Ontario, check with the Electrical Safety Authority (ESA) for permit requirements. When in doubt, hire a pro.
How do I stop blocking my own light when cooking?
Under cabinet kitchen lighting is the fix. Overhead kitchen ceiling lights will always cast a body shadow when you stand at the counter. LED strips mounted under upper cabinets put light directly on the work surface from in front of you. Problem solved.
What’s the best lighting for a kitchen with dark cabinets?
Add under-cabinet LED strips (they bounce light off the countertop), use a reflective backsplash (glass tile or glossy ceramic), and add interior cabinet lighting behind glass-door uppers. You don’t need to paint your dark cabinets lighter. You need to add kitchen lights that work with the dark surfaces instead of fighting them.
What to Do This Week
Three things matter most for kitchen lighting: layers, colour temperature, and placement.
Use all three lighting layers: kitchen ceiling lights for ambient, under cabinet kitchen lighting for task, and accent lighting where it makes sense. Choose 3000K, CRI 90+ for all your kitchen light fixtures. Space your recessed lights at half the ceiling height and mount under-cabinet strips at the front edge.
If you’re renovating, plan the kitchen lighting layout at the same time as cabinets. Not after. If you’re upgrading an existing kitchen, start with under-cabinet LED strips. It’s the single biggest improvement you can make, and you can do it in an afternoon.
This week: measure your counter runs and count how many under-cabinet zones you need. This month: check your local permit requirements and, for commercial projects, provincial rebate programmes.
Votatec’s LED downlights, strip fixtures, and surface-mount lights are designed for Canadian conditions, DLC-qualified, and built to deliver CRI 90+ performance where it matters. Get in touch for product specs or a quote.