


Flush mount sits flat against the ceiling. Surface mount drops down with a visible housing. That’s the core difference. But which one works better for your space?
Short answer: flush mount wins for standard-height rooms and clean aesthetics. Surface mount wins for high-output commercial settings and easy maintenance. The right choice depends on ceiling height, room function, and whether looks or performance matter more.
Let’s break down flush mount vs surface mount lighting so you can pick the right option for your project.
What Is Flush Mount Lighting?
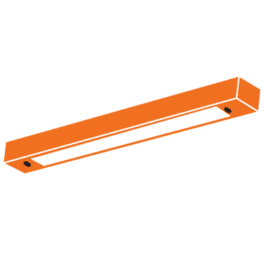
A flush mount light fixture attaches directly to the ceiling with little to no gap between the fixture base and the ceiling surface. The result is a clean, flat profile that doesn’t hang down into the room.
These are the most common ceiling lights in Canadian homes. You’ve seen them everywhere: bedrooms, hallways, closets, bathrooms, basements. Pretty much any room with a standard 2.4-metre (8-foot) ceiling probably has a flush mount.
Modern LED flush mount fixtures are slim, sometimes just 2.5 to 5 cm (1 to 2 inches) thick. They provide even, diffused light through a frosted lens or acrylic cover. No hanging parts. No exposed bulbs. Just a disc of light on the ceiling.
Common Types of Flush Mount Ceiling Lights
Not all flush mounts look the same. Here are the main types you’ll find:
- LED disc lights. Ultra-thin panels that sit almost completely flat. Popular in modern renovations. Usually 12 to 24 watts and dimmable.
- Drum flush mounts. A fabric or frosted glass shade sits tight against the ceiling. More decorative. Common in living rooms and bedrooms.
- Square/rectangular flush panels. Often used in kitchens and offices. These provide broad, even illumination over larger areas.
- Decorative flush mounts. Crystal, geometric, or patterned designs for spaces where aesthetics matter as much as function.
The key advantage? They don’t eat into your headroom. In a room with 2.4-metre ceilings, every centimetre counts. A flush mount keeps things open and uncluttered.
What Is Surface Mount Lighting?
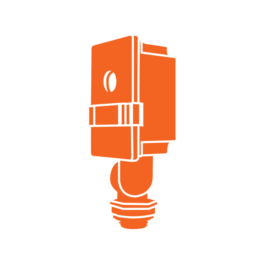
A surface mount light fixture also attaches to the ceiling, but the housing sits below the ceiling surface. There’s a visible body, usually a rectangular or round housing that drops 5 to 15 cm (2 to 6 inches) below the ceiling plane.
Surface mount fixtures are common in commercial spaces: offices, warehouses, retail stores, parking garages, schools, hospitals. You’ll also see them in residential basements, workshops, and garages where function takes priority over style.
The housing contains the LED driver, optics, and heat management components. Because there’s more room inside the fixture body, surface mounts can pack more lumens and offer better thermal management than ultra-thin flush mounts.
Common Types of Surface Mount Fixtures
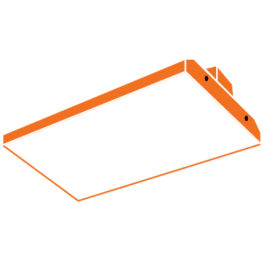
- LED wraparound fixtures. Long rectangular fixtures with a wraparound acrylic lens. The workhorse of commercial corridors and utility spaces.
- Surface mount panels. Flat LED panels with a frame that sits on the ceiling. Used when the ceiling can’t accommodate recessed panels (like concrete ceilings).
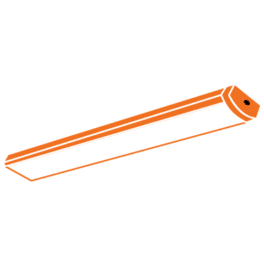
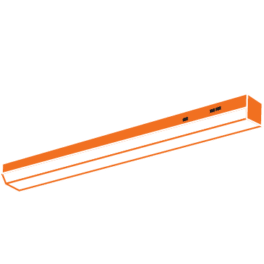
- Linear surface mounts. Long, narrow fixtures often used in rows for office or retail lighting.
- Surface mount downlights. Round or square fixtures that project light downward. Used when you want directional light but can’t recess into the ceiling.
- Vapor tight fixtures. Sealed surface mount lights for wet or dusty environments. Common in food processing, parking garages, and outdoor canopies.
Surface mounts are about performance and accessibility. The housing is exposed, so replacing drivers or cleaning optics is straightforward. That matters a lot in commercial settings where maintenance crews need quick access.
Flush Mount vs Surface Mount: Key Differences at a Glance
Here’s the comparison most people are looking for. Side by side, no fluff.
| Feature | Flush Mount | Surface Mount |
| Profile | Sits flat against ceiling (2-5 cm) | Drops below ceiling (5-15 cm) |
| Appearance | Sleek, minimal, low-profile | Visible housing, more industrial |
| Light Output | Moderate (800-3,000 lumens typical) | Higher (1,500-10,000+ lumens) |
| Light Distribution | Diffused, even spread | Can be directional or wide-spread |
| Best Ceiling Height | Standard 2.4m (8 ft) or lower | Any height, ideal for 2.7m+ (9 ft+) |
| Installation | Junction box required | Junction box or direct wire |
| Maintenance | Must remove fixture to access wiring | Easier access to components |
| Typical Use | Residential rooms, hallways | Commercial, industrial, utility |
| Cost Range | $30-$200 per fixture | $40-$300+ per fixture |
| Thermal Management | Limited (thin profile) | Better (larger housing) |
The takeaway? Flush mount is about looks and space savings. Surface mount is about performance and serviceability. Neither is universally “better.” It depends on what you need.
Which Mounting Style Fits Your Ceiling Height?
This is one of the most practical deciding factors. Here’s a quick rule of thumb:
- Under 2.4 metres (8 feet): Flush mount only. Anything that drops down will feel cramped and may not meet building code clearance requirements.
- 2.4 to 2.7 metres (8-9 feet): Flush mount preferred. Surface mount works if the drop is minimal (under 7 cm).
- 2.7 to 3 metres (9-10 feet): Either works well. You have room for surface mount without it feeling imposing.
- Over 3 metres (10+ feet): Surface mount, pendant, or even suspended linear fixtures. Flush mount can feel lost on very high ceilings because the light source is too far from the work plane.
Most Canadian homes have 2.4-metre ceilings on the main floor and sometimes lower in basements. That’s why flush mount dominates residential lighting. It’s not just preference. It’s practical.
Recessed Lighting vs Flush Mount: Which Gives Better Light?
This comparison comes up constantly. And it’s a fair question because recessed lights (pot lights) and flush mounts serve similar spaces but work very differently.
Recessed lights sit inside the ceiling. You see just the trim ring and the light output. They’re invisible from the side. Clean and modern.
Flush mounts sit on the ceiling surface. You see the entire fixture. Less invisible but also less involved to install since you don’t need ceiling cavity space.
So which gives better light? Depends on what “better” means for you.
Recessed wins for: Directional lighting, accent lighting, kitchens with multiple zones, modern aesthetics, rooms where you want zero visible fixtures.
Flush mount wins for: Even ambient lighting, rooms with limited ceiling cavity, quick replacement, lower installation cost, spaces where one or two fixtures cover the whole room.
Flush Mounted vs Recessed Mounted: Side-by-Side Comparison
| Feature | Flush Mounted | Recessed Mounted |
| Visibility | Fixture visible on ceiling | Only trim ring visible |
| Ceiling Cavity Needed | No | Yes (minimum 15 cm / 6 inches) |
| Installation Complexity | Low (junction box + mount) | Medium (cut hole + housing + trim) |
| Light Spread | Wide, diffused | Narrower, more directional |
| Number Needed | 1-2 per room typically | 4-8 per room typically |
| Cost Per Fixture | $30-$200 | $20-$80 (but need more units) |
| Total Project Cost | Lower | Higher (more fixtures + installation) |
| Maintenance | Remove fixture to access | Remove trim to access |
| Insulation Contact | Not applicable | Must be IC-rated for insulated ceilings |
| Best For | General ambient light | Task and accent lighting |
Here’s something people miss. A single flush mount can light a 12 x 12 foot bedroom evenly. To get similar coverage with recessed lights, you’d need four to six units. The per-fixture cost of recessed is lower, but the total project cost is usually higher.
That said, recessed lights look fantastic in kitchens, living rooms, and open-concept spaces. It’s about what matters more: simplicity or design flexibility.
Flush Mount vs Pendant Lighting: When to Use Each
Pendants hang from the ceiling on a cord, chain, or rod. They’re a completely different animal from flush mounts. But people often choose between the two for kitchens, dining areas, and entryways.
The biggest factor? Ceiling height. Again.
Pendants need clearance. A pendant hanging over a kitchen island should sit about 70 to 85 cm (28 to 34 inches) above the countertop. Over a dining table, about 75 to 90 cm (30 to 36 inches) above the table surface. If your ceiling is 2.4 metres, that doesn’t leave much room.
Flush mounts don’t have this problem. They work at any ceiling height.
Ceiling Height Requirements for Pendants vs Flush Mounts
| Ceiling Height | Pendant | Flush Mount |
| Under 2.4m (8 ft) | Not recommended | Ideal |
| 2.4-2.7m (8-9 ft) | Limited (mini pendants only) | Ideal |
| 2.7-3m (9-10 ft) | Works well | Works well |
| Over 3m (10+ ft) | Ideal | Can feel too distant |
Choose flush mount when: You need ambient light across the whole room, ceiling height is limited, you want low maintenance, or you’re lighting a hallway, closet, or bathroom.
Choose pendant when: You want decorative task lighting over a specific area (island, table, reading nook), your ceiling is 2.7 metres or higher, and you’re okay with the fixture being a visual element in the room.
And honestly? Many rooms benefit from both. A flush mount for general ambient light plus a pendant over the dining table. They don’t compete. They complement.
Best Applications for Each Mounting Type
Knowing the differences is one thing. Knowing where to use each type is what actually matters.
Flush Mount – Best Rooms and Settings
- Bedrooms. Clean look, no hanging fixture to bump your head on. One 1,500-2,000 lumen flush mount covers most bedrooms.
- Hallways and corridors. Tight spaces where anything that hangs down gets in the way.
- Bathrooms. Flush mounts with damp or wet ratings are perfect for bathrooms. Low profile keeps them clear of shower steam paths.
- Closets. Building code in most Canadian provinces requires enclosed fixtures in closets. Flush mount LED meets this requirement easily.
- Basements. Low ceilings make flush mount the only practical option in most basements.
- Kids’ rooms. Nothing to grab, swing from, or knock down. Parents appreciate that.
Surface Mount – Best Rooms and Settings
- Garages and workshops. High lumen output in a durable housing. Wraparound surface mounts are the standard here.
- Office spaces. Surface mount panels provide even, glare-free light for computer work.
- Retail stores. Flexible positioning without needing a drop ceiling grid.
- Warehouses and storage. Vapor tight surface mounts handle dust, moisture, and temperature swings.
- Parking garages. Sealed surface mounts rated for damp locations are the industry standard.
- Schools and healthcare. Easy maintenance access matters in institutional settings where downtime needs to be minimal.
How to Install Flush Mount Ceiling Light: Quick Overview
Installing a flush mount LED is one of the simplest electrical jobs you can do. If you’re comfortable with basic wiring, this takes about 20 to 30 minutes.
Tools You’ll Need for Installation
- Non-contact voltage tester
- Flathead and Phillips screwdrivers
- Wire strippers
- Wire nuts (usually included with the fixture)
- Step ladder
Basic steps:
- Turn off the breaker controlling the ceiling light circuit. Test with a voltage tester to confirm power is off.
- Remove the existing fixture (see next section if you need help with that).
- Attach the new mounting bracket to the junction box using the provided screws.
- Connect the wires: black to black (hot), white to white (neutral), green or bare copper to ground.
- Tuck wires into the junction box. Lift the fixture and secure it to the mounting bracket.
- Restore power and test.
For anything beyond a simple swap, like running new wiring or adding a junction box, you’ll need a licensed electrician. The Electrical Safety Authority (ESA) requires permits for new electrical installations in Ontario, and other provinces have similar rules.
How to Remove Flush Mount Ceiling Light for Replacement
Removing the old fixture is usually the first step in any upgrade. And it trips people up more than it should. Most flush mounts don’t have obvious screws.
Step-by-Step Removal Process
- Turn off the breaker. Always. Test with a voltage tester.
- Look for the release mechanism. Most modern flush mounts use one of these methods:
- Twist-off base: Grab the outer ring or base and rotate counterclockwise about a quarter turn. It should release from the mounting plate.
- Decorative screws or knobs: Small finials or screws on the outer edge. Unscrew them and the cover drops down.
- Spring clips: Some slim LED fixtures use spring clips that hold the fixture against the ceiling. Pull straight down gently and the clips release.
- Centre nut: A single nut in the centre of the fixture. Unscrew it and the cover comes off, exposing the mounting plate.
- Support the fixture as it releases. Don’t let it hang by the wires.
- Disconnect the wires. Untwist the wire nuts and separate the fixture wires from the house wires.
- Remove the mounting bracket if your new fixture uses a different one.
Take a photo of the wiring before disconnecting. Every time. It takes two seconds and saves confusion later.
Flush Mount vs Surface Mount for Commercial and Institutional Spaces
In commercial settings, the flush mount vs surface mount decision is driven by different priorities than residential. Looks matter less. Performance, maintenance, and code compliance matter more.
Office, Retail, and Healthcare Considerations
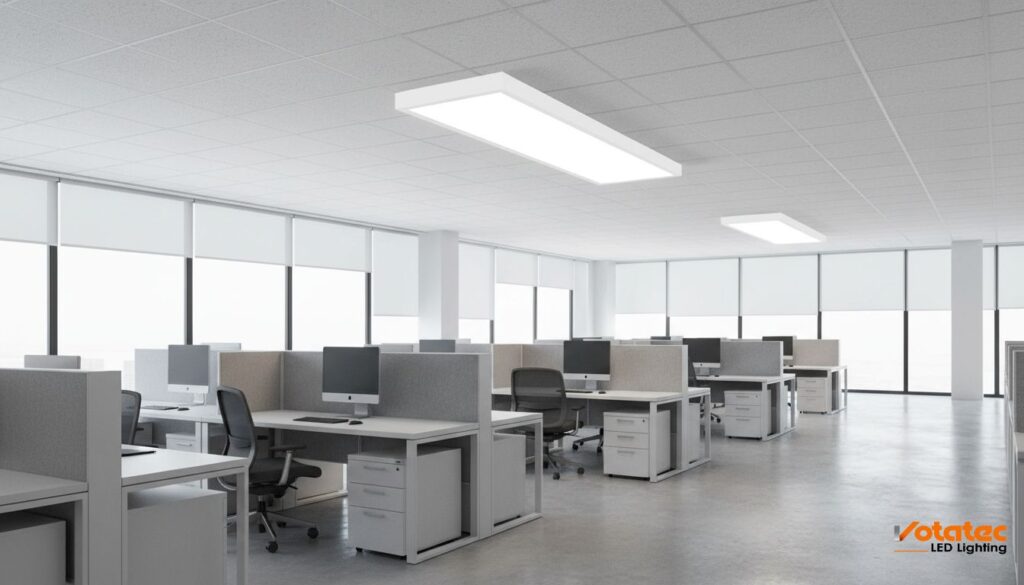
Offices: Surface mount LED panels (typically 2×2 or 2×4 feet) are the standard for offices without drop ceilings. They provide uniform illumination that meets the Illuminating Engineering Society’s recommended 300-500 lux for office work. Flush mount discs work in private offices and smaller meeting rooms, but open floor plans need the higher output and broader coverage of surface mount panels.
Retail: Lighting affects sales. Retail spaces use a mix of surface mount track lighting for accent and display lighting, plus flush or recessed for ambient. Surface mount offers easier repositioning when store layouts change.
Healthcare: Hospitals and clinics need fixtures that are easy to clean, sealed against dust, and offer high CRI for accurate colour assessment. Surface mount fixtures with sealed lenses and tool-free access panels are preferred. According to Natural Resources Canada, LED retrofits in healthcare facilities can reduce lighting energy use by up to 75% while improving light quality for patients and staff.
Education: Schools need durable, low-maintenance fixtures. Surface mounts with polycarbonate lenses resist impact from sports equipment and are easier to service than recessed alternatives. Plus, they don’t require ceiling cavity space, which many older school buildings lack.
Canadian Code and Certification Requirements
Whatever mounting type you choose, your fixtures need to meet Canadian safety standards. This isn’t optional.
CSA Certification and Energy Star Eligibility
All light fixtures installed in Canada must bear a certification mark from a recognized testing organization. The most common are:
- CSA (Canadian Standards Association)
- cUL (UL Listed for Canada)
- cETL (ETL Listed for Canada)
A fixture without one of these marks isn’t legal to install. Period. And if something goes wrong, your insurance may not cover damage from non-certified products.
For energy rebates, look for Energy Star certification. Many provincial utility programs, like Ontario’s SaveOnEnergy and BC Hydro’s rebate programs, require Energy Star or DLC (DesignLights Consortium) qualification to be eligible.
The CSA Group maintains the standards that all electrical products in Canada must meet. If you’re specifying fixtures for a commercial project, require CSA or cUL certification in your procurement documents. No exceptions.
One more thing. For flush mount fixtures in closets, the Canadian Electrical Code requires enclosed fixtures. Open or recessed fixtures without covers aren’t permitted in storage closets due to fire risk from contact with stored materials. Flush mount LED panels with sealed lenses meet this requirement perfectly.
Frequently Asked Questions About Flush Mount vs Surface Mount Lighting
Is Flush Mount or Surface Mount Better for Low Ceilings?
Flush mount. Every time. With ceiling heights under 2.4 metres (8 feet), a surface mount fixture that drops 10-15 cm starts to feel intrusive. Flush mount fixtures add just 2.5 to 5 cm below the ceiling, keeping the room feeling open. In basements with 2.1-metre (7-foot) ceilings, flush mount is really the only practical option.
Can I Replace a Surface Mount Light with a Flush Mount?
Yes, in most cases. As long as there’s a standard junction box behind the surface mount fixture, you can swap it for a flush mount. You’ll need to remove the old fixture, possibly replace the mounting bracket, and then install the new flush mount to the same junction box. The wiring connections are the same: black to black, white to white, ground to ground.
Do Flush Mount Lights Provide Enough Light for a Kitchen?
It depends on the kitchen size and layout. A single flush mount works for small kitchens under 9 square metres (100 square feet). For larger kitchens, you’ll either need a high-lumen flush mount (3,000+ lumens) or multiple fixtures. Many designers combine a central flush mount for ambient light with under-cabinet LED strips for task lighting. That combo covers most kitchen needs without installing six recessed pots.
Are Surface Mount Fixtures Harder to Install Than Flush Mount?
Not really. The process is similar: turn off power, connect to junction box, secure to ceiling. Surface mount fixtures are sometimes slightly heavier due to the larger housing, so you may need a helper or a sturdier mounting bracket. The main difference is that commercial surface mounts may require direct wiring through conduit rather than a standard residential junction box. For those installations, a licensed electrician is recommended.
How Long Do LED Flush Mount and Surface Mount Fixtures Last?
Quality LED fixtures in both mounting styles are rated for 50,000+ hours. At 8 hours of daily use, that’s roughly 17 years. The LED driver (the electronic component that powers the LEDs) typically has a shorter lifespan, maybe 30,000 to 50,000 hours, and is usually the first component to fail. Surface mount fixtures have an advantage here because driver access is typically easier, making replacement faster and cheaper than with flush mounts where you need to remove the entire fixture.
Final Thoughts on Choosing Between Flush Mount and Surface Mount
The flush mount vs surface mount decision comes down to three things: ceiling height, room function, and maintenance needs.
For most Canadian homes with standard ceilings, flush mount LED fixtures are the practical winner. They’re slim, bright enough for residential rooms, easy to install, and look clean. For commercial spaces, workshops, garages, and anywhere you need high lumen output with easy maintenance access, surface mount is the better tool for the job.
And don’t overthink it. Both styles use the same LED technology, offer the same energy savings (up to 75% over incandescent), and last 50,000+ hours. You’re getting great light either way.
Votatec carries a full range of CSA-certified flush mount and surface mount LED fixtures designed for Canadian residential and commercial applications. Every product is rated for -40°C to +50°C operation and backed by a 5-year warranty.