









 (+1) 905 597 5955


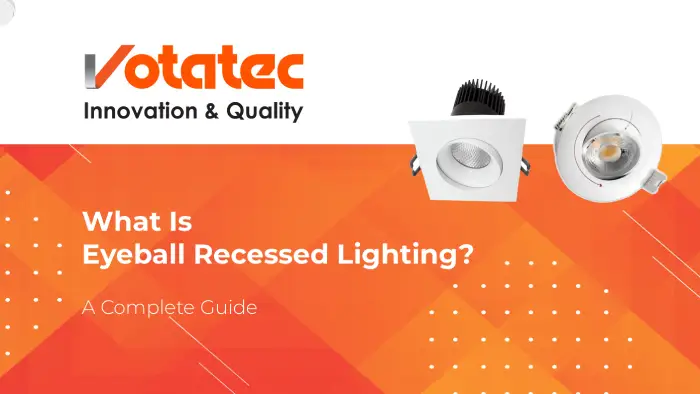

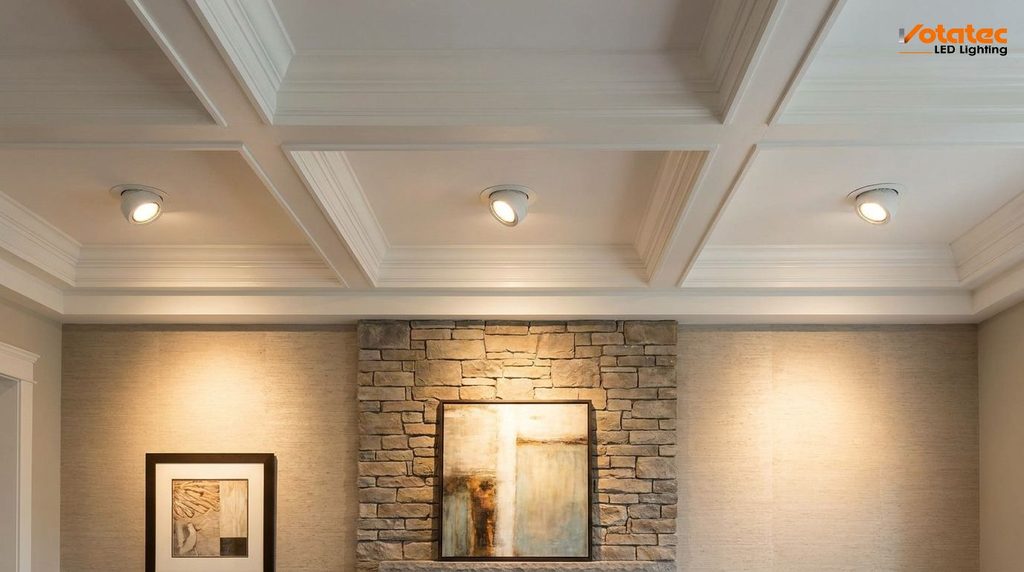
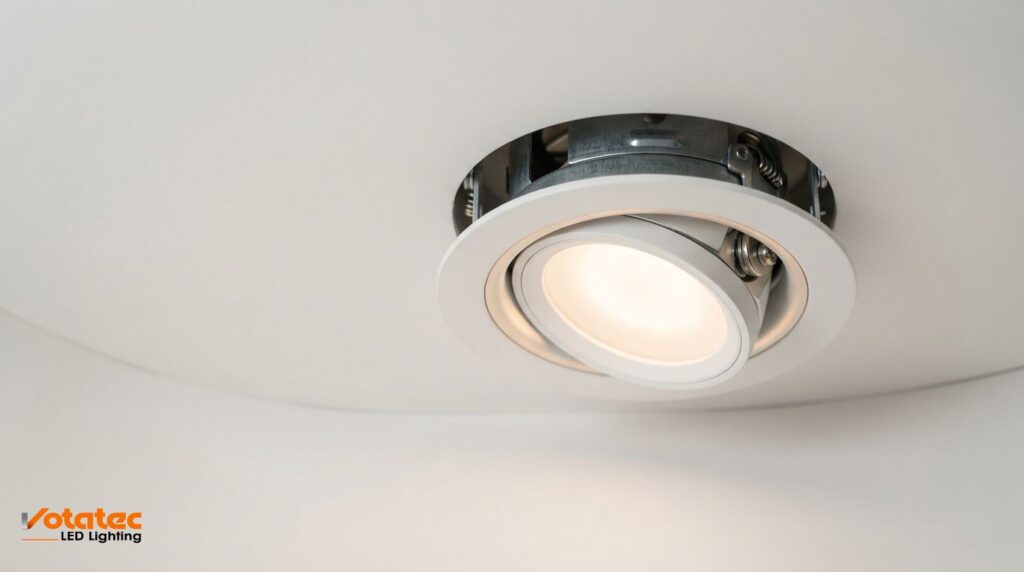
Eyeball recessed lighting is a recessed ceiling fixture whose lamp sits inside a rounded, ball-shaped shell that tilts and swivels within the trim ring. You aim the beam. The housing stays hidden above the ceiling, the visible dome sits slightly below the ceiling plane, and the light can be pointed at a wall, a painting, a countertop or a product display instead of straight down.
That’s the whole idea in one sentence. A standard pot light throws light down. An eyeball throws it where you want it.
The name is literal. The moving shell looks like an eye set in a socket, and it swivels the same way. This guide covers what eyeball recessed lighting does, what it’s called, where it earns its place, how to aim it, how to install and remove it, what the Canadian Electrical Code says, and how to retrofit an old lamp-based eyeball to LED.
What eyeball recessed lighting is called: eyeballs lighting, eye ball lighting and can light eyeball
Nobody agrees on the name, which is why this fixture is hard to shop for. Every one of these describes the same thing:
- Eyeball trim or eyeball downlight, what suppliers and spec sheets use
- Eyeballs lighting and eye ball lighting, the spellings shoppers type without the trade term
- Can light eyeball, the electrician’s phrase, because the trim drops into an existing can
- Ceiling eyeball lights, what homeowners say when describing what they see
- Recessed eyeball light, adjustable recessed trim or directional downlight, the catalogue and commercial wording
- Adjustable pot light, what most Canadians call it
They all point to one product category: a recessed fixture you can aim. If a supplier lists “eye ball lighting” and a competitor lists “adjustable trim,” you’re looking at the same part.
One thing eyeball recessed lighting isn’t: the eyeball headlight
Worth clearing up, because the search results mix them. An eyeball headlight is an automotive part, a round headlamp housing on a car or motorcycle, sometimes a projector lamp set in a spherical bezel. It has nothing to do with ceilings, cans or trims. If you landed here looking for a vehicle lamp, this guide won’t help. Everything below is about architectural lighting fixtures recessed into a ceiling.
How Eyeball Recessed Lighting Works
Every adjustable recessed fixture solves one problem: a fixed downlight can only light the floor. Tilt the source and you can light a vertical surface, which is where people actually look.
Eyeball recessed lighting does this with two movements.
- Tilt. The ball rotates inside the trim ring, typically 30 to 45 degrees off vertical. Older lamp-holding eyeballs sit at the wider end of that range.
- Rotation. The ring itself spins, usually a full 358 to 360 degrees, so you can aim at any compass direction in the room.
Combine the two and one fixture covers a cone of aiming positions. That’s the practical value. You can commission a whole room after drywall goes up, and re-aim it two years later when the client moves the artwork.
Regressed vs protruding eyeball trims
This is the detail most buying guides skip, and it changes how the ceiling looks.
A traditional eyeball protrudes. The dome hangs below the ceiling plane by 15 to 25 mm, which is what makes it visible from across the room and what drives the “are these dated?” question you’ll find all over Houzz and Reddit.
A regressed adjustable trim keeps the light engine set back above the aperture. The lens sits deeper in the can, the ceiling reads flatter, and the shielding angle is steeper, so you see the lit surface instead of the source. Votatec’s 3.5-inch regressed gimbal is built this way: 12W, 800 lumens, CRI above 90, five selectable colour temperatures from 2700K to 5000K, 40-degree beam, IC rated and wet location listed.
Same job, cleaner ceiling, far less glare. If somebody tells you ceiling eyeball lights look old, they’re describing the protruding style, not the function.
Eyeball vs Gimbal vs Eyelid vs Fixed Downlight
Four trim styles get mixed up constantly, including by the people writing product listings. Only two of the four are eyeball recessed lighting in the strict sense.
| Trim type | How it moves | Visual profile | Best used for |
|---|---|---|---|
| Eyeball | Ball tilts in the ring, 30 to 45 degrees, ring rotates | Dome protrudes below the ceiling | Retrofitting existing 5-inch and 6-inch cans, strong accent aiming |
| Gimbal | Light engine pivots on a yoke inside the aperture | Sits flush or regressed | New builds, sloped ceilings, low-glare accent work |
| Eyelid (wall wash) | Fixed or slightly adjustable behind a shield | Flush, with a visible crescent hood | Even wall washing without scallops |
| Fixed downlight | No movement | Flush | General ambient light, corridors, open offices |
The functional gap between eyeball and gimbal is smaller than the marketing suggests. Both aim light. The gimbal usually aims it with less glare because the source stays behind the aperture, while the eyeball gets a slightly wider tilt range because the whole shell swings out.
We’ve written a full breakdown of the mechanism, tilt ranges and spec differences in the gimbal recessed light guide. If you’re deciding between those two for a specific job, start there. For background on fixed recessed fixtures, read what is a recessed downlight.
What a recessed light eyelid trim does
The recessed light eyelid is the one most people have never heard of, and it solves a problem eyeball recessed lighting can’t.
Aim an eyeball at a wall and you get scallops, those repeating arcs where each beam edge lands. Fine for one painting. Ugly across a long feature wall.
An eyelid trim fits a crescent-shaped shield across part of the aperture, like a half-closed eye. It blocks the beam on the room side and pushes the rest toward the wall. Output drops, and you get an even wash from ceiling to floor with no scalloping and no visible source.
Use the two together. Eyelid trims for the continuous wall wash, eyeball or gimbal trims for the objects you want to pick out of it.
Where Ceiling Eyeball Lights Belong
Eyeball recessed lighting costs more than fixed trims and takes longer to commission. Use it where aiming matters, and use fixed downlights everywhere else.
Sloped and vaulted ceilings
This is the strongest case. Put a fixed downlight in a sloped ceiling and the beam runs at the slope angle, which lights the far wall and leaves the room dim. Eyeball recessed lighting corrects the tilt back to vertical, so a 6:12 pitch ceiling still delivers light to the floor. Check the fixture’s tilt range against your roof pitch before ordering, because a 30-degree trim won’t fully correct a steeper slope.
Wall washing and artwork
Vertical surfaces are what the eye reads as brightness. Wash a wall and the room feels larger. Aim two or three adjustable trims at a feature wall, a stone fireplace or a gallery run, and you get depth that no amount of downlighting produces. For a long unbroken wall, reach for eyelid trims instead.
Retail, showroom and display
Retail is where eyeball recessed lighting pays for itself. Lighting designers commonly work to a contrast ratio of about 5:1 between a display and its surroundings for a noticeable accent, and roughly 15:1 for a dramatic one. You can’t hit either with fixed downlights. You need aim.
Kitchens and work zones
Under-cabinet work surfaces sit against a wall, not under the centre of the ceiling. A fixed pot light on a 600 mm setback lights the countertop edge and your own shoulders. Tilt it 20 degrees toward the backsplash and the shadow moves off the cutting board. More on layout in our kitchen lighting guide.
Coves, trays and layered ceilings
Adjustable trims combine well with cove and strip runs. We compared the options for stepped ceilings in tray ceiling lighting: LED strip, cove and recessed compared.
How to Aim Eyeball Recessed Lighting: The 30-Degree Rule
Almost nobody publishes the actual geometry, so aiming gets done by eye and the results show it. Here’s the method museum and gallery lighting practice has settled on.
Aim the beam 30 degrees off vertical. Steeper than that and the fixture casts frame shadows and hot spots. Shallower and you get veiling reflections, that milky glare across glass and varnish that washes out the image.
The 30-degree figure sets where the fixture goes. Measure the vertical drop between the ceiling and the centre of what you’re lighting, then multiply by 0.58 to get how far out from the wall the fixture belongs.
| Ceiling height | Centre of artwork | Fixture distance from wall |
|---|---|---|
| 2.4 m (8 ft) | 1.5 m | 0.52 m (about 20 in) |
| 2.7 m (9 ft) | 1.5 m | 0.69 m (about 27 in) |
| 3.0 m (10 ft) | 1.6 m | 0.81 m (about 32 in) |
| 3.7 m (12 ft) | 1.7 m | 1.15 m (about 45 in) |
Two adjustments worth knowing. Add about 5 degrees when the artwork has a deep frame, or the frame’s own shadow lands on the canvas. Pull the fixture closer to the wall when you’re washing the whole surface rather than accenting one object, roughly one third of the wall height out, with the fixtures spaced at that same interval.
Beam angle does the rest of the work:
- Under 15 degrees (narrow spot): one object, sculpture, single display
- 24 to 40 degrees (flood): general accent, wall washing, most residential eyeball recessed lighting
- Over 60 degrees (wide flood): ambient fill, not accent
The 40-degree beam on Votatec’s regressed gimbal sits in the middle band, which is right for wall washing and countertop accent. It’s the wrong choice for a tight museum spot on a single canvas. Match the beam to the target size, not to the room.
How to Specify Eyeball Recessed Lighting in Canada
Specifying eyeball recessed lighting comes down to eight items. Run them in order, because skipping one is what causes the reorder.
1. Aperture size. Aperture drives the look. Across the 50 Votatec recessed downlight models listed on the public ENERGY STAR certified product data, 4-inch is the most common can size by a wide margin, with 3-inch and 6-inch next. Smaller apertures read more architectural. Larger ones deliver more lumens per fixture and cost less per lumen.
2. Lumens, not watts. Natural Resources Canada makes this point on its own ENERGY STAR lighting page: compare lumens for light output and watts only for power draw. An 800-lumen adjustable trim replaces roughly a 65W BR30 lamp.
3. Efficacy. Those same 50 certified models range from 82 to 126.7 lumens per watt. Ask for the figure in writing. Adjustable trims sit below flat downlights of equal wattage, because the optic trades output for beam control.
4. Colour temperature. 2700K residential, 3000K commercial interiors, 3500K to 4000K retail and workspaces, 5000K utility. Selectable CCT lets one SKU cover several zones. Keep it identical across a single ceiling.
5. Colour rendering. CRI 80 is the floor. Where colour accuracy sells the product, specify CRI 90 or better. The certified Votatec range runs 80 to 96.
6. Beam angle. See the table above. Get this from the spec sheet, not from the product title.
7. Dimming. Confirm the driver type and the dimmer compatibility list before you order, not after. Most 120V residential adjustable trims are continuously dimmable on a forward or reverse phase dimmer; 0-10V is a commercial feature and not standard. Our LED dimmer switch range and the guide on whether all LED bulbs are dimmable cover the failure modes.
8. Ratings. IC rating, air-tight, damp or wet location, and the certification mark. This is where jobs fail inspection, so it gets its own section next.
Canadian Electrical Code and Eyeball Recessed Lighting
Eyeball recessed lighting is governed by Section 30 of the Canadian Electrical Code, Part I (CSA C22.1), the same as any other recessed fixture. Provinces adopt the code with their own amendments and timing, so always confirm with the authority having jurisdiction for your project.
The part that matters most is the IC marking.
- A fixture marked Type IC (or “Type IC, inherently protected”) is permitted to be in contact with combustible material or blanketed with thermal insulation.
- A non-IC fixture must be kept clear of insulation and combustibles by the spacing the code and the fixture marking specify.
- Vapour barriers and cellulose fibre insulation installed against a Type IC fixture have to be suitable for at least 90 degrees C.
- Rules in the 30-900 series cover the installation and spacing of IC, non-IC and non-combustible-surface types, plus the wiring connection temperature rating.
The International Association of Electrical Inspectors has a plain-language walkthrough of Section 30 that’s worth reading before your next insulated-ceiling job.
Why this bites on adjustable trims specifically: an eyeball generates heat in a moving shell inside the can, and insulation packed against a non-IC housing is a genuine fire risk. On the certified Votatec register, 41 of 50 recessed models carry a Type IC can rating, 6 of those as Type IC Airtight, and 4 are Type Non-IC. The rating isn’t a marketing badge. Read it off the label for the exact model you’re buying, because it varies inside a single product family.
Two more ratings to check:
- Air-tight matters in insulated ceilings under Canadian energy codes, because a leaky can bleeds conditioned air into the attic.
- Damp vs wet location decides whether the trim can go in a covered porch, a bathroom ceiling or a shower. Damp is not wet. Get it in writing.
How to Install Eyeball Lights, Change the Bulb and Remove the Trim
Three jobs, three procedures. Whether you’re searching how to install eyeball lights, how to change eyeball light bulb assemblies or how to remove eyeball light trims, all three start the same way: switch off the breaker, not just the wall switch, and confirm the circuit is dead with a non-contact tester. In Canada, any work that involves altering wiring or adding circuits needs a licensed electrician and, in most provinces, a permit. Swapping a lamp or a trim in an existing can is homeowner territory.
How to install eyeball lights
Installing eyeball recessed lighting into an existing can takes about ten minutes per fixture.
- Kill the power at the breaker and test the wires before touching them.
- Match the trim to the can. Measure the ceiling opening and the can depth. A 6-inch trim won’t fit a 5-inch can, and a deep eyeball shell can foul a shallow housing.
- Check the insulation situation. Type IC can sit against insulation. Non-IC needs the clearance in Section 30. Confirm before the trim goes up, not after.
- Wire it. Retrofit modules usually terminate in an E26 screw-base adapter that threads into the existing socket. Canless fixtures come with their own junction box and get wired directly.
- Set the switches first. Selectable CCT and wattage switches live on the back of the fixture. Set them on the ground. Reaching them once the trim’s in the ceiling is miserable.
- Seat the trim. Torsion-spring trims have two coiled arms that slot into brackets inside the can, then push flush. Friction-clip trims squeeze inward and release against the can wall. Never force a trim that isn’t lining up, since you’ll bend the springs.
- Restore power and aim every fixture. This is the step people skip. An un-aimed eyeball is just an expensive fixed downlight.
How to change an eyeball light bulb
Legacy eyeball recessed lighting trims are lamp holders, so the bulb is a consumable. Everyone who asks how to change eyeball light bulb units hits the same snag: the shell blocks your hand.
- Switch off and let it cool. Halogen and incandescent reflector lamps run hot enough to burn.
- Rotate the ball back to straight down. Aimed at an angle, the lamp is trapped behind the trim ring. Level it and the bulb clears.
- Look for a retaining wire. Many eyeballs have a thin spring clip or wire loop across the aperture holding the lamp in. Ease it aside first.
- Unscrew the lamp, turning counter-clockwise, holding the outer trim ring rather than the ball so you don’t shift the aim.
- Fit the same shape. A BR30 housing needs a BR30-shaped LED, not an A19. Wrong shape means the beam clips the trim. Our PAR lamp range covers the common reflector bases.
- Re-aim and restore power.
How to remove an eyeball light
The how to remove eyeball light question has one answer that matters: pull the ring, not the ball.
- Breaker off, tested, fixture cool.
- Work out what’s holding it. Three options: torsion springs (two coiled arms into slots), friction clips (flat spring blades against the can wall), or screws through the trim flange.
- Pull on the trim ring, not the ball. Pulling the eyeball shell twists the mechanism and can snap the pivot.
- For torsion springs, pull the trim straight down 25 to 50 mm until you feel the arms clear their slots, then squeeze the arms inward to release.
- For friction clips, pull down steadily and the blades will drag free. Expect it to feel like something’s breaking. It usually isn’t.
- Disconnect last. Unscrew the E26 adapter or open the twist connectors once the trim is out and supported.
Step-by-step photos for this are in our dedicated guide on how to remove a recessed light fixture.
Can light eyeball trims: what fits an existing can
Most retrofit questions come down to one measurement. A can light eyeball trim is sized to the housing, not to the hole you see, so check these four before ordering:
- Aperture diameter, measured across the ceiling opening, not the visible trim flange
- Can depth, from the ceiling plane to the top of the housing, which limits which modules physically fit
- Socket type and position, usually E26, sometimes on an adjustable bracket
- IC stamp inside the can, which decides what you’re allowed to install
Cans run 4, 5 and 6 inches in North American ceilings. 5-inch and 6-inch cans often share trims, which is why so many products list as “5/6 inch.” Smaller 2-inch and 3-inch apertures are almost always canless.
Replacing Old Eyeball Recessed Lighting With LED
Retrofitting eyeball recessed lighting is the most common reason people search this topic, and the answer depends on what’s above your ceiling.
Old eyeball trims take a BR30, BR40, PAR30 or PAR38 reflector lamp in a 5-inch or 6-inch can. You’ve got three routes.
Route 1: change the lamp only. Cheapest, two minutes, and it’s the procedure above. Fit an LED reflector lamp of the same shape. You keep the protruding dome and its glare, but drop the wattage by roughly 80%.
Route 2: change the trim, keep the can. Swap the old eyeball recessed lighting trim for an LED adjustable retrofit module that threads into the socket or clips to the can. You get a regressed profile, better shielding and integrated LED efficacy without touching the ceiling.
Route 3: replace the whole fixture. Pull the old can and fit a canless adjustable downlight. Best light quality, best glare control, cleanest ceiling, and you can move to a smaller aperture. It needs ceiling access or a patched hole, so it suits renovations rather than a Saturday afternoon.
One thing to be honest about: if the goal is a flat, modern ceiling, a retrofit into an old 6-inch can will always look like a 6-inch can. Route 3 is the only path to a genuinely different ceiling. Our trimless recessed downlight sizing guide walks through the aperture options.
Common Mistakes With Eyeball Recessed Lighting
- Using eyeball recessed lighting everywhere. Adjustable trims cost more and need commissioning. Aim them at walls and features; use fixed downlights for the general layer.
- Leaving them pointed straight down. We see this on finished jobs constantly. Someone has to walk the space and aim every fixture.
- Mixing colour temperatures in one ceiling. A 3000K trim beside a 4000K trim reads as a fault, not a design choice.
- Ignoring the shielding angle. A protruding dome at 45 degrees puts the diode in the sightline of anyone sitting down. Regressed optics fix this.
- Using eyeballs where an eyelid belongs. Scalloped arcs down a long feature wall are the tell.
- Buying on watts. Two 12W adjustable trims can differ by 40% in output. Compare lumens and beam angle.
- Assuming certification carries across a family. Ratings change between wattages and finishes inside the same product line.
- Packing insulation against a non-IC can. Code violation and fire risk. Check the stamp.
Energy, Efficacy and the Canadian Payback Case
Lighting is 13.5% of the energy used in Canadian commercial and institutional buildings, and 3.5% in the average Canadian home, according to Natural Resources Canada. That split explains why retrofit budgets sit with facility managers rather than homeowners.
The numbers on LED eyeball recessed lighting stack up like this. A legacy 65W BR30 eyeball running 10 hours a day for 250 days costs about 163 kWh a year. An 800-lumen LED adjustable trim at 12W over the same hours draws 30 kWh. Multiply by the fixture count on a floor plate and the case makes itself.
Rated life on the certified Votatec recessed range runs 50,000 to 102,000 hours, most models at 54,000 to 55,000. At 2,500 hours a year, the lower end is over 20 years.
Provincial and utility rebate programmes change every year, and eligibility usually depends on a qualified product list rather than generic LED status, so confirm the current programme in your province before you build savings into a quote. Don’t promise a rebate you haven’t checked.
Votatec supplies contractors and facility managers across Canada from the LED downlight category, including regressed gimbal and multi-directional adjustable trims, alongside the wider LED light fixtures range. For display and gallery work where you need to re-aim often, track lighting is often the better tool than ceiling eyeball lights, because you can move the head as well as aim it.
Frequently Asked Questions
What are eyeball lights called?
Eyeball recessed lighting goes by a long list of names: eyeball trim, can light eyeball, recessed eyeball light, ceiling eyeball lights, adjustable recessed trim, directional downlight, and in Canada often just an adjustable pot light. Shoppers also search “eyeballs lighting” and “eye ball lighting,” which return the same products. Manufacturers use “gimbal” for the flush version where the light engine pivots inside the aperture instead of doming below it.
What is the difference between a gimbal trim, an eyeball trim and a recessed light eyelid?
An eyeball’s rounded shell tilts inside the trim ring and protrudes below the ceiling, giving a wide tilt range of roughly 30 to 45 degrees. A gimbal pivots the light engine on a yoke and sits flush or regressed, which controls glare better and looks flatter. A recessed light eyelid is different again: it doesn’t aim, it shields, using a crescent hood to push light toward a wall for an even wash with no scallops. Full comparison in our gimbal recessed light guide.
How do I change an eyeball light bulb or remove the trim?
To change the bulb: cut power at the breaker, let the lamp cool, rotate the ball to straight down so the bulb clears the trim ring, ease aside any retaining spring, then unscrew the lamp while holding the outer ring. To remove the whole trim: pull down on the trim ring (never the ball) until the torsion springs or friction clips release, then disconnect the socket adapter. Replace like with like, so a BR30 gets a BR30-shaped LED.
Is eyeball recessed lighting dated?
The protruding dome style dates a ceiling, which is what the design forums react to. The function doesn’t date at all, because aimable light is how you light walls, art and displays. Regressed adjustable trims deliver the same aiming with a flat ceiling and much less glare, so the fix is a trim change rather than abandoning eyeball recessed lighting altogether.
What are the disadvantages of eyeball recessed lighting?
Eyeball recessed lighting has four real drawbacks. Glare, if the trim protrudes and the shielding angle is shallow. Cost, since adjustable trims run above fixed downlights. Commissioning time, because every fixture has to be aimed by hand and re-checked after furniture moves. And efficacy, which usually sits a little below a flat downlight of the same wattage because the optic trades output for beam control. Each is manageable. None is a reason to use fixed downlights on a feature wall.
The Bottom Line
Eyeball recessed lighting is aimable recessed lighting, and it exists because fixed downlights can only light the floor. Use it on sloped ceilings, feature walls, artwork and retail displays. Use eyelid trims for long even wall washes. Use fixed pot lights for everything else.
Four things decide whether the install works:
- Aim all eyeball recessed lighting at 30 degrees off vertical, positioning each fixture with the drop-times-0.58 rule
- Match the beam angle to the target, narrow for objects, 24 to 40 degrees for walls
- Read the IC and location rating off the specific model, not off the product family
- Choose regressed over protruding whenever the ceiling appearance matters
Planning a recessed lighting package for a Canadian project? Votatec is a Canadian LED wholesaler supplying contractors, facility managers and government buyers with quote-based pricing. Browse the LED downlight range, see where to buy LED downlights in Canada, or contact our team with your ceiling plan and we’ll spec the fixtures against it.