











 (+1) 905 597 5955



The best tray ceiling lighting starts with an LED strip hidden in the cove, mounted in an aluminum channel and aimed up the recessed step. That soft, indirect glow is what makes a tray ceiling look expensive. For task light, add recessed downlights in the flat centre. The strongest result usually combines both.
That’s the short answer. Now here’s how to pick the right setup for your room, your budget, and your build.
This guide compares the three real options: LED strip in the cove, recessed downlights, and the layered combination. You’ll get lumen targets, spacing rules, a contractor spec checklist, and the mistakes that make a tray ceiling look cheap
Quick comparison: strip vs cove vs recessed
| Feature | LED strip (cove) | Recessed downlights | Combination |
|---|---|---|---|
| Main job | Ambient, decorative glow | Task and general light | Both layers |
| Where it sits | Inside the recessed step | Flat centre of the tray | Cove + centre |
| Look | Soft, indirect, floating ceiling | Bright, even, functional | Layered, high-end |
| Rough material cost | $ (strip + channel + driver) | $$ (fixtures + wiring) | $$$ |
| Dimming | Excellent, sets the mood | Good | Best, zone by zone |
| Best for | Bedrooms, living rooms, feature walls | Kitchens, offices, halls | Primary living spaces |
Note: “cove lighting” is just the technique of hiding a light source in a ledge or step so you see the glow, not the fixture. In a tray ceiling, the LED strip is what creates the cove effect.
What is a tray ceiling, and why does lighting matter?
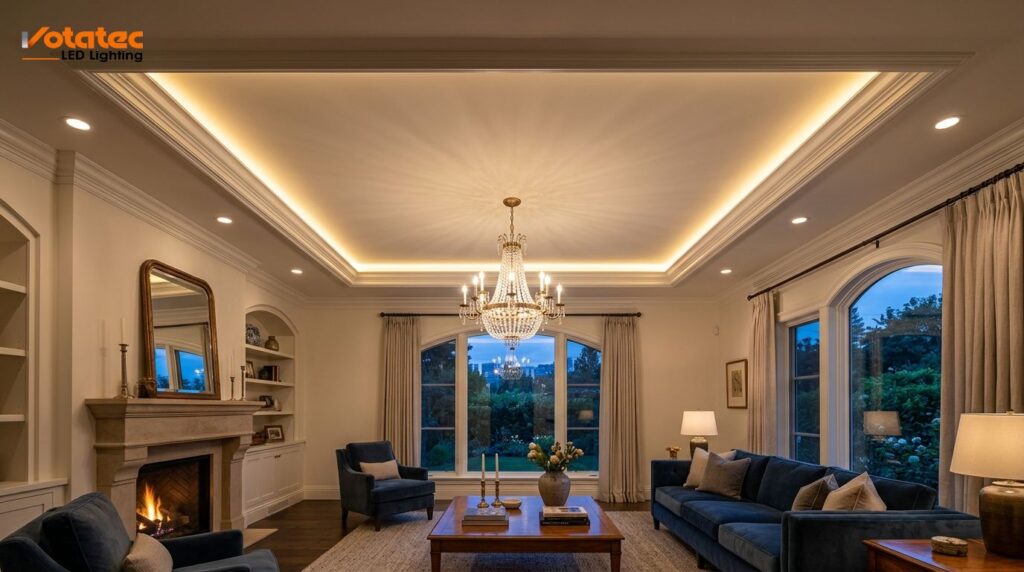
A tray ceiling has a recessed centre panel that sits higher than the border, so the edge looks like an inverted tray. That recessed step, or “cove”, is a natural pocket for hidden light. Point a strip up into it and the ceiling appears to lift and float.
Get the lighting wrong and the effect disappears. A single flush fixture in the middle flattens the whole feature. That’s why the light source, its brightness, and its position matter more than the fixture you can see. For a plain-English primer on the shape itself, The Spruce has a good overview.
Option 1: LED strip lighting in the cove
This is the classic tray ceiling look. You run a continuous LED strip along the recessed ledge, aim it upward, and let the light wash across the raised panel. No visible fixture. Just a clean line of glow.
What to spec
- Brightness: For a decorative cove glow, target roughly 200 to 500 lumens per foot. For a cove doing more of the room’s ambient lighting, push toward 400 to 1,000 lumens per foot (HitLights lumen guide).
- Colour temperature: 2700K to 3000K (warm white) suits bedrooms and living rooms. 3500K to 4000K reads cleaner in kitchens and offices.
- Colour quality: Use a high-CRI strip (90+). Low-CRI light makes paint and wood look grey and flat.
- COB vs SMD: COB (chip-on-board) strip gives a smooth, dot-free line. SMD strip can show dots in a shallow cove.
- Aluminum channel: Always mount the strip in an aluminum channel. It hides the strip, spreads the light, and pulls heat away so the diodes last. Skipping the channel is the top reason cove strips fail early.
- Driver: Size the low-voltage driver to the total run, with headroom. One driver per zone keeps dimming smooth.
Pros and cons
Pros: Best “wow” factor, fully dimmable, low energy use, no visible hardware.
Cons: Needs a proper channel and driver, and a clean ledge to hide the strip. Poor prep shows.
Votatec’s LED strip lights and linear strip fixtures are built for exactly this: COB and SMD options, warm and neutral CCT, with aluminum channels for heat control. Planning your cuts around the strip’s cut points matters too, so read where and how to cut LED strip before you order lengths.
Option 2: Recessed downlights in the tray
Recessed downlights (pot lights) sit flush in the flat centre of the tray and push light straight down. They do the heavy lifting for task and general lighting. On their own they won’t create the floating-ceiling effect, but they light the room properly.
Spacing rule that works
A simple starting point: divide the ceiling height by two to get the spacing. An 8-foot ceiling gets lights about every 4 feet on-centre. A 10-foot ceiling gets about every 5 feet (Eaton spacing guide).
- Keep downlights about 2 feet off the walls. Closer than that and you scallop the wall unevenly.
- Stay inside the flat panel. Don’t cut a downlight into the sloped step, or the beam clips the edge and looks off.
Modern LED downlights throw more even, wider light than old halogen cans, so you often need fewer of them. That means less cutting, less wiring, and lower load.
Pros and cons
Pros: Bright, even, functional. Great for kitchens and workspaces.
Cons: No decorative glow on its own. Layout mistakes are hard to fix once the holes are cut.
Browse Votatec’s LED downlights for CCT-selectable, dimmable fixtures sized for residential and commercial trays.
Option 3: The layered combination (usually the winner)
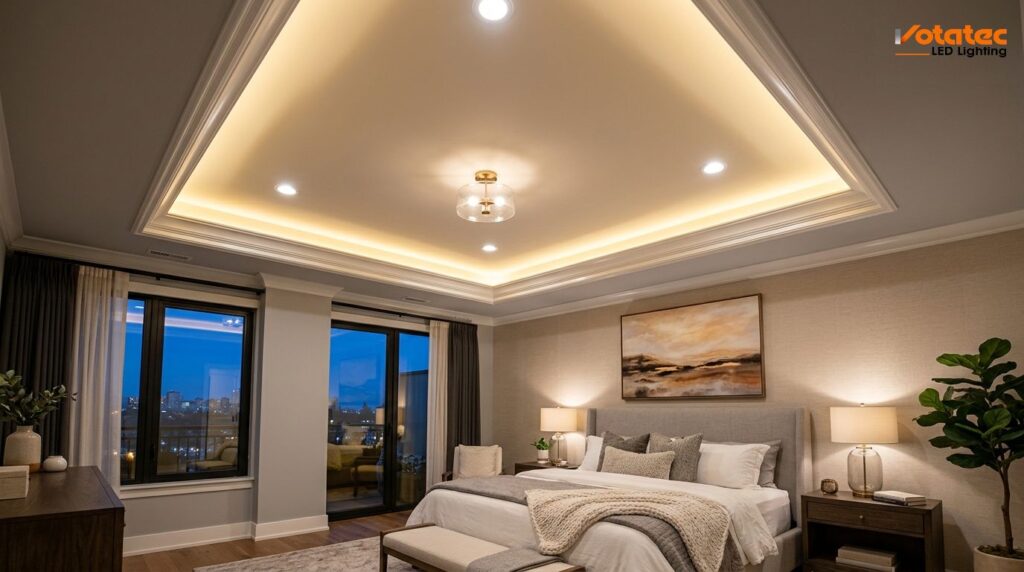
For a primary living space, do both. Run a warm LED strip in the cove for the mood layer, and add recessed downlights in the centre for the work layer. Put each on its own dimmer or zone.
Why this wins: you can drop the downlights and leave the cove glowing for movie night, or bring both up for cleaning and cooking. One ceiling, two moods. This layered approach is what makes rooms photograph well and feel finished.
It costs more up front. For bedrooms, family rooms, and feature entryways, most builders find it worth the spend.
How to choose tray ceiling lighting for each room
| Room | Best choice | Why |
|---|---|---|
| Bedroom | Strip in cove | Warm, calming, no glare overhead |
| Living / family room | Combination | Mood layer plus task layer |
| Kitchen | Recessed + optional strip | Needs bright, even task light |
| Home office | Recessed (neutral CCT) | Function first, low glare |
| Entryway / feature | Strip in cove | Pure visual impact |
What drives tray ceiling lighting cost?
Cost depends far more on the setup you choose than on the fixtures alone. Five factors move the number:
- Run length of the strip. You pay per foot for strip, channel, and connectors. A large room with a full perimeter cove costs more than a small feature ceiling.
- Number of downlights. More cuts, more fixtures, more wiring and labour.
- Driver and dimming. Quality drivers and matched dimmers cost more but prevent flicker and early failure.
- Colour quality. High-CRI strip runs a bit more than budget strip. Worth it in living spaces.
- Labour and prep. A clean cove ready to hide the strip is quick. Retrofitting one into finished drywall is not.
A single-layer cove strip is the most affordable path. A layered cove-plus-recessed setup in a large room sits at the top end. Wholesale sourcing on the fixtures keeps project budgets tighter, which is where buying direct from a Canadian supplier helps. Because volumes and specs vary by project, Votatec prices are quote-based rather than fixed retail.
Contractor spec checklist
- CCT: Confirm one colour temperature across strip and downlights. Mixed CCT looks like a mistake.
- CRI 90+: Non-negotiable for living spaces.
- Aluminum channel: Every cove strip needs one for heat and light spread.
- Driver headroom: Size drivers above the measured load, one per zone.
- Dimming protocol: Match strip, driver, and wall control (0-10V, TRIAC, or PWM). Mismatch causes flicker.
- IC rating on downlights: Required where fixtures contact insulation.
- Certification: Spec CSA-certified product for Canadian inspections.
- Warranty: Check the term per product line and keep the documentation.
Votatec supplies wholesale to electrical contractors, builders, and facility teams across Canada, with CSA-certified product and quotes turned around fast. Prices are quote-based for project volumes, so request a quote with your run lengths and fixture counts.
Common tray ceiling lighting mistakes to avoid
- No channel on the strip. The strip overheats, shows dots, and dies early.
- One flush fixture in the middle. Kills the tray effect completely.
- Mixed colour temperatures. Warm strip with cool downlights looks broken.
- Under-powered driver. Runs hot, dims poorly, shortens life.
- Downlights too close to the wall or in the slope. Uneven, clipped beams.
- Low-CRI strip to save money. Makes the whole room look dull.
Frequently asked questions
What kind of lights are best for a tray ceiling?
LED strip lighting hidden in the recessed cove is the best choice for the signature glow, mounted in an aluminum channel and aimed up. For task lighting, add recessed downlights in the flat centre. Combining both, on separate dimmers, gives the most flexible and high-end result.
Is a tray ceiling dated?
No. A tray ceiling isn’t dated when the lighting is done well. The look feels flat only when it’s lit by a single overhead fixture. A warm, dimmable LED strip in the cove keeps the feature current and reads as a premium detail in 2026.
Should I use recessed lighting or strip lighting in a tray ceiling?
Use both if you can. Strip lighting in the cove creates the decorative glow but doesn’t light the room for tasks. Recessed downlights light the room but don’t create the glow. In a main living space, layer them and zone the dimmers.
What colour temperature is best for tray ceiling lighting?
For bedrooms and living rooms, warm white at 2700K to 3000K feels calm and inviting. For kitchens and home offices, a neutral 3500K to 4000K keeps the space crisp. Keep the strip and any downlights at the same temperature so the ceiling reads as one design.
Do I need an aluminum channel for the LED strip?
Yes. The channel hides the strip, spreads the light into a smooth line, and moves heat away from the diodes. Running a bare strip in a cove is the most common reason these installs fail early.
How bright should the cove LED strip be?
For a decorative accent glow, aim for about 200 to 500 lumens per foot. If the cove is doing most of the room’s ambient lighting, step up to 400 to 1,000 lumens per foot and keep it on a dimmer.
The bottom line
Good tray ceiling lighting lives or dies by the light source, not the fixture you see. Hide a warm, high-CRI LED strip in the cove for the glow. Add recessed downlights in the centre for real task light. Layer them for the best rooms. Mount every strip in an aluminum channel, match your colour temperatures, and size the driver with headroom.
Planning a project across a home or a build? Votatec stocks the LED strip, linear, and downlight fixtures to do it right, wholesale, CSA-certified, and shipped across Canada. Request a quote with your specs.