














 (+1) 905 597 5955


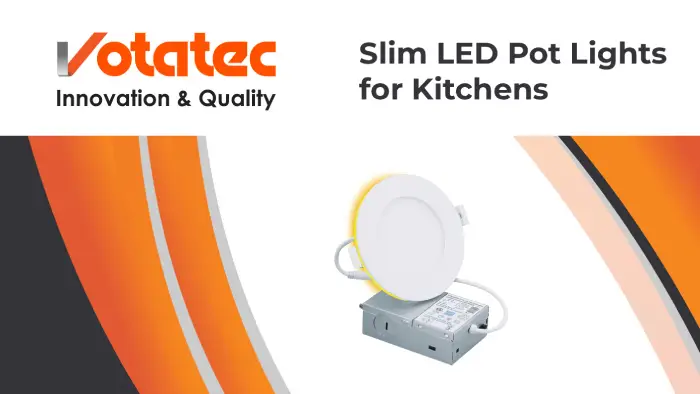

Quick answer: most kitchens need one slim LED pot light for every 15 to 20 square feet of floor. That’s about 9 to 12 slim LED pot lights in a 12 x 14 ft kitchen. Use 4-inch slim LED pot lights on 8 to 9 ft ceilings and 6-inch slim LED pot lights on 9 ft and higher. Put the perimeter row 24 to 30 inches from the wall, over the front edge of the counter. Not 3 feet out. A 3-foot offset puts the light behind your head.
That’s the short version. The rest of this guide shows the math, so you can adjust it for your own kitchen instead of guessing.
Search “pot lights for kitchen” in Canada and Google’s AI summary gives you two rules: keep lights 3 feet from the walls, and space them at ceiling height divided by two. Both rules come from old recessed cans with narrow beams. Slim LED pot lights behave differently. Use those rules with slim LED pot lights and you’ll cut more holes than you need and still get a shadow right where you chop vegetables.
What Are Slim LED Pot Lights (and What Are They Called Now)?
Slim LED pot lights are recessed ceiling lights with no can housing. The LED, lens and trim form one thin disc, usually under an inch deep, and the driver sits in a small junction box resting on top of the drywall. You’ll also see slim LED pot lights sold as:
- Wafer lights (the common term in US stores)
- Canless recessed lights
- Slim panels or slim round panels (the factory name, used on most Votatec spec sheets)
- Ultra-thin or low-profile recessed lighting
Same product, different labels. Our 4″ Slim Round Panel 5-Way CCT measures 4.92 inches across and 0.8 inches deep. That’s the whole fixture. No can, no bulb.
So why do slim LED pot lights suit kitchens so well?
- They fit where cans can’t. Kitchen ceilings are full of joists, ducts and bulkheads. Slim LED pot lights under an inch deep clear most of them.
- The beam is wide. Cans and gimbals throw a 40 to 60 degree cone. Slim LED pot lights spread light far wider, so each one covers more counter.
- They’re easy to retrofit. Cut a hole, pull the cable, clip in the box, push the panel up. Done.
Weighing slim LED pot lights against a retrofit module in existing cans? Our guide to the best LED for can lights compares all three paths.
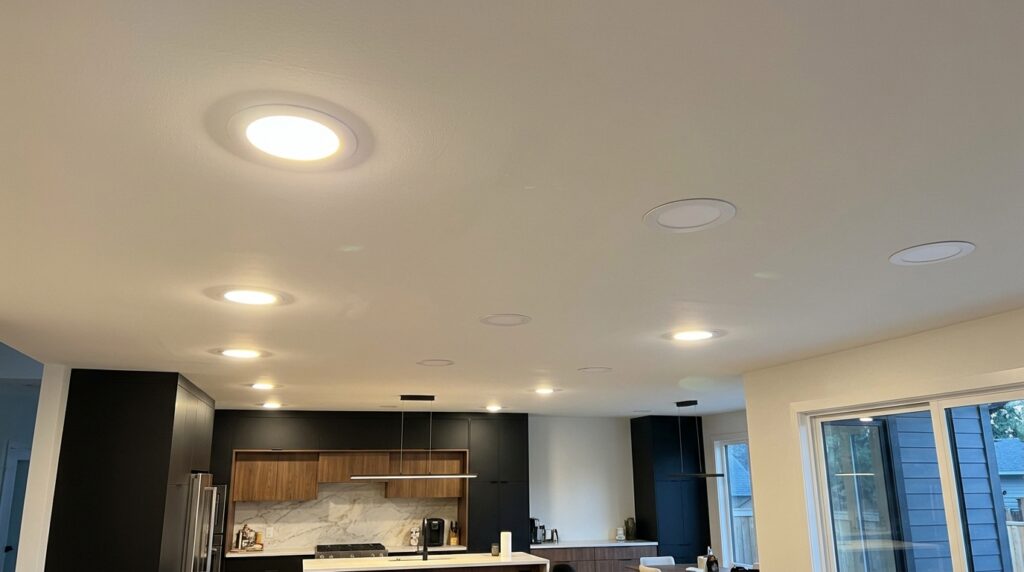
How Many Slim LED Pot Lights Does a Kitchen Need?
Here’s the method a lighting designer would use, cut down to three steps.
Step 1: Pick a light level. The Illuminating Engineering Society publishes residential targets in its Recommended Practice for residential lighting (RP-11). The figures most often quoted from it for kitchens are about 30 to 40 foot-candles (roughly 300 to 430 lux) for general light and 50 to 75 foot-candles (roughly 540 to 800 lux) on counters. One foot-candle is one lumen landing on one square foot.
Step 2: Work out the lumens. Multiply floor area by target foot-candles, then divide by about 0.6. Why 0.6? Not every lumen reaches the floor. Cabinets, walls and dust absorb some. Around 0.6 is a fair working number for a kitchen with light walls.
Step 3: Divide by the fixture’s lumens. Use the lumen rating on the spec sheet of your slim LED pot lights, not the “equivalent watts” on the box.
Say your kitchen is 12 x 14 feet:
- 168 sq ft x 30 fc = 5,040 lumens on the work plane
- 5,040 / 0.6 = 8,400 lumens out of the fixtures
- 8,400 / 750 lm (typical 4-inch slim LED pot lights) = 12 fixtures
- 8,400 / 1,000 lm (typical 6-inch slim LED pot lights) = 9 fixtures
That’s it. No ceiling-height rule needed.
Kitchen Pot Light Count Chart
Same formula. The 30 fc columns assume under-cabinet lights handle the counters. The 40 fc columns assume the slim LED pot lights carry everything.
| Kitchen size | Floor area | 4″ (750 lm) at 30 fc | 4″ at 40 fc | 6″ (1,000 lm) at 30 fc | 6″ at 40 fc |
|---|---|---|---|---|---|
| 10 x 10 ft | 100 sq ft | 7 | 9 | 5 | 7 |
| 10 x 12 ft | 120 sq ft | 8 | 11 | 6 | 8 |
| 12 x 14 ft | 168 sq ft | 12 | 15 | 9 | 12 |
| 12 x 16 ft | 192 sq ft | 13 | 18 | 10 | 13 |
| 15 x 15 ft | 225 sq ft | 15 | 20 | 12 | 15 |
| 15 x 20 ft | 300 sq ft | 20 | 27 | 15 | 20 |
Treat these as a starting point. You’ll round a fixture or two so the grid lines up with cabinets and the island. Dark cabinets and floors soak up light, so lean toward the 40 fc column there.
Need other rooms too? Our LED lumens guide covers the whole house.
Why “Ceiling Height Divided by Two” Fails for Canless Wafer Lights
The ceiling-height rule says 4 feet apart on an 8-foot ceiling. It was built for cans. A can’s metal walls cut off the wide angles, so the beam is narrow and fixtures must sit close together.
Slim LED pot lights don’t have that problem. We’ve gone through the photometric (IES) files for several of our slim LED pot lights, and the measured beam angles land between about 107 and 114 degrees. At a 9-foot ceiling, a 110-degree beam is roughly 17 feet wide by counter height. A 60-degree can covers about 7. Big difference.
So the honest rule:
- Lumens decide how many slim LED pot lights you need.
- The beam decides how far apart they can go.
Designers call the second part a “spacing criterion”. For wide-beam slim LED pot lights it’s around 1.4, meaning the gap shouldn’t exceed 1.4 times the height above the work surface. On an 8-foot ceiling with 3-foot counters, that’s about 7 feet. On a 9-foot ceiling, about 8.4. The lumen count almost always puts fixtures closer than that. Galley kitchens are the exception (more below).
Our disk light spacing guide covers pot light spacing in full.
What Size Slim LED Pot Lights Are Best for a Kitchen?
Size mostly tracks lumens. Bigger slim LED pot lights hold more LEDs, so the right size depends on ceiling height and how many holes you’ll accept.
| Ceiling height | Best size | Typical output | Notes |
|---|---|---|---|
| 8 ft | 4-inch | 700 to 800 lm | The default for most Canadian kitchens |
| 8 ft, accent only | 3-inch | about 450 to 560 lm | Over a sink, inside a bulkhead |
| 9 ft | 4-inch or 6-inch | 750 to 1,100 lm | 6-inch cuts the count by about a quarter |
| 10 ft and up | 6-inch | about 1,000 to 1,100 lm | Fewer, brighter fixtures |
| 12 ft+, open plan | 6-inch or 8-inch | 1,000 lm and up | Mix with pendants |
4-Inch vs 6-Inch Pot Lights for Kitchen Ceilings
Most kitchen pros lean toward 4-inch slim LED pot lights, and Google’s summary agrees. The reason is looks more than light. Smaller trims disappear, and a kitchen ceiling already has a hood, maybe a skylight and pendants competing for attention.
But 6-inch slim LED pot lights make sense in two cases. Ceilings of 9 feet or more, where 4-inch would need too many holes. And big open-plan kitchens, where 20 small trims look busy.
Honestly, the mistake we see most isn’t the wrong size. It’s mixing sizes at random. Pick one size of slim LED pot lights for the grid and stick with it.
Round or Square Trims?
Round slim LED pot lights are the standard in every size. Square slim LED pot lights, like our 4″ Slim Square Panel, suit flat-panel doors and straight-lined modern kitchens. The cut-out under a 4-inch square trim is still round, so you use the same hole saw. Line square trims up with the cabinet edges, or they’ll look crooked even when they aren’t.
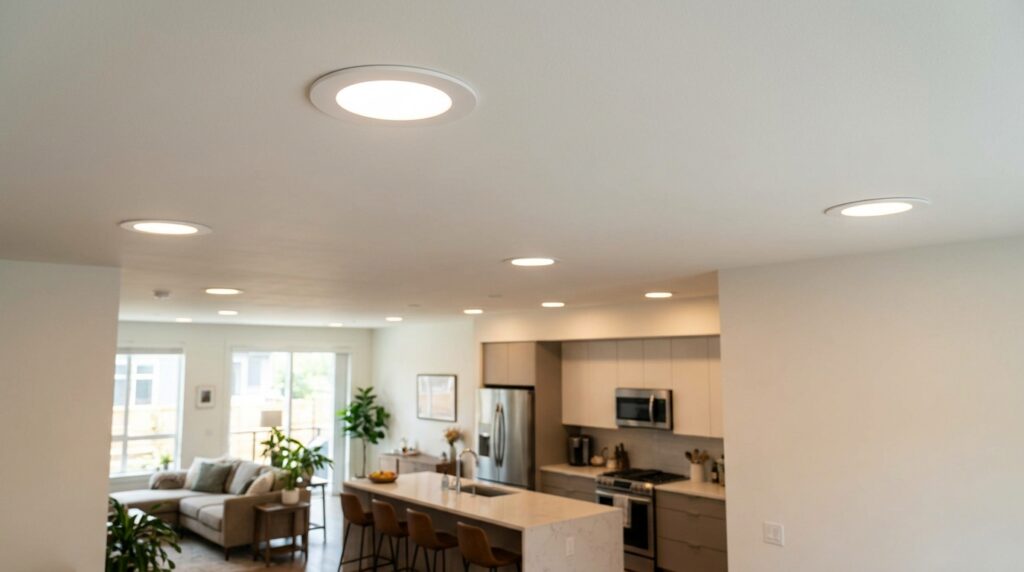
Kitchen Pot Light Layout: Where Each Fixture Goes
Now the part people get wrong. Here’s a kitchen recessed lighting layout that works in most rooms, in planning order.
1. Start With the Counter Row
Counters need the most light, so plan them first. Upper cabinets are about 12 inches deep and counters about 25. Standing at the counter, your body sits roughly 30 to 36 inches from the wall.
Now picture the “3 feet from the wall” rule. It puts the light right above or behind your head. You block it. Your cutting board sits in your own shadow. Sound familiar?
So place the perimeter row of slim LED pot lights 24 to 30 inches from the wall, roughly over the counter’s front edge. The light lands in front of you, and the wide beam still reaches the backsplash. Keep slim LED pot lights a few inches clear of the cabinet face so open doors don’t throw hard shadows.
Run the row 4 to 6 feet on centre. Centre slim LED pot lights on the sink and cooktop where you can. It looks deliberate.
2. Fill the Middle With an Even Grid
The remaining slim LED pot lights go in a grid across the open floor, spaced about equally both ways. Align the grid with the perimeter row, not the walls, so the ceiling reads as one pattern.
3. Handle the Island Separately
Islands usually get pendants. Our pendant sizing chart for kitchen islands covers how many. Skipping pendants? Run slim LED pot lights along the island’s centre line, or two rows inside the long edges on islands deeper than about 4 feet.
4. Galley Kitchens
Here’s the exception. In a narrow galley, the lumen math might say 5 slim LED pot lights, but 5 spread along a 16-foot run leaves gaps too wide for even light. Let spacing set the count. Run one line down the centre in galleys under about 7 feet wide, or one row over each counter in wider ones.
5. Plan Two Switch Zones (At Least)
Wire the perimeter slim LED pot lights and the centre grid on separate dimmers. Counters at full and centre at 30% looks great at night. The island gets its own zone. One switch for everything wastes good fixtures.
Add under-cabinet lights and the counters get light from two directions, which kills the last shadows. Our under-cabinet lighting install guide walks through it, and the broader kitchen lighting guide explains how the ambient, task and accent layers fit together.
Colour Temperature and CRI for Slim LED Pot Lights
Most kitchens look best at 3000K to 4000K. 3000K feels warm and suits wood and warm stone. 4000K feels crisper and suits white kitchens and stainless steel. 5000K reads as clinical in most homes.
Most slim LED pot lights now have a selectable colour switch (3CCT or 5CCT) on the junction box. Handy. But here’s what almost nobody mentions: output isn’t the same at every setting. A test report on one of our 5CCT fixtures shows about 932 lumens at 2700K and 1,057 at 4000K, a 13% swing. Running warm white? Size the job with the lower number.
CRI matters more in a kitchen than anywhere else. CRI (colour rendering index) tells you how true colours look. Under low-CRI light, raw chicken looks grey and tomatoes look dull. Look for slim LED pot lights rated CRI 90 or higher. Many 5CCT models hit that, while some 3CCT models stop at CRI 80 to squeeze out more lumens. Check the spec sheet.
Our colour temperature guide shows 3000K, 4000K and 5000K side by side.
IC Rated Pot Lights, Airtight or Fire Rated: Which Goes Where?
What sits above the ceiling decides which ratings your slim LED pot lights need.
Attic above (bungalows, top-floor kitchens): you need IC rated pot lights. IC means “insulation contact”, so the fixture can sit buried in insulation without overheating. In a Canadian attic, choose airtight slim LED pot lights too, so warm, moist kitchen air doesn’t leak into the cold attic and condense. Our 4″ Square Slim Airtight Gimbal is built for that.
Floor above (two-storey homes): IC rated slim LED pot lights still help, since floor cavities often hold sound insulation.
Another unit above (condos, basement suites, stacked towns): the ceiling may be a fire separation, and a standard hole can break it. Fire-rated slim LED pot lights, like our 4″ Slim Panel Fire Rated and 6″ Slim Panel Fire Rated, are made for these ceilings. Confirm the required rating with the drawings or your inspector.
A kitchen ceiling is normally a dry location, even over the sink. Damp and wet ratings matter near showers and outdoors.
Every listing should carry a recognised Canadian certification mark (CSA, cUL, cETL or similar). To compare efficiency, check Natural Resources Canada’s product energy ratings.
How to Install Slim LED Pot Lights in a Kitchen Ceiling
Slim LED pot lights are the easiest recessed lights to install, which is half the reason they’ve taken over.
- Mark the layout on the ceiling with painter’s tape.
- Check for joists with a stud finder. The junction box hangs on a short cable, so you get a few inches of wiggle room.
- Cut the hole to the manual’s size. Many 4-inch slim LED pot lights need about 4-1/4 inches, but check the template.
- Run cable hole to hole, wire each junction box and set the colour switch.
- Clip the panel in. The spring clips grip the drywall from above.
Kitchen-specific things to watch:
- Dimmers: use one listed as compatible on the spec sheet. A mismatch is the top cause of buzzing and flicker. Our guide to flickering LED lights covers fixes.
- Bulkheads: slim LED pot lights are usually the only recessed option shallow enough for the bulkhead over upper cabinets.
- Permits: in Ontario, new lighting circuits and added fixtures need an ESA permit. A licensed electrical contractor files it, and homeowners working on their own home can file their own. See ESA’s permit guidance. Other provinces set their own rules.
Replacing old recessed lights first? Our trimless recessed downlight sizing guide helps you match cut-outs.
Common Kitchen Pot Light Mistakes
We see the same problems over and over.
- Lights too far from the wall. The 3-foot rule puts light behind you. Stay at 24 to 30 inches.
- Too many fixtures. The ceiling-height rule roughly doubles the count for wide-beam slim LED pot lights.
- Counting watts, not lumens. “Equivalent to 75W” means nothing. Compare lumens.
- One switch for everything. Split counters, centre and island.
- Low CRI. Food and finishes look flat. Go CRI 90+.
And a quiet one: the junction box on top of slim LED pot lights still needs access. Don’t seal a joist bay with spray foam and then drop a fixture under it.
Buying Kitchen Pot Lights in Bulk: Tips for Contractors
Contractors and builders doing kitchens in volume can save time on site with a few spec choices:
- Pick 5CCT slim LED pot lights so one SKU covers every client’s colour preference.
- Stick to one size per job to keep hole saws and stock simple.
- Ask for the IES file and certification listing before buying slim LED pot lights in bulk. Real photometric data shows the true beam and lumens.
- Check voltage. Most homes run 120V, but some Canadian commercial and multi-unit buildings use 347V lighting circuits. Votatec stocks multi-voltage slim LED pot lights for those jobs.
You’ll find our slim LED pot lights, from 3-inch to 8-inch, in the LED downlight category. Concrete ceiling with no cavity? See surface mount LED lights. The 6″ Slim Round Panel 5CCT and 3″ Slim Round Panel pages list full specs and documents.
Need a quote on a full kitchen package? Votatec supplies contractors, builders and property managers across Canada. Contact our team and we’ll price the job.
Frequently Asked Questions
How many slim LED pot lights do I need for a kitchen?
Most kitchens need one fixture per 15 to 20 square feet. A 12 x 14 ft kitchen typically takes 9 at 1,000 lumens or 12 at 750 lumens. To work it out, multiply floor area by 30 to 40 foot-candles, divide by 0.6, then divide by the fixture’s lumens.
How far from the wall should kitchen pot lights be?
Place the counter row of slim LED pot lights 24 to 30 inches from the wall, roughly over the counter’s front edge. That puts light in front of you while you work. The common “3 feet from the wall” advice puts the fixture behind your head, so you shadow your own counter.
Are 4-inch or 6-inch slim LED pot lights better for a kitchen?
4-inch slim LED pot lights suit most kitchens with 8 to 9 ft ceilings. They’re less visible and spread light evenly. 6-inch slim LED pot lights make more sense on 9 ft and higher ceilings or in large open-plan kitchens, where they cut the number of holes by about a quarter.
Do slim LED pot lights need to be IC rated?
Only if insulation will touch them, but IC rated slim LED pot lights are the smart pick for any kitchen ceiling below an attic or insulated floor. Under a cold attic, choose airtight slim LED pot lights too. Under another dwelling unit, you may need fire-rated slim LED pot lights to keep the fire separation intact.
Can you install slim LED pot lights without attic access?
Yes. That’s one of their biggest advantages. Slim LED pot lights install entirely from below. You cut the hole, fish cable from hole to hole, connect the junction box and clip the panel in. Many renovations add kitchen pot lights this way with very little drywall repair.
Bottom Line on Slim LED Pot Lights for Kitchens
- Count slim LED pot lights with lumens, not ceiling height. About one per 15 to 20 sq ft is typical.
- Use 4-inch slim LED pot lights on 8 to 9 ft ceilings and 6-inch on 9 ft and up.
- Set the perimeter row 24 to 30 inches from the wall, over the counter edge.
- Choose 3000K to 4000K and CRI 90+. Warm settings put out fewer lumens.
- Match the rating to what’s above: IC and airtight under an attic, fire-rated under another unit.
Get those five right and your kitchen will be bright, even and shadow-free without one extra hole.