










 (+1) 905 597 5955



Two numbers decide it. Total lumens sets how many disk lights you need, and the spacing limit sets how far apart they can sit. Get both and the layout falls out on its own.
Here’s the fast version. Multiply your floor area in square feet by a foot-candle target for the room, divide by the delivered output of one disk light, then round up. A 12 x 12 kitchen at 35 foot-candles needs about 5,040 lumens, which is six 6-inch disk lights at 1,000 lumens each once you allow for light loss. A 12 x 12 bedroom at 15 foot-candles needs three.
That’s the method. Below: room-by-room tables, the spacing rule most guides get wrong, how long disk lights last, and how to swap one out.
The Short Answer: Disk Light Counts by Room
Run these numbers on an 8-foot ceiling using 6-inch, 1,000-lumen disk lights.
| Room | Size | Target foot-candles | Lumens needed | 6″ disk lights |
|---|---|---|---|---|
| Bathroom | 5 x 8 (40 sq ft) | 35 | 1,400 | 2 |
| Bedroom | 10 x 12 (120 sq ft) | 15 | 1,800 | 3 |
| Bedroom | 12 x 12 (144 sq ft) | 15 | 2,160 | 3 |
| Kitchen | 10 x 10 (100 sq ft) | 35 | 3,500 | 5 |
| Kitchen | 12 x 12 (144 sq ft) | 35 | 5,040 | 6 |
| Living room | 14 x 16 (224 sq ft) | 15 | 3,360 | 4 |
| Great room | 20 x 20 (400 sq ft) | 15 | 6,000 | 8 |
| Home office | 12 x 12 (144 sq ft) | 40 | 5,760 | 7 |
| Garage, storage | 12 x 20 (240 sq ft) | 5 | 1,200 | 2 |
| Garage, service work | 12 x 20 (240 sq ft) | 15 | 3,600 | 5 |
| Hallway | 3 x 20 (60 sq ft) | 8 | 480 | 3 (spacing governs) |
Notice the hallway. The lumen math says one disk light. Spacing says three. When those two answers disagree, the bigger number wins, and hallways are the room where that happens every time.
What Are Disc Lights?
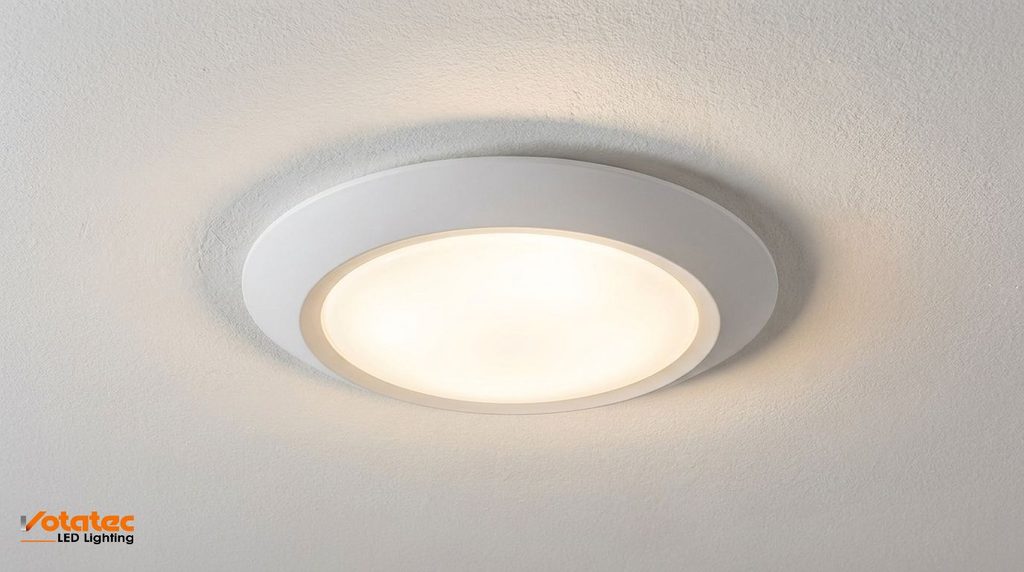
A disc light is a shallow, round LED ceiling fixture that mounts flat to the ceiling or onto an existing junction box, sitting about an inch below the ceiling line. The LED is built in, so there’s no bulb to change. They’re also sold as disk lights, surface mount ceiling lights, or low profile LED ceiling lights.
Same fixture, four names. Half the people shopping spell it “disc” and half spell it “disk,” so search both or you’ll miss most of the market.
What makes disk lights their own category:
- No ceiling cavity needed. A recessed can wants 4 to 8 inches of depth. Disk lights need none, which is why they turn up in finished basements, concrete ceilings and condo retrofits.
- Integrated LED. No lamp, no socket, no bulb changes.
- Junction box mount. They fit a standard 4-inch or 6-inch J-box or an existing can, so a swap often needs no cutting.
- Wide, even light. Ours measure about 115 degrees, close to a full hemisphere.
- Selectable colour temperature. Pick the white on site with a switch on the back.
Disk lights do one job well: even ambient light across a whole ceiling, in a space that can’t take a recessed housing. Not accent lighting. Not task lighting.
Can Lights vs Disc Lights
This comparison changes your fixture count, so get it straight before drawing a layout.
A can light, or pot light, buries its housing inside the ceiling. The aperture and trim clip off the wide angles, so a typical can throws a 40 to 60 degree cone. Disk lights sit at the ceiling plane with nothing shading them, so light leaves at nearly every angle.
| Disc lights | Can lights (pot lights) | |
|---|---|---|
| Mounting | Surface, flat to ceiling or J-box | Housing inside the ceiling cavity |
| Cavity depth needed | None, about 1″ proud of the ceiling | 4 to 8 inches |
| Beam spread | About 115 degrees (measured) | 40 to 60 degrees typical |
| Spacing, 8 ft ceiling | 6 to 8 ft | 4 to 5 ft |
| Fixtures per room | Fewer | More |
| Install | Wire to a J-box, often no cutting | Cut the hole, fit the housing |
| Bulb changes | None, integrated LED | Varies, many now integrated too |
| Insulation contact | Not IC-rated on our models | IC-rated versions available |
| Best at | Even wash, low ceilings, retrofits, corridors | Accent, directional, tight pools of light |
At the same lumen output, neither one is brighter. The difference is beam shape and ceiling depth, not brightness. What changes is how many you need, because a 115 degree beam overlaps its neighbour much sooner than a 45 degree cone does.
Which should you pick? Ceiling has depth and you want directional pools over an island, use cans. Ceiling is shallow, the job is even ambient light, or a junction box is already up there, and disk lights do it with fewer fixtures and less labour. Our guide to what a recessed downlight is covers the recessed side.
We wanted the real beam figure, not the marketing one. So we pulled the photometric files for three of our disk lights and ran zonal integration on the candela tables. Measured 50 percent beam angles: 113.3 degrees on the 6-inch, 114.5 on the 4-inch, 115.2 on the 7.5-inch, all a few degrees under the published 120. Design around 115 and you’ll be right.
Step 1: Pick a Foot-Candle Target
A foot-candle is one lumen landing on one square foot. It’s what lighting standards actually specify.
The Illuminating Engineering Society publishes recommended levels by space type. Their Recommended Practice for interior and exterior residential environments is the reference for homes. These are the targets we spec to:
- Hallways, stairs, closets: 5 to 10 foot-candles
- Bedrooms, living rooms (ambient): 10 to 20
- Basements, rec rooms: 20 to 30
- Kitchens and bathrooms (general): 30 to 40
- Home offices, laundry: 30 to 50
- Kitchen counters, vanity (task): 50 to 75
- Offices and retail floor: 30 to 50
- Commercial corridors: 5 to 10
- Warehouse aisles: 10 to 20
Garages get their own set, because a garage is three rooms wearing one coat. Storage wants 5, parking 10, service work 10 to 20, a repair bay 50 to 100.
Pick the low end when lamps or under-cabinet strips help. Pick the high end when the disk lights do all the work. Older eyes need more, so bump a level if you know your occupants.
Step 2: Turn Foot-Candles Into Total Lumens
Multiply. That’s it.
Floor area (sq ft) x target foot-candles = lumens needed
A 144 square foot kitchen at 35 foot-candles wants 5,040 lumens. A 400 square foot great room at 15 wants 6,000.
Now the part that separates a real calculation from a guess. Disk lights don’t deliver rated lumens onto your floor forever. Dust settles on the lens, the LED fades, and some light lands on walls. Designers fold that into a light loss factor: 0.8 for clean indoor space, 0.7 for a dusty shop, basement or garage.
Number of disk lights = (area x foot-candles) / (disk light lumens x light loss factor)
That kitchen again. 5,040 lumens needed, 1,000-lumen disk lights, 0.8 factor. So 5,040 / 800 = 6.3, round to six.
Skip that factor and you’ll be about 20 percent short by year five. Nobody notices it happening. They just decide the room feels gloomy and blame the colour temperature. Our room-by-room LED lumens guide goes deeper on lumen maintenance.
Step 3: Divide by One Disk Light’s Output
You need to know what a single fixture puts out. Here’s our current range:
| Model | Size | Power | Published lumens | CRI | CCT settings |
|---|---|---|---|---|---|
| 4″ Disk Light 3-CCT | 4″ | 10W | 700 | >80 | 3000K / 4000K / 5000K |
| 4″ Disk Light 5-CCT | 4″ | 9W | ~700 | >90 | 2700K to 5000K |
| 6″ Disk Light 3-CCT | 6″ | 15W | 1,000 | >80 | 3000K / 4000K / 5000K |
| 6″ Disk Light 5-CCT | 6″ | 11W | ~700 | >90 | 2700K to 5000K |
| 7.5″ Disk Light 5-CCT + PIR | 7.5″ | 14W | 1,000 | >90 | 2700K to 5000K |
Two things to flag before building a spec on this table.
Selectable-CCT disk lights don’t emit the same lumens at every setting. This catches people out constantly. Our 7.5-inch measures 932 lumens at 2700K, 989 at 3000K, 1,055 at 3500K, 1,057 at 4000K and 970 at 5000K. A 13 percent swing across the dial. Spec warm 2700K for a bedroom and you get noticeably less light than the headline suggests.
CRI and output trade against each other. Our 5-CCT disk lights clear CRI 90 and draw less power, but give up lumens. The 3-CCT models push more light at CRI above 80. Kitchens and retail, take the CRI 90 fixture and add one to the count.
Step 4: Check the Spacing Limit
You’ve got a count. Now make the layout even.
Almost every guide online repeats the same rule: divide ceiling height by two and space the lights that far apart. Eight-foot ceiling, four feet apart. It’s what Google’s own AI summary tells you.
That rule comes from recessed cans. It’s wrong for disk lights.
The proper method uses the Spacing Criterion, published with a fixture’s photometric data. It’s the spacing-to-mounting-height ratio that still gives even light across the work plane:
Maximum spacing = Spacing Criterion x mounting height above the work plane
Wide-beam disk lights carry a Spacing Criterion around 1.3 to 1.5. Call it 1.4. On an 8-foot ceiling measured to the floor, that permits roughly 11 feet between fixtures. Measured to a 2.5-foot counter, mounting height drops to 5.5 feet and you get about 7.7 feet.
Against the four feet the ceiling-height rule gives you. The folk rule asks for nearly double the disk lights a 115-degree beam needs.
Why does it survive? More fixtures also raises the light level, so the two effects get bundled together and the room comes out bright enough. You’ve just paid for twice the disk lights and twice the labour.
Cleaner way to think about it:
- Total lumens decides how many disk lights you buy. That’s Step 2.
- The Spacing Criterion decides the maximum gap. It’s a ceiling on spacing, not a target.
- Lay the count out in an even grid. If a gap lands over the SC limit, add a fixture. Usually it won’t.
- Set the first row half your fixture spacing off the wall, normally 2 or 3 feet.
Push disk lights tight to a wall and you get a hot scallop on the paint with the room centre left dim.
When spacing overrules the lumen count
Long narrow spaces. Corridors, hallways, stairwells, closets.
A 3 x 20 hallway needs 480 lumens at 8 foot-candles. One disk light covers that on paper. Install one and you get a bright puddle in the middle with two dark ends.
Uniformity governs here. Space the disk lights 6 to 8 feet apart down the centre line and take whatever count that gives. Twenty feet at 7-foot spacing is three disk lights, about 3 feet from each end. The 4-inch models suit this, and so does our 7.5-inch PIR model, since a hallway lit only when occupied costs almost nothing to run.
How Many Disk Lights by Room Size
Kitchens
Kitchens want the most light in the house. Target 30 to 40 foot-candles general, counters separately at 50 to 75.
Don’t try to hit counter levels with ceiling disk lights. You’ll stand in your own shadow. Disk lights do the ambient layer, under-cabinet lighting the task layer, covered in our puck light sizing guide.
- 10 x 10 (100 sq ft): 3,500 lumens, so 5 x 6-inch
- 12 x 12 (144 sq ft): 5,040 lumens, so 6 x 6-inch
- 12 x 16 (192 sq ft): 6,720 lumens, so 8 x 6-inch
Grid the disk lights clear of the cabinet fronts by about 2 feet, so light falls on the counter edge instead of the doors.
Bedrooms and living rooms
These run 10 to 20 foot-candles. Lamps and daylight carry part of the load, so the ceiling layer sits lower than people assume.
- 10 x 12 (120 sq ft): 1,800 lumens, so 3 x 6-inch
- 12 x 12 (144 sq ft): 2,160 lumens, so 3 x 6-inch
- 14 x 16 (224 sq ft): 3,360 lumens, so 4 x 6-inch
- 20 x 20 (400 sq ft): 6,000 lumens, so 8 x 6-inch
A note on layout over arithmetic. In a square room, four disk lights in a 2 x 2 grid look better than three in a row, even when three is what the math gives you. You can’t install 2.7 disk lights. Round to the layout that grids evenly.
Bathrooms
Small rooms, high targets, low counts. Use 30 to 40 foot-candles and light the mirror separately.
- 5 x 8 (40 sq ft): 1,400 lumens, so 2 x 6-inch or 2 x 4-inch
- 8 x 10 (80 sq ft): 2,800 lumens, so 4 x 6-inch
Vanity light should come from beside or above the mirror, not from a disk light behind you. Overhead-only bathrooms throw shadows straight down the face, which is why so many feel harsh even when the metre reads fine.
Check the location rating before putting disk lights above a tub or inside a shower. Our documentation isn’t consistent on this point, so ask us rather than guess.
Basements, garages and workshops
Low ceilings make disk lights the natural fit. A recessed can needs cavity depth a finished basement often doesn’t have. Disk lights need none.
- Basement rec room, 20 x 30 (600 sq ft) at 15 fc: 9,000 lumens, so 11 x 6-inch
- Single garage, 12 x 20 (240 sq ft), storage at 5 fc: 1,200 lumens, so 2 x 6-inch
- Same garage, service work at 15 fc: 3,600 lumens, so 5 x 6-inch
Drop the light loss factor to 0.7 in unfinished spaces. A garage disk light lens gets dirty faster than anything in the house.
How Long Do Disk Lights Last?
Rated life for quality LED disk lights runs 25,000 to 50,000 hours, and our product pages state 50,000. At 3 hours a day that’s decades. At 12 hours a day, about 11 years. In a corridor running 24/7, about 5.7 years.
But LEDs don’t burn out the way a bulb does. They fade. So the industry measures life as L70, the hours until output drops to 70 percent of what it started at. Disk lights at their L70 mark are still lit. Just noticeably dimmer than the day you installed them.
Where does that number come from? Two IES documents. LM-80 measures real LED packages at 3,000, 6,000 and 10,000 hours across several temperatures and drive currents. TM-21 projects those measurements out to 25,000 or 50,000 hours. So a 50,000-hour rating is a projection built on 6,000 to 10,000 hours of testing, not a fixture anyone ran for six years.
Three honest caveats:
- Ask for the report on commercial jobs. If a 50,000-hour figure is going into a payback model, request the LM-80 data and TM-21 projection behind it. The documents we hold on the disk light family don’t include one, so treat it as typical for the class rather than tested for that SKU. Our warranty is 5 years.
- The driver usually goes first. Electronics fail before diodes fade. Most disk lights that die early die at the driver, from heat or a mismatched dimmer.
- Heat kills them. Our manuals rate these disk lights for -20 to +40°C and say plainly not to cover them with heat-insulating material. Bury one under blown-in insulation and you’ll get a fraction of the rated life.
Same reason Step 2 uses a 0.8 light loss factor. Design to day-one lumens and the room is right on day one and wrong for a decade.
How to Change or Remove an LED Disk Light
Here’s the thing people are surprised by: you don’t change a bulb in a disk light. The LED is integrated, and our manuals specifically say not to change the LED board or the driver. Changing an LED disk light means replacing the whole fixture.
Good news is that’s a short job on disk lights, because there’s no housing and no spring clips to fight.
How to Change LED Disk Light Fixtures
There’s no lamp to swap, so a “bulb change” is a fixture change. Order the same aperture, kill the power, and follow the removal steps below in reverse.
How to Remove LED Disk Light Fixtures in Four Steps
- Kill the breaker, then prove it’s dead. Switch off at the panel and check the fixture with a non-contact voltage tester. Not the wall switch. The breaker.
- Free the fixture from its bracket. Disk lights seat on a mounting bracket with a twist or a clip. Support the fixture with one hand and release it. Wear gloves, since the manual warns the edges are sharp.
- Disconnect the wiring. Undo the wire nuts joining the fixture leads to the supply. Three connections normally: line, neutral, ground.
- Unscrew the bracket from the junction box. Two screws. The J-box stays in the ceiling, which is exactly why the replacement goes in so fast.
Fitting the new one runs the list backwards. Bracket on with two screws, wire nuts, push the wires back, seat the fixture. Set the CCT switch before seating it, because you can’t reach it afterwards.
Match the aperture to the existing bracket and J-box, since 4-inch and 6-inch disk lights aren’t interchangeable. And pulling an old recessed can is a different job, with spring clips and a housing involved, walked through in our guide on how to remove a recessed light fixture.
Swapping a fixture on an existing circuit isn’t the same as adding one. New lighting circuits in Ontario need a permit and inspection through the Electrical Safety Authority.
Disk Lights in Commercial Ceilings
Same arithmetic, different targets. A 1,000 square foot office at 40 foot-candles needs 40,000 lumens, so 50 of our 15W 6-inch disk lights at a 0.8 loss factor, or 750 watts of connected load. A 100-foot corridor needs only 4,000 lumens, but uniformity puts disk lights every 8 to 10 feet, so you install 11 or 12 regardless.
Three things to settle first: these disk lights aren’t IC-rated so they can’t sit under blown-in insulation, they’re 120V where many Canadian buildings run 347V, and provincial rebate terms shift yearly, so check before building savings into a proposal. Natural Resources Canada covers the federal picture, and our commercial disc light guide goes deeper on efficacy, dimming and certification.
Common Mistakes That Blow the Count
- Using the ceiling-height-over-two rule on a wide-beam fixture. It’s a recessed can rule. On 115-degree disk lights it roughly doubles your count.
- Ignoring the light loss factor. Rated lumens are day-one lumens in a lab.
- Trusting headline lumens on selectable-CCT disk lights. Output varies by setting, sometimes 13 percent.
- Lighting counters from the ceiling. You block your own light. Layer it.
- Disk lights too close to walls. Half your spacing is the offset. Closer and you wash the paint, not the room.
- Forgetting the ceiling colour. Dark finishes eat reflected light. Drop the loss factor a notch.
Which Size Disk Light Should You Use?
| Size | Best for | Typical spacing |
|---|---|---|
| 4″ | Hallways, closets, small bathrooms, tight grids | 4 to 6 ft |
| 6″ | General purpose: kitchens, bedrooms, living rooms, offices | 6 to 8 ft |
| 7.5″ | Larger rooms, garages, corridors needing occupancy sensing | 8 to 10 ft |
Bigger apertures aren’t automatically better. Four-inch disk lights on a tighter grid give smoother light than 7.5-inch on a wide one, though they cost more in fixtures and labour. Pick one size per sightline. Browse the full surface mount LED range to compare.
Frequently Asked Questions
How many disk lights do I need for a 12×12 room?
Three 6-inch disk lights for a bedroom or living room at 15 foot-candles, and six for a kitchen or home office at 35 to 40. The room’s use drives the count far more than its size. Same 144 square feet, double the fixtures, because a kitchen needs more than twice the light a bedroom does.
Can lights vs disc lights: which should I choose?
Pick disc lights when the ceiling is shallow, the job is even ambient light, or a junction box is already up there. Pick can lights when you have 4 to 8 inches of cavity and want directional pools over an island or artwork. At equal lumens neither is brighter. Disc lights spread about 115 degrees against 40 to 60 for a can, so you need fewer of them, spaced further apart.
How long do disk lights last?
Rated life is 25,000 to 50,000 hours, and our pages state 50,000, which is roughly 11 years at 12 hours a day. That rating is L70, meaning the hour at which output falls to 70 percent of new, not the hour the fixture quits. LEDs fade rather than burn out. On commercial jobs, ask for the LM-80 and TM-21 data behind any lifespan figure before you build it into a payback model.
How do you change or remove an LED disk light?
There’s no bulb to change, since the LED is integrated, so changing one means replacing the whole fixture. To remove it: shut off the breaker and confirm with a voltage tester, twist or unclip the fixture off its mounting bracket, undo the wire nuts, then unscrew the bracket from the junction box. Two screws and three wires. The new one goes on in reverse, and you should set the CCT switch before seating it.
How far apart should disk lights be spaced?
Space 6-inch disk lights 6 to 8 feet apart on a standard 8-foot ceiling, with the first row 2 to 3 feet off the wall. Wide-beam disk lights tolerate spacing up to about 1.4 times the mounting height above your work plane, wider than the ceiling-height-divided-by-two rule suggests. Set the wall offset at half your fixture spacing
Bottom Line
Two calculations, in this order.
- Count: area x foot-candles, divided by the lumens of one disk light x 0.8. Round up.
- Spacing: grid the disk lights evenly, keep gaps under 1.4 times the mounting height, hold the first row 2 to 3 feet off the wall.
- Exceptions: corridors get spaced by uniformity, task surfaces get their own layer, and selectable-CCT disk lights give up lumens at their warmest setting.
Do those and your disk lights land within one fixture of what a lighting designer would draw. Lean on the ceiling-height rule instead and you’ll be over-lit and over-budget.
Working on a layout? Send us your room dimensions and how the space gets used. Our technical team will run the photometrics and come back with a disk light count and a spacing plan. Request a quote and include the ceiling height, since it changes both numbers.