












 (+1) 905 597 5955



Spec outdoor area lighting in this order: required light level, fixture type, mounting height and spacing, then dark-sky and rebate compliance. Get the light level right first. Everything else follows from it.
If you install or quote commercial sites, you already know the pain. A parking lot that looks fine on paper comes back with dark patches between poles. A wall pack throws light into a neighbour’s window and triggers a complaint. A retrofit misses the rebate because the fixture wasn’t on the right list. This guide walks through the numbers and the decisions so your next outdoor job passes inspection, hits the photometric target, and keeps the client’s rebate intact.
The fast answer: what to spec for a standard commercial lot
For a typical Canadian commercial parking lot, here’s the working baseline:
| Spec | Target |
|---|---|
| Average light level | 1 to 2 foot-candles (fc) |
| Minimum light level | 0.5 fc |
| Entrances, exits, crosswalks | 3 to 5 fc |
| Uniformity (average : minimum) | 4:1 or better |
| Colour temperature | 3000K to 4000K |
| Pole height | 20 to 25 ft (most common) |
| Pole spacing | 2 to 2.5 x pole height |
| Fixture | LED shoebox, DLC-listed, full cut-off |
| Glare control | BUG rating with low backlight and zero uplight (U0) |
These come from IES recommended practice for parking facilities. Adjust up for high-security sites, down for low-activity overflow lots. The rest of this guide explains how to apply each one.
What is outdoor area lighting?
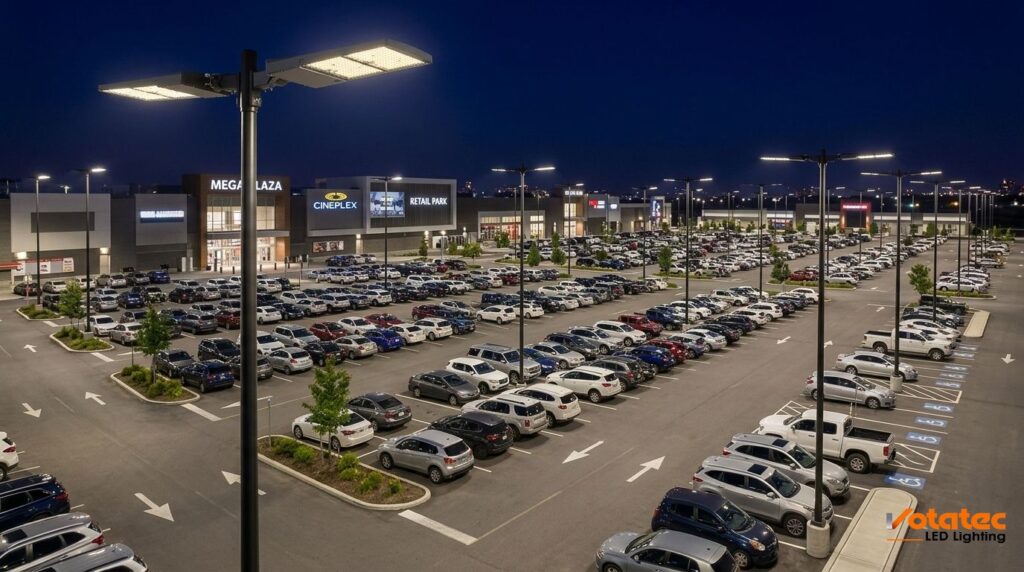
Outdoor area lighting is the lighting used to cover large exterior spaces, such as parking lots, driveways, pathways, building perimeters, and storage yards. It’s built around pole-mounted or wall-mounted LED fixtures that spread light across a wide horizontal area rather than aiming at a single object. The goal is even coverage, safe visibility, and controlled glare.
It’s a different problem than floodlighting a building face or spotlighting a sign. Area lighting is about uniform coverage across a defined zone, and it’s judged on light level and uniformity, not raw brightness.
How much light does a parking lot actually need?
Light level is measured in foot-candles. One foot-candle is the light from one candle falling on a surface one foot away. The number that matters for a parking lot is the average maintained level across the whole surface, plus the minimum in the darkest spot.
The Illuminating Engineering Society publishes the recommended practice that most Canadian designs and municipal codes reference. Parking-facility guidance, formerly its own document (RP-20), now lives in ANSI/IES RP-8, Lighting Roadway and Parking Facilities. Here are the working targets by space type:
| Space | Average fc | Minimum fc |
|---|---|---|
| Basic commercial lot | 1.0 to 2.0 | 0.5 |
| Enhanced-security lot | up to 5.0 | 1.0 |
| Pedestrian pathways | 0.5 to 1.0 | 0.2 |
| Entrances and crosswalks | 3.0 to 5.0 | 1.0 |
| Building perimeter / walls | 1.0 to 2.0 | 0.5 |
Two things to watch. First, these are maintained levels, meaning the design has to account for light loss as the fixture ages and collects dirt. Spec to the target plus a light-loss factor, not to the day-one output. Second, more is not better. Overlighting wastes energy, blows the rebate math, and creates glare that actually reduces visibility.
Source: ANSI/IES RP-8, Lighting Roadway and Parking Facilities – Illuminating Engineering Society
Why uniformity matters more than brightness
A lot can hit its average target and still fail. The reason is uniformity. If you have bright pools under each pole and dark gaps between them, the eye adjusts to the bright spots and the dark areas read as black holes. That’s where trips, collisions, and security problems happen.
Uniformity is expressed as a ratio of average light to minimum light. IES recommends 4:1 (average : minimum) or better for parking areas. Tighter ratios (3:1) suit high-traffic or security-sensitive sites. The way you hit it is through fixture optics and pole spacing, not by cranking up wattage.
Three quick rules:
- Pick the right optic. A Type III or Type IV distribution throws light forward and to the sides, which suits perimeter poles. Type V spreads light in a circle, which suits centre-of-lot poles.
- Don’t over-space poles. Gaps create dark zones no fixture can fill from the next pole over.
- Run a photometric layout. A point-by-point calculation shows the uniformity before you order a single fixture.
Which fixture type goes where?
Outdoor area lighting isn’t one product. Match the fixture to the zone:
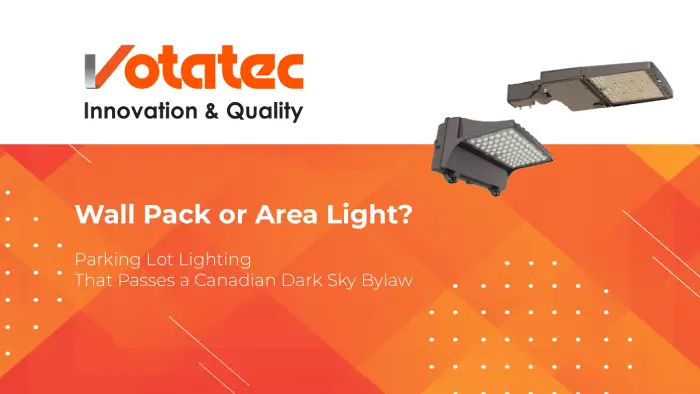
- Shoebox / area lights – The workhorse for parking lots. Pole-mounted, rectangular, available in Type III, IV, and V distributions. This is what you spec for the open lot. See our LED parking lot and area lights.
- Wall packs – Mounted on the building face for perimeter, loading docks, and back-of-house. Look for full cut-off LED wall pack models that throw light down, not out.
- Flood lights – Aimed lighting for facades, signage, and yards. Useful for accent and security, not for general area coverage. Browse LED flood lights.
- Bollards – Low-level fixtures for pathways, courtyards, and pedestrian zones where pole lighting would be overkill.
- Post-top fixtures – Decorative pole-tops for streetscapes, campuses, and walkways where appearance counts.
- High-mast – Very tall poles (over 30 ft) for large lots, transit yards, and industrial sites where fewer poles cover more ground.
For most commercial lots, the answer is shoebox lights on the open area plus full cut-off wall packs around the building.
Pole height and spacing: getting coverage right
Pole height drives everything. Taller poles cover more ground per fixture but need more output and can run into municipal height caps. Here’s the field-tested relationship:
| Pole height | Spacing | Fixture output (lumens) |
|---|---|---|
| 15 to 20 ft | 20 to 30 ft | 12,000 to 18,000 |
| 20 to 25 ft | 30 to 40 ft | 20,000 to 30,000 |
| 25 to 35 ft | 40 to 50 ft | 30,000 to 70,000 |
The shortcut most designers use: space poles 2 to 2.5 times their height apart. A 25 ft pole gets spaced roughly 50 to 60 ft from the next one for even coverage. Push past that and you’ll see dark gaps.
A few field notes. Many municipalities cap pole height at 20 or 25 ft, so check the local bylaw before you design around 35 ft poles. Mounting one to four fixtures per pole is normal. And don’t forget the light-loss factor when you size lumen output, because the design has to hold up three and five years out, not just on commissioning day.
Spacing and mounting-height ratios follow established roadway and parking design practice consolidated in ANSI/IES RP-8. Always confirm the pole-height cap in your local zoning bylaw.
How do BUG ratings and dark-sky rules affect your spec?
This is where a lot of jobs trip up. Outdoor lighting in Canada is increasingly governed by light-pollution rules, and the spec has to account for them or the install gets rejected.
The BUG rating is the system to know. It stands for Backlight, Uplight, and Glare, each scored on a scale. Backlight is light spilling behind the pole. Uplight is light escaping into the sky. Glare is light shooting sideways into eyes. Lower numbers are better. For dark-sky friendly area lighting, you want low backlight, zero uplight (U0), and controlled glare. Full cut-off fixtures, which emit no light above horizontal, are the practical way to get there.
Canadian rules are tightening. The Royal Astronomical Society of Canada publishes the Canadian Guidelines for Outdoor Lighting (Low-Impact Lighting), which many municipalities reference. Townships like Muskoka Lakes have had dark-sky bylaws since 2014, requiring shielded full cut-off fixtures. If your site is anywhere near a dark-sky community, cottage country, or a sensitive zone, check the local bylaw first.
Colour temperature is part of compliance. Dark-sky guidance recommends a maximum of 3000K, because warmer light cuts the blue wavelengths that drive skyglow and disrupt wildlife and sleep. For most commercial lots, 3000K to 4000K balances visibility against light pollution. Go to 3000K or below in sensitive areas.
Sources: Canadian Guidelines for Outdoor Lighting – RASC (PDF)
Don’t lose the rebate: DLC and LUNA
Many Canadian utility rebates require the fixture to be listed on the DesignLights Consortium (DLC) Qualified Products List. As of DLC 6.0, the LUNA dark-sky criteria are folded directly into the core list for exterior product categories, so dark-sky performance and rebate eligibility now travel together.
What this means for your spec:
- Check the DLC listing before you order. A fixture that isn’t listed, or sits on an outdated version, can disqualify the whole project from the rebate.
- Match the rebate program’s required DLC version. Utilities update their requirements, and a fixture qualified under an old version may not count.
- Keep the documentation. Rebate paperwork wants model numbers, listings, and photometric data.
Getting this wrong is expensive. The rebate often covers a meaningful slice of the project, and it’s gone if the paperwork doesn’t line up.
Source: DesignLights Consortium – LUNA and the Qualified Products List and Outdoor Lighting Ordinances guidance (PDF)
Controls: photocells, motion, and dimming
Controls turn a compliant install into an efficient one, and they often factor into rebate calculations.
- Photocells (dusk-to-dawn) switch lights on at dark and off at dawn. Standard on nearly every area fixture now.
- Motion sensors drop output to a low level when no one’s around, then ramp up on detection. Strong fit for low-traffic lots, back lanes, and overflow parking.
- Dimming and scheduling let a site run at full output during business hours and step down overnight. Useful where a bylaw or client wants reduced late-night levels.
LED switches instantly and survives constant on-off cycling, so these controls work without shortening fixture life. That wasn’t true of the metal halide gear they replace.
The contractor’s spec checklist
Run every outdoor area job through this before you quote:
- Light level – What’s the required average and minimum fc for each zone?
- Photometric layout – Has a point-by-point calc confirmed the uniformity?
- Fixture type – Shoebox for the lot, wall packs for the building, bollards for paths?
- Distribution – Type III/IV for perimeter, Type V for centre poles?
- Pole height and spacing – Within the 2 to 2.5x rule and the municipal cap?
- BUG / dark-sky – Full cut-off, U0 uplight, within the local bylaw?
- Colour temperature – 3000K to 4000K, lower in sensitive zones?
- DLC listing – On the Qualified Products List, matching the rebate’s required version?
- Controls – Photocell standard, motion or dimming where it pays off?
- Maintained output – Lumen output sized with a light-loss factor?
Tick all ten and the job passes inspection, hits the target, and protects the rebate.
Common mistakes to avoid
- Speccing by wattage instead of lumens. LED wattage tells you energy draw, not light output. Two 200W fixtures can produce very different lumens. Design to lumens and fc.
- Ignoring uniformity. Hitting the average while leaving dark gaps is the most common failure. It looks fine in a spreadsheet and bad on the ground.
- Overlighting “to be safe.” Too much light wastes energy, creates glare, and can breach a dark-sky bylaw. The target is a target, not a floor to beat.
- Skipping the DLC check. Ordering before confirming the listing is how rebates get lost.
- Forgetting the light-loss factor. Designing to day-one output means the lot falls below target within a couple of years.
- Wrong colour temperature near sensitive zones. A 5000K lot beside a dark-sky community is a complaint waiting to happen.
Frequently asked questions
How many lumens do I need for a parking lot?
It depends on pole height and the target light level, not a single number. As a guide, 20 to 25 ft poles for a standard commercial lot usually run 20,000 to 30,000 lumens per fixture, spaced 30 to 40 ft apart. The real answer comes from a photometric layout that matches your fc target and lot dimensions.
What colour temperature is best for outdoor area lighting?
3000K to 4000K for most commercial lots. It balances visibility against light pollution. In dark-sky zones, near cottage country, or beside sensitive ecological areas, go to 3000K or lower to cut blue light and skyglow.
What does a full cut-off fixture mean?
A full cut-off fixture emits no light above the horizontal plane. All the light goes down onto the target area, none escapes into the sky. It’s the practical way to hit a zero-uplight (U0) BUG rating and meet most Canadian dark-sky bylaws.
Do outdoor area lights qualify for Canadian rebates?
Often, yes, if the fixture is on the DesignLights Consortium (DLC) Qualified Products List and matches the version your utility’s rebate program requires. Confirm the listing before ordering, and keep the model numbers and photometric data for the rebate paperwork.
How far apart should parking lot light poles be?
Space poles 2 to 2.5 times their height apart. A 25 ft pole gets spaced about 50 to 60 ft from the next one. Push past that range and you’ll get dark gaps between poles that no amount of fixture output will fill.
Spec it once, spec it right
Outdoor area lighting comes down to a chain of decisions: light level, fixture, height and spacing, then dark-sky and rebate compliance. Get the order right and the rest falls into place.
- Design to foot-candles and uniformity, not raw wattage.
- Match the fixture and optic to each zone.
- Keep poles within the 2 to 2.5x spacing rule and the local height cap.
- Spec full cut-off, U0, 3000K to 4000K for dark-sky compliance.
- Confirm the DLC listing before you order, or risk the rebate.
Working on a parking lot, pathway, or building-exterior job and want the fixture list and photometric layout handled? Request a quote from Votatec with your site dimensions and target light level, and we’ll spec DLC-listed, dark-sky-ready fixtures that hit the numbers and protect the rebate.