














 (+1) 905 597 5955


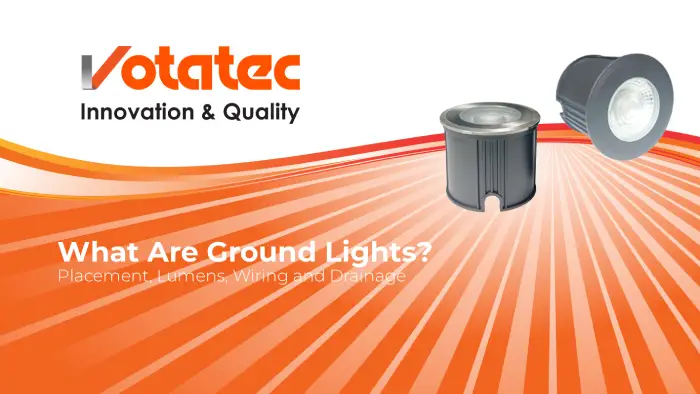

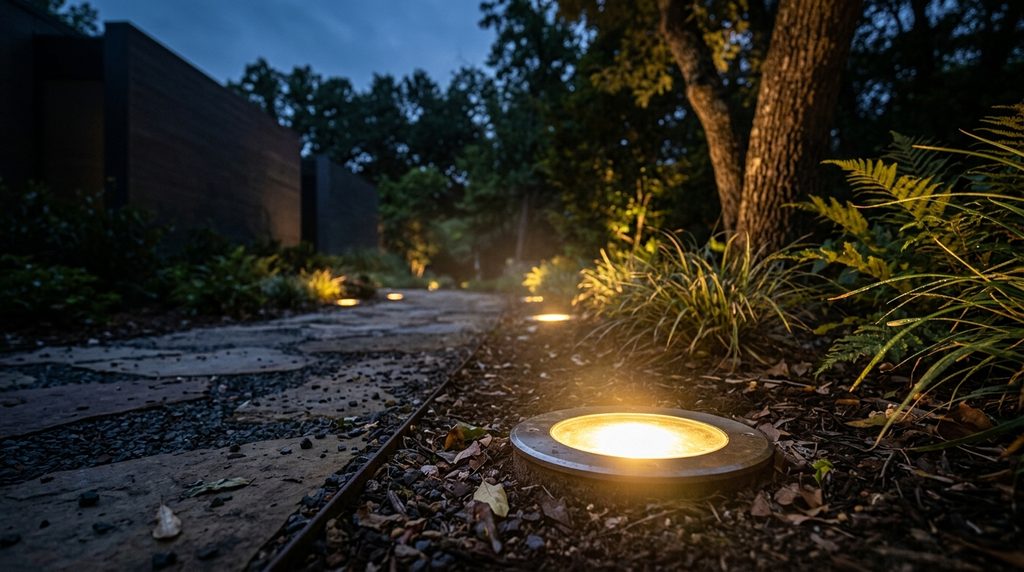
A ground light is a sealed outdoor fixture buried so its lens sits flush with the soil, lawn, deck or paving, aiming light up or across. You’ll also hear them called in-ground lights, well lights, in-grade lights or recessed ground lights. Same idea. Most are 12V low-voltage fixtures that run off a landscape transformer, and the ones that last are the ones installed over proper drainage.
That’s the short answer. The longer one matters, because a ground light lives in the worst spot on your property. It sits in wet soil, freezes in January, gets stepped on, gets buried under mulch, and sometimes gets salted. Pick the wrong fixture or skip the gravel and you’ll be digging it back up within two seasons.
This guide covers what ground lights are, where to put them, how many lumens each job needs, how to wire them, and how to keep water out. We’ll use the specs and manuals from our own in-ground fixtures as the worked example, including where those fixtures fit and where they don’t.
What Are Ground Lights Called? In-Ground, Well and In-Grade Lights Explained
Names vary by trade and by catalogue. Here’s how the terms line up:
| Term | What it usually means |
|---|---|
| Ground light | Catch-all for any light set into the ground |
| In-ground light / inground light | The same fixture, the most common retail term in Canada |
| Well light | A ground light with a deeper housing (the “well”) that recesses the lamp below the lens, cutting glare |
| In-grade light | Specifier and architect term, common on commercial drawings |
| Recessed ground light | Emphasises the flush, low-profile install |
| Deck, paver or step light | Small in-ground lights sized for decking, pavers or stair treads |
So a contractor’s “in-grade uplight” and a homeowner’s “ground lights” are the same family. The differences that matter are size, output, beam angle and how the housing handles water. In daylight you see a small stainless ring in the lawn. At night the light seems to come from nowhere, which is the whole appeal and also why getting the install right the first time pays off.
Where Should You Place Ground Lights? 7 Proven Spots
Placement drives lumens, beam angle and fixture size. Here’s where ground lights work best.
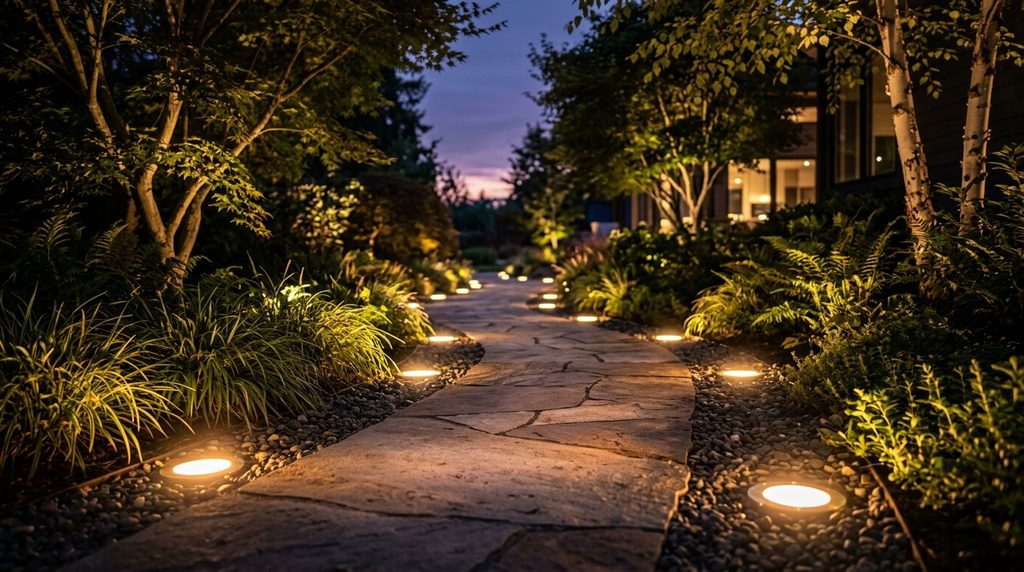
- Path and walkway edges. Small in-ground lights mark the edge without the clutter of path posts. Space them so the pools of light just touch. Too much overlap looks like a runway.
- Steps and stair landings. Set a ground light at the base of each riser run or in the landing to show the change in level. For stairs against a wall, stair wall lights are often the better tool.
- Wall grazing. Place the fixture 15 to 30 cm out from a stone or textured wall and aim straight up. Close placement brings out texture. Move it further out and you get a flatter, even wash.
- Columns, pillars and entry features. One ground light per column frames an entrance.
- Small trees and ornamental shrubs. Japanese maples, dwarf conifers and specimen shrubs suit a ground light at the trunk or just in front.
- Flagpoles and signage. A narrow, focused beam aimed up the pole works better than a wide flood. On commercial sites, check whether the municipality has an outdoor lighting bylaw first.
- Deck perimeters and patio borders. Small in-ground lights set into pavers or deck boards outline the space without a single fixture standing in the way.
Where Not to Put a Ground Light
- Low spots where water pools. If the lawn holds a puddle after rain, a ground light there will sit underwater. More on drainage below.
- Driveway wheel paths, unless the fixture is specifically rated for vehicle loads. Many in-ground lights, ours included, carry no drive-over rating.
- The middle of a walking line, where the uplight shines into people’s eyes.
- Downspout splash zones and salt spray from de-icers along sidewalks and drives.
Sound like a lot of rules? It’s mostly common sense once you picture the spot on a February night. And mark fixture locations with a stake before the first snow so the snowblower finds the stake, not the lens.
How Many Lumens Do Ground Lights Need?
Most ground lights need 50 to 500 lumens: 50 to 100 lm to mark a path, 200 to 500 lm to graze a wall or light a small tree. A ground light doesn’t need to be bright. It needs to be right for the job. Too much output on a short path makes the yard look like a parking lot, and it pushes light into the sky and into your neighbour’s bedroom window.
Use these field ranges as a starting point. They’re common practice across low-voltage installers, not a code requirement, so adjust by eye on site.
| Job | Typical ground light output | Beam |
|---|---|---|
| Path or deck marker | 50 to 100 lm | Wide (45° or more) |
| Step, landing or path accent | 100 to 250 lm | Medium to wide |
| Wall graze, column, small tree or shrub | 200 to 500 lm | Narrow to medium (15° to 40°) |
| Medium tree (3 to 6 m) | 300 to 600 lm | Narrow to medium |
| Mature tree or tall facade | 600 lm and up, often 2 fixtures | Narrow, layered |
Two things change the number more than people expect. Beam angle first: a 200 lm fixture with a 36° beam looks far brighter on a wall than the same 200 lm spread across 60°. Then surface colour. Light stone and stucco bounce a lot back. Dark brick, cedar and evergreen foliage soak it up and need more.
Where Votatec’s In-Ground Lights Fit (and Where They Don’t)
We’ll be straight about our own range. Votatec stocks two in-ground fixtures, and both are compact accent lights:
- 1.5″ In-Ground Spot Light, 3CCT: 1W, rated 60 to 70 lm, 12V AC/DC, 45° beam, IP67, stainless steel, cETLus wet location. It fits a 40 mm hole. Think path markers, deck borders and step edges.
- 3″ In-Ground Spot Light, 3CCT: 3W, rated 200 to 230 lm, 12V AC/DC, 36° beam, IP67, stainless steel with tempered glass, cETLus wet location. It fits a 73 mm hole. Good for grazing a low wall, lighting a column or picking out a small tree.
Both let you choose 3000K, 4000K or 5000K by how you connect the leads, so one SKU covers warm residential and cooler commercial looks. Neither is dimmable.
What they won’t do is light a 15-metre oak. For that, use a higher-output landscape spotlight, or two fixtures crossing from different sides. You’ll find those in our LED landscape lighting category. Using a 3W ground light on a mature tree just gives you a bright trunk and a dark canopy.
What Colour Temperature Should Ground Lights Be?
For homes, 3000K is the safe default. It’s warm enough to flatter wood, stone and plants, and it’s the ceiling most dark-sky guidance recommends. Our 3000K vs 4000K vs 5000K colour temperature guide covers the trade-offs. The RASC Canadian Guidelines for Outdoor Lighting favour warm sources and fully shielded fixtures to cut skyglow. 4000K reads crisper and suits modern commercial frontages. Use 5000K sparingly, maybe for security-led spots or to match existing cool site lighting.
Uplights are the hardest fixtures to keep dark-sky friendly, because they aim at the sky by design. So keep output modest, aim at a surface (a wall, a trunk, a canopy) rather than open air, and put them on a timer. If you’re lighting a commercial site, our guide to dark sky bylaws for wall packs and area lights shows what Ontario towns already enforce.
How Many Lumens Should a Driveway Light Be?
Short answer: it depends on whether you’re marking the driveway or actually lighting it.
To mark the edges, a run of in-ground lights at 50 to 150 lm each, every 2 to 3 m along the side, gives drivers a clear line in snow and rain. Set them just outside the paved edge, not in it, unless the fixture carries a drive-over load rating. Plows and snowblowers find edge fixtures, so keep them back from the asphalt line.
To light the surface for walking and safety, ground lights alone aren’t the tool. You want light coming down, not up. Bollards or post lights at 300 to 1,000 lm each, spaced along the drive, do that job properly. Our guides to outdoor pole lights for driveways and LED bollard lighting cover spacing and heights.
Most good driveway schemes combine both. In-ground markers for the edge, down-lights for the surface.
12V Wired vs Solar Ground Lights in a Canadian Winter
Solar ground lights are cheap and need no wiring. So why do most installers stick with 12V wired?
Canada, mostly.
- Snow covers the panel. A solar disc light buried under 20 cm of snow charges nothing, and it can stay buried for weeks.
- Short winter days. In December, Toronto gets under 9 hours of daylight and Edmonton gets closer to 7. Weak sun plus a low angle means a short runtime, right when you need light most.
- Cold kills batteries. Small rechargeable cells lose capacity in deep cold and wear out faster after repeated freeze-thaw cycles.
A 12V wired ground light runs off a transformer on a timer or photocell and gives the same output every night of the year. Solar has its place on a cottage path or a rental. For anything permanent, especially commercial, wired low voltage is the better spend.
Votatec doesn’t sell solar ground lights. That’s partly why, honestly.
How Ground Lights Are Wired: 12V Low-Voltage Basics
Nearly every residential and light-commercial ground light today is 12V. Line-voltage (120V) in-ground fixtures exist for large commercial and municipal projects, but they need conduit, deeper burial and a licensed electrician end to end.
A typical 12V system has four parts:
- A landscape transformer plugged into a weatherproof GFCI outdoor receptacle (or hardwired), stepping 120V down to 12V. Most include a timer or photocell. Our 120W transformer for landscape lighting is one example.
- Direct-burial landscape cable running from the transformer to each fixture. Look for 12/2 or 10/2 rated for the job, like our LVL landscape cable.
- Waterproof connectors at every splice and fixture lead. Gel-filled or heat-shrink connectors, never bare twist-on wire nuts in soil.
- The ground lights themselves, each drawing a small, fixed wattage.
Sizing the Transformer
Add up the wattage of every fixture on the run. Ten 3W ground lights is 30W. Ten 1W lights is 10W. LED loads are tiny, so even a modest transformer can carry a lot of fixtures.
The rule is simple: the total load must not exceed the transformer’s rating, and many installers leave about 20% headroom so the unit runs cool and you have room to add lights later. Check the manual for your specific transformer. Some state a hard maximum.
Voltage Drop on Long Runs
Low voltage loses volts over distance. The further a ground light sits from the transformer, the less voltage reaches it, and the dimmer or more erratic it can get. LED fixtures are more forgiving than old halogen, but long runs still need attention:
- Use heavier cable (10/2 instead of 12/2) on runs over roughly 30 m.
- Feed fixtures in a loop or “T” layout instead of one long daisy chain.
- Measure voltage at the last fixture with a meter after install.
- Check each fixture’s spec sheet for its accepted input range.
What the Canadian Electrical Code and ESA Say
Low-voltage landscape systems fall under the extra-low-voltage lighting rules in Section 30 of the Canadian Electrical Code (Rules 30-1200 to 30-1208). In Ontario, the Electrical Safety Authority adds a point a lot of people miss. Some Class 2 equipment is exempt from product approval, but the ESA product approval exceptions page lists “lighting equipment that incorporates LEDs” among the products that still need approval.
So a 12V LED ground light still needs a recognised Canadian mark: cETLus, cCSAus or cULus, on the fixture and the transformer. A CE mark alone doesn’t count. Both Votatec in-ground fixtures carry cETLus wet-location listings.
Plugging a transformer into an existing outdoor receptacle is usually homeowner territory. Adding a new circuit or outlet is a job for a licensed electrician, and in Ontario it needs an ESA permit.
How to Install Ground Lights So They Drain and Last
This is where most ground light problems start. Rain doesn’t hurt a sealed fixture nearly as much as standing water does. A ground light set into clay with nowhere for rain to go spends half the spring sitting in a puddle, and every freeze-thaw cycle works on the seals.
We cover the full step-by-step in how to install landscape lighting for walkways, gardens and driveways. Here’s what’s specific to in-ground lights.
Step 1: Call Before You Dig
In Ontario it’s the law to contact Ontario One Call before you dig, and the locate is free. Other provinces run similar services. Click Before You Dig routes you to the right one for your province. Gas, hydro, telecom and irrigation lines often run shallow near walkways and driveways, exactly where ground lights go.
Step 2: Dig Deeper Than the Fixture
Dig the hole well below the bottom of the housing, then backfill the extra depth with clean gravel or crushed stone. Our own installation manuals call for a gravel bed of at least 25 cm under the mounting sleeve. That’s deeper than many online guides suggest, and there’s a reason. In heavy clay soils, common across the GTA and much of southern Ontario, water needs a real reservoir to drain into.
A common rule elsewhere is a hole about twice the width and depth of the fixture. Treat that as a minimum, not a target.
Step 3: Set the Sleeve Level With Grade
Most in-ground lights mount in a plastic sleeve or “can.” Set it so the top sits level with the finished grade: soil, turf, pavers or deck surface. Too high and it’s a trip hazard and a mower target. Too low and the lens becomes a little bowl that collects water, leaves and grit.
Check level in two directions. A tilted sleeve throws the beam off and lets water sit on one side of the lens.
Step 4: Make Waterproof Connections and Leave Slack
Connect the fixture lead to the landscape cable with a waterproof connector. Leave a coil of slack cable in the hole so you can pull the fixture out later for service without cutting anything. Run the cable at the depth your local code and the cable rating call for, and keep it clear of where you’ll be edging or aerating.
Step 5: Backfill, Test and Aim
Backfill around the sleeve with gravel, then soil or sand, tamping lightly. Power up and test each ground light at night before you finish the surface. Adjustable fixtures should be aimed now, while you can still get at them easily.
IP67 vs IP68 for In-Ground Lights
Ingress protection (IP) ratings come from the IEC 60529 standard. For ground lights, two matter:
| Rating | What it means | Practical use |
|---|---|---|
| IP67 | Dust-tight, survives temporary immersion (about 1 m for 30 minutes in the test) | Well-drained soil, lawns, gardens, decks |
| IP68 | Dust-tight, rated for continuous immersion to a depth the maker specifies | Fountains, water features, areas that may flood |
IP67 is the norm for in-ground lights in drained soil, and it’s what both Votatec fixtures carry. But IP67 is not a licence to install underwater. Our 1.5″ manual says plainly not to install the fixture under water, and not in sea water or high-salt or acidic ground. If the location floods, either fix the drainage or choose an IP68 fixture built for submersion.
Here’s the thing. Drainage beats IP rating every time. A well-drained IP67 ground light outlasts a badly drained IP68 one.
What Type of Landscape Lighting Is Easiest to Install?
A plug-in 12V system is the easiest by a wide margin. Mount the transformer by an outdoor GFCI receptacle, lay direct-burial cable in a shallow trench and connect fixtures with waterproof connectors. A mistake at 12V won’t hurt you the way one at 120V can.
Stake spotlights go in faster than ground lights, since there’s no hole or drainage to prep. But in-ground lights have nothing to knock over or trip on. Just being practical here: if you’re laying a new patio or path anyway, that’s the time to add ground lights. Retrofitting through finished pavers is a much bigger job.
For layout ideas beyond in-ground lights, see our landscape lighting ideas for your yard.
Ground Lights for Commercial and Multi-Unit Properties
For property managers and contractors, ground lights handle monument signs, courtyard walkway edges and facade grazing at office parks, schools and clinics. Three checks before you specify ground lights:
- Certification. Confirm a Canadian mark (cETLus, cCSAus, cULus) and a wet-location listing on every fixture and transformer. Pair ground lights with proper area lighting using our commercial outdoor lighting spec guide.
- Local bylaws. More Canadian towns now regulate uplighting and outdoor light levels. The RASC example bylaws library shows what municipalities are adopting.
- Maintenance access. Put fixture locations on the as-built drawings so lenses get cleaned and damaged units get found.
Frequently Asked Questions About Ground Lights
What are ground lights?
Ground lights are outdoor fixtures installed in the ground so the lens sits flush with soil, lawn, decking or pavers. They aim light upward or across to highlight paths, walls, trees and architectural features. Most are 12V low-voltage LED fixtures powered by a landscape transformer, though line-voltage versions exist for large commercial projects.
Are in-ground lights and well lights the same thing?
Mostly, yes. “In-ground light” is the general term, while “well light” usually means a ground light with a deeper housing that recesses the LED below the lens to cut glare. Specifiers often call both “in-grade lights.” The useful differences are output, beam angle, IP rating and load rating, not the name.
How deep should you install a ground light?
Deeper than the fixture itself. Dig below the housing and fill the extra depth with clean gravel so water drains away from the lens and seals. Votatec’s in-ground light manuals call for a gravel bed of at least 25 cm under the mounting sleeve, with the top of the sleeve set level with finished grade.
Can you drive over ground lights?
Only if the fixture carries a drive-over or vehicle load rating from the manufacturer. Many in-ground lights, including Votatec’s 1.5″ and 3″ models, aren’t rated for vehicle traffic. Install them beside a driveway rather than in the wheel path, and keep them back from the edge where plows and snowblowers run.
Do ground lights work in Canadian winters?
Wired 12V ground lights work well year round if they’re rated for cold and installed over proper drainage. Check the operating temperature on the spec sheet (our 1.5″ model is rated -20°C to +40°C), mark fixture locations before snowfall, and keep them out of salt splash. Solar ground lights struggle in winter because snow covers the panel and daylight is short.
Key Takeaways
- Ground lights sit flush with the surface. Keep them out of low spots and wheel paths.
- Markers need 50 to 100 lm. Walls and small trees, 200 to 500 lm.
- 12V wired beats solar through a Canadian winter.
- At least 25 cm of gravel under the sleeve. Drainage beats IP rating.
Ready to spec your project? Browse our LED landscape lighting range, including both in-ground spot lights, or contact Votatec for trade pricing on contractor and commercial orders.